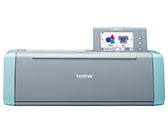
SDX125e
FAQs & Troubleshooting |
What should I do if the desired network SSID is not displayed when setting up the wireless network using the Setup Wizard?
If the desired network SSID is not displayed on the LCD display screen, check the following points.
- Make sure that the wireless access point/router is powered on.
- Move your machine to an area with no items which obstruct the wireless network signal, such as metal doors or walls, or closer to the wireless access point/router.
- Temporarily place your machine within about 1 m (3.3 feet) from the wireless access point when you are configuring the wireless settings.
-
If your wireless access point/router is using MAC address filtering, confirm the MAC address of this machine is allowed in the filter. For more information, you should see the documentation provided with your wireless access point/router, or consult the router manufacturer, your system administrator, or internet provider.
If the desired network SSID is not still displayed on the LCD display screen, follow the steps below to add the SSID (Network Name), Network Key (Password), Authentication method and Encryption method manually.
Before setting up the wireless network, you must know your wireless network settings of the WLAN access point/router.
Check and record the current wireless network settings below.
| SSID | |
| Network Key (Password) | |
| Authentication method | |
| Encryption method |
If you don't know your wireless settings of your WLAN access point/router, refer to How to find the Network Name (SSID) and Network Key (Password)?.
Setting up the wireless network manually
-
Touch
 in the home screen.
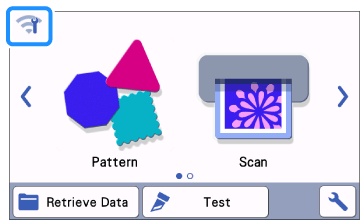
>> The network settings screen appears.
The settings can also be specified from the Network menu, displayed by pressing in the home screen.
-
Under Network settings screen as shown below, touch Setup Wizard.
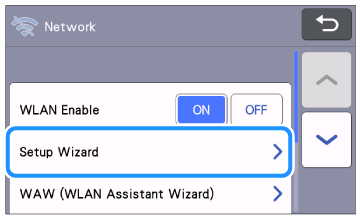
>> Any available SSIDs are searched for and displayed.
-
Touch
 until New SSID appears. Select New SSID, and then touch OK key.
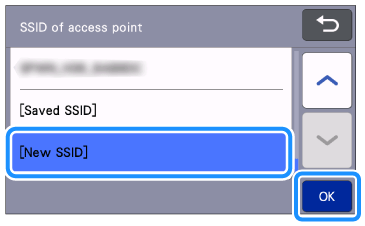
>> New SSID appears at the bottom of the list of detected SSIDs.
-
Type in the desired network SSID, and then touch the OK key.
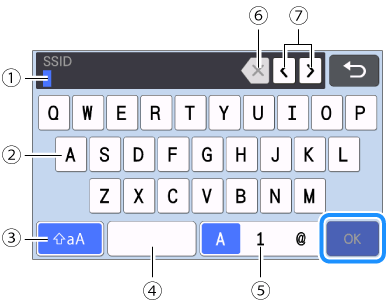
(1) Character input display
(2) Character keys
(3) Uppercase/lowercase selection key
(4) Space key
(5) Letter/number/special character selection key
(6) Backspace key (Deletes the character at the cursor’s position.)
(7) Cursor keys (Move the cursor to the left or right.)
Some Wireless Network Name (SSID) and Network Password (Key) are case (upper case and lower case) sensitive.
-
Follow the instructions that appear in the machine's LCD display screen in order to complete the setup. Touch Yes.

If a connection is not established correctly and an error message appears, see Error messages in the Troubleshooting.
-
When a connection is established, the following message.
Touch Next key to register your machine with CanvasWorkspace.
For details on registering your machine, refer to How to register Your Machine with CanvasWorkspace.

