PS5234
FAQs & Troubleshooting |
Threading the left needle
- Turn off the machine before threading for safety.
- Turn the hand wheel so that the mark on the hand wheel is aligned to the line on the machine.
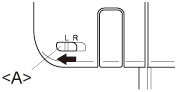
- Slide the change switch <A> to the left until it is aligned to the "L" mark on the machine.
- Run the thread in the sequence illustrated, following the yellow color and the numbers next to each threading point.
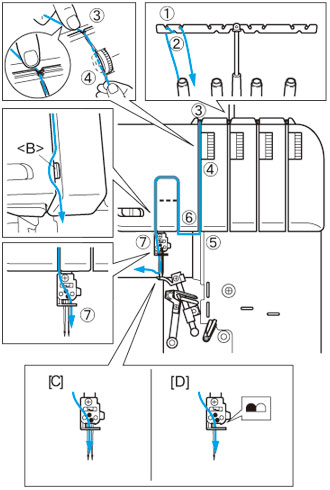
[C]: Two needles / [D]: One needle
- Pull the thread off the spool and directly up through the thread holder
 and the thread holder
  on the thread tree from back to front.
- Hold the thread with your left and right hands, then pass the thread through the thread guide
 , and then pass the thread through the tension disc
  which is in the channel next to the yellow tension adjustment dial.
- Guide the thread down the channel and across through the threading points


 next to the yellow color marks following the numerical order in the accompanying illustration.
Make sure the thread is through the left of the separater <B>.
- Pull the thread off the spool and directly up through the thread holder
Content Feedback
To help us improve our support, please provide your feedback below.