PS5234
FAQs & Troubleshooting |
How to attach and remove the presser foot
- Turn off the main power and light switch or disconnect the electric supply plug.
-
Raise the presser foot lever.

-
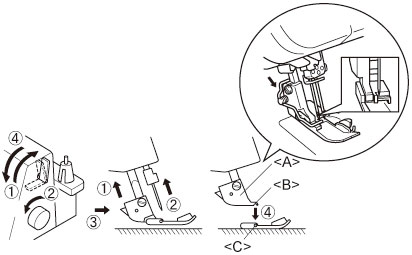
Turn the hand wheel
 so that the mark on the hand wheel is aligned to the line on the machine.
 -
Push the button on the presser foot holder and the standard presser foot will be released.

- Raise the presser foot farther by pushing the presser foot lever upward. Then remove the presser foot and store it in a safe location.
-
Again, raise the presser foot farther by pushing the presser foot lever upward. Then place the presser foot just under the presser foot holder <A> so that the groove in the bottom of the presser foot holder <B> is aligned and catches the bar on the top of the foot <C>. Then lower the presser foot lever to attatch the foot, pushing the button on the presser foot.

Content Feedback
To help us improve our support, please provide your feedback below.