PR680W / PR680WC
FAQs & Troubleshooting |
How do I use the embroidery crosshair positioning laser function to align the embroidering position?
By using the embroidery crosshair positioning laser function, the embroidering position can easily be aligned. This is useful when embroidering in an area where it is necessary to align the pattern, as shown below.
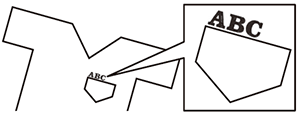
1. Use a chalk pencil to mark the desired embroidering position.
The line drawn for the reference direction should be longer.
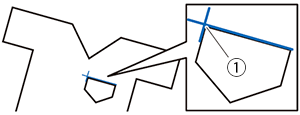
(1) Chalk pencil mark
- If the desired position of the pattern can be clearly established, such as when embroidering along a pocket, it is not necessary to mark the position with a chalk pencil.
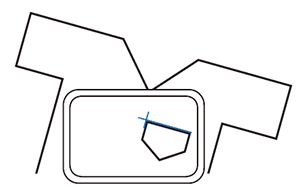
2. Hoop the fabric in the embroidery frame.
-
When hooping the fabric in the embroidery frame, make sure that the embroidery pattern will fit within the embroidering area of the frame being used.
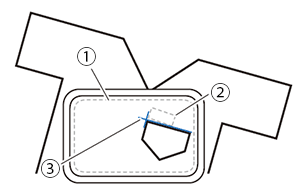
(1) Embroidering area
(2) Embroidery pattern size
(3) Chalk pencil mark
3. Select the pattern.
4. Touch ![]() to display the embroidering settings screen.
to display the embroidering settings screen.
5. Touch ![]() in the embroidering settings screen.
in the embroidering settings screen.
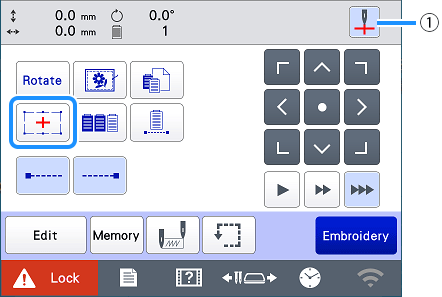
(1) Switch on/off the embroidery crosshair positioning laser.
- The embroidery crosshair positioning laser lights up to indicate the needle drop point.
- With certain types of embroidery frames, the embroidery crosshair positioning laser function cannot be used.
- If the surface of the fabric is too uneven or rough, check and adjust the alignment of the embroidery crosshair positioning laser and the needle drop point before starting to embroider.
- When using the cap frame, check and adjust the alignment of the embroidery crosshair positioning laser and the needle drop point before starting to embroider.
6. If a message appears, indicating that the move and rotate settings will return to the original ones, touch ![]() .
.
7. From the reference points shown in the screen, select the point to be used for aligning the pattern.
For this example, select the point in the lower-left corner of the pattern.
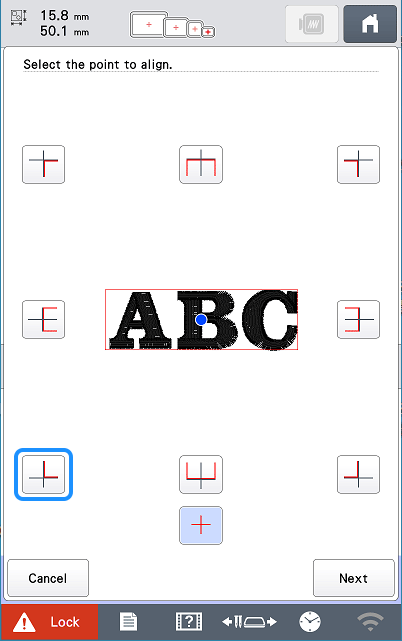
- Even if the embroidery crosshair positioning laser function is set to [OFF], the embroidery crosshair positioning laser appears so that the pattern can be aligned. When pattern alignment is completed, the embroidery crosshair positioning laser goes off.
- In order for the embroidery crosshair positioning laser to be easily seen, the brightness of the embroidery light will be slightly decreased if it was set at a high setting.
8. Touch ![]() .
.
9. Select the direction (from the reference point) to be used as a reference for aligning the pattern.
For this example, select the arrow pointing to the right as the reference direction.
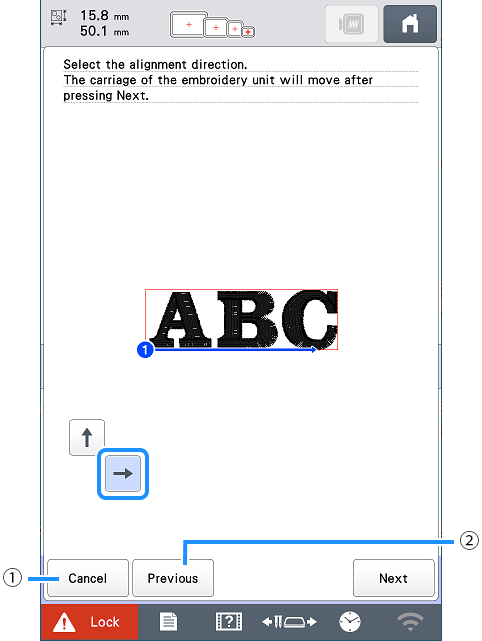
(1) Cancel the pattern alignment settings.
(2) Return to the previous screen.
10. Touch ![]() .
.
11. Touch the positioning keys to move the embroidery frame until the embroidery crosshair positioning laser and the center of the mark are aligned.
To change the speed that the frame moves, use the frame movement speed keys. If it is difficult to make a precision alignment, touch a frame movement speed key for a slower speed.
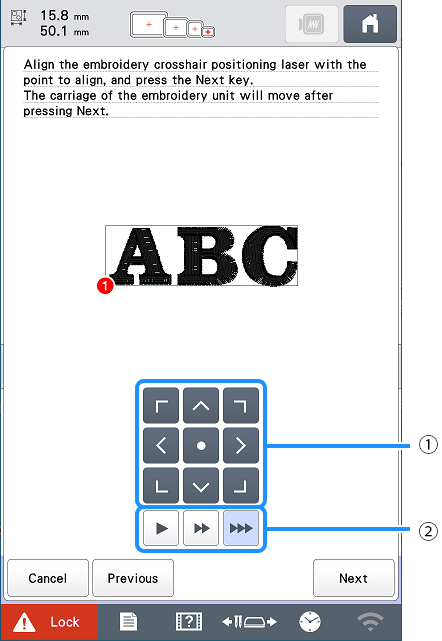
(1) Positioning keys
(2) Frame movement speed keys
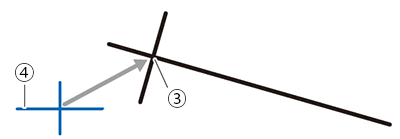
(3) Center of mark
(4) Embroidery crosshair positioning laser
12. Touch ![]() .
.
13. Touch the positioning keys to move the embroidery frame until the embroidery crosshair positioning laser is aligned with the mark in the reference direction.
To change the speed that the frame moves, use the frame movement speed keys. If it is difficult to make a precision alignment, touch a frame movement speed key for a slower speed.
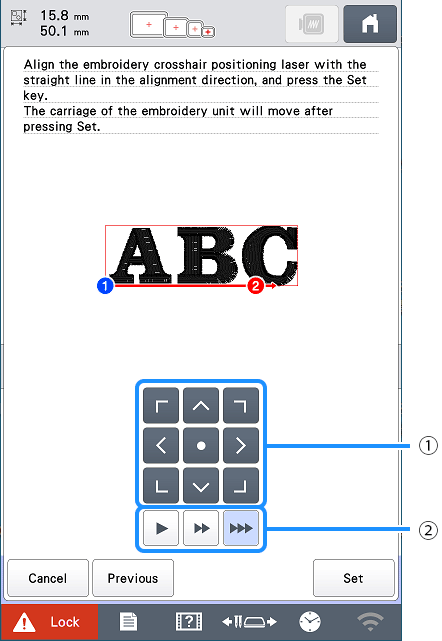
(1) Positioning keys
(2) Frame movement speed keys
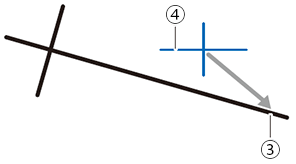
(3) Reference direction of mark
(4) Embroidery crosshair positioning laser
- Do not set the position of the embroidery crosshair positioning laser too close to the center of the mark. If it is too close, a message will appear, prompting you to reposition it.
- For best accuracy, set the position of the embroidery crosshair positioning laser on the reference direction of mark (3) as far away from the center of the mark as possible.
14. Touch ![]() .
.
The pattern is repositioned.
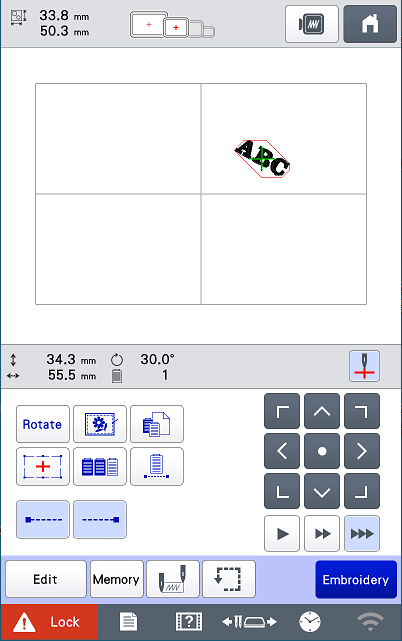
15. Touch ![]() .
.
16. Touch ![]() , and then press the "Start/Stop" button to start embroidering.
, and then press the "Start/Stop" button to start embroidering.
