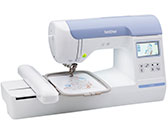
PE800
FAQs & Troubleshooting |
How do I attach or remove the Embroidery Unit?
Attaching the Embroidery unit
- Do not move the machine with the embroidery unit in place. The embroidery unit may be dropped and cause injury.
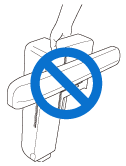
- Keep your hands and other objects away from the embroidery carriage and frame. Otherwise injury may result.
- Do not touch the connector in the embroidery unit connector slot. The connector could be damaged, and it may cause malfunctions.
-
Do not lift up on the embroidery carriage, and do not forcefully move it. It may cause malfunctions.
-
Turn off the machine.
Before attaching the embroidery unit, be sure to turn off the machine. Otherwise, injuries may occur if one of the operation buttons is accidentally pressed and the machine starts sewing.
-
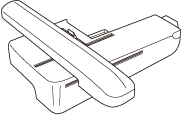
Insert the embroidery unit connector into the connection port, and then lightly push in the embroidery unit until it snaps into place.
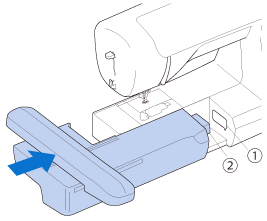
(1) Connection port (2) Embroidery unit connector
- Make sure that there is no gap between the embroidery unit and the machine, otherwise the embroidery pattern may not be sewn correctly. Be sure to fully insert the connector into the connection port.
- Do not push on the carriage when attaching the embroidery unit to the machine, otherwise damage to the embroidery unit may result.
-
Turn on the machine.
A message appears in the screen.
-
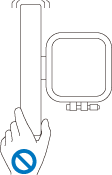
Be sure that no objects or hands are near the embroidery unit and press "OK".
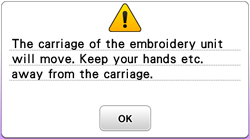
The carriage moves to its initial position.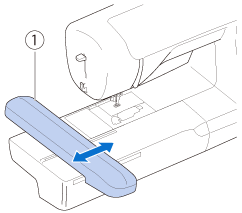
(1) Carriage Keep your hands and foreign objects away from the embroidery carriage and frame when the machine is embroidering. Otherwise, injury may result.
If the machine was not initialized correctly, the initial screen may not appear. This is not a sign of a malfunction. If this occurs, turn the machine off, then on again.
The screen for selecting the embroidery pattern type is displayed.
Removing the Embroidery Unit
Make sure that the machine is completely stopped and follow the instructions below.
-
Remove the embroidery frame.
For details on removing the embroidery frame, refer to How do I attach or remove the embroidery frame?
-
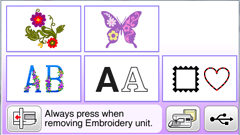
Press
 , and then press "OK" .
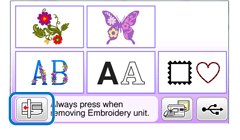
The embroidery carriage moves into a position where it can be stored. -
Turn off the machine.
Always turn off the machine before removing the embroidery unit.
It may cause malfunctions if removed when the machine is turned on.
-
Hold the release button on the bottom left of the embroidery unit, and slowly pull the embroidery unit to the left.
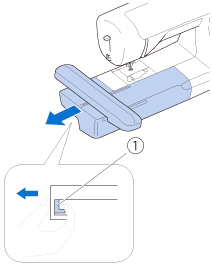
(1) Release button Do not carry the embroidery unit by holding the release button compartment.