PE-780D
FAQs & Troubleshooting |
How do I attach the embroidery frame?
-
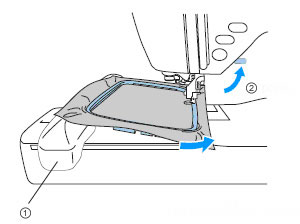
With the embroidery presser foot in the raised position, press the embroidery frame under the presser foot.
 embroidery carriage
 presser footer lever
 -
Place your left hand on the embroidery carriage while attaching the embroidery frame with your right hand.
Use caution when gripping the embroidery carriage as there are exposed screws at the rear.
-
Press the lever on the embroidery carriage to the left to attach the embroidery frame.
Follow instruction below.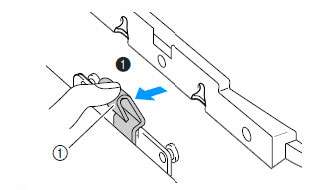
 Lever on frame holder of embroidery carriage
 -
Install the front mounting bracket of the frame to the front pin of the frame holder first, and then install the back mounting bracket to the back pin.
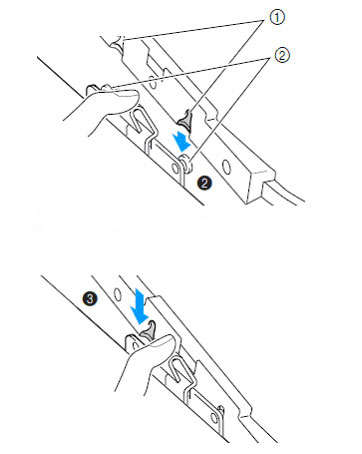
 Mounting brackets of frame
 Pin of frame holder
 - Confirm that the embroidery frame is secured to the frame holder.
Video instructions
- This movie is being streamed from YouTube.
Content Feedback
To help us improve our support, please provide your feedback below.