CM350H
FAQs & Troubleshooting |
How to connect my machine to a wireless network using the Setup Wizard
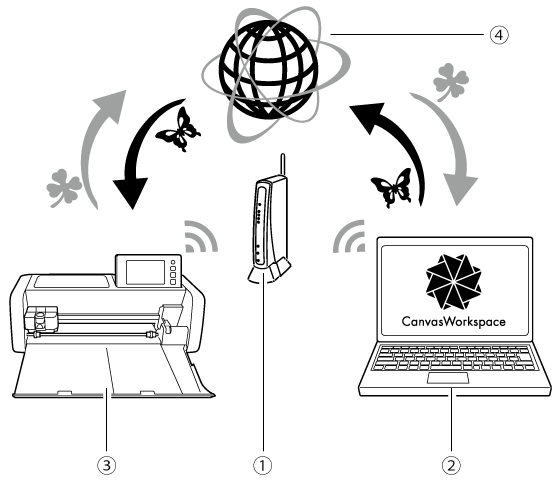
You can use a wireless network to send data created in CanvasWorkspace to your machine as well as save data that you have edited on your machine to CanvasWorkspace.
 |
|
|
(1) (3) (4) |
Wireless network access point/router Computer/Tablet connected to wireless network access point/router
Your machine |
Setting up the wireless network connection
The first step of the setup is to connect your machine to a wireless network.
- The wireless network connection complies with IEEE 802.11 n/g/b standards and uses the 2.4 GHz frequency.
-
A wireless network cannot be set up with WPA/WPA2 Enterprise. Your machine supports the following authentication methods:
For infrastructure mode, change the authentication and encryption methods of the wireless access point/router.Authentication method Encryption method WPA-Personal TKIP AES WPA2-Personal AES Open WEP None (without encryption) Shared key WEP
-
With your machine, press
 in the operation panel to display the settings screen.
-
Display page 6, and then touch
 beside "Network".
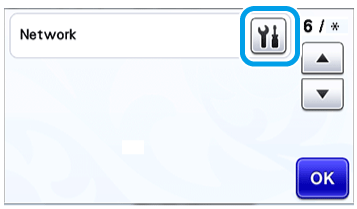
The network settings screen appears.
-
Select "ON" for "WLAN Enable".
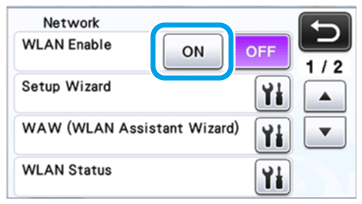
Your machine will begin to emit the wireless network signal.
-
The SSID and Network Key for your wireless access point/router are necessary to connect your machine to the wireless network.
The Network Key may also be described as the Password, Security Key or Encryption Key.
Find this information and note it first.
SSID (Network Name) Network Key (Password) - If you do not know this information (SSID and Network Key), you cannot continue the wireless setup.
-
How to find the Network Name (SSID) and Network Key
(1) See the side of your WLAN access point/router. 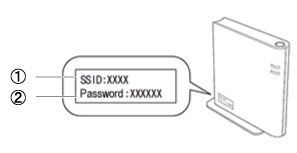
(1) SSID
(2) Network Key(Password)
(2) You should see the documentation provided with your wireless access point/router. (3) The default SSID could be the manufacturer’s name or the model name. (4) If you do not know the security information, please consult the router manufacturer, your system administrator, or internet provider.
-
In the network settings screen, touch
 beside "Setup Wizard".
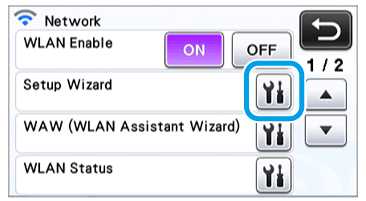
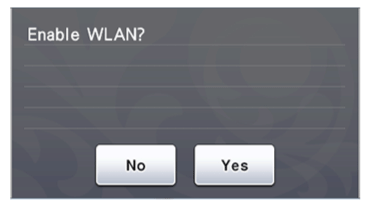
Any available SSIDs are searched for and displayed."WLAN Enable" can also be set to "ON" by touching the "Yes" key when the following message appeared in the "Setup Wizard".
-
Select the SSID noted in step 4, and then touch the "OK" key.
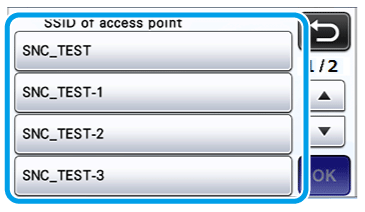
The screen for entering the Network Key (Password) appears.If the desired network SSID is not displayed, check the following and try to configure the wireless settings from step 2 again.
(1) Make sure that the wireless access point/ router is powered on. (2) Move your machine to an area with no items which obstruct the wireless network signal, such as metal doors or walls, or closer to the wireless access point/router.
(3) Temporarily place your machine within about 1 m (3.3 feet) from the wireless access point when you are configuring the wireless settings. (4) Your machine supports IEEE 802.11 n/g/b standards and uses the 2.4 GHz frequency. Confirm if your WLAN access point/router supports IEEE 802.11 n/g/b and 2.4 GHz frequency.
If the desired network SSID is still not displayed, configure the machine for a wireless network manually.
For details on the procedure, refer to What should I do if the desired network SSID is not displayed when setting up the wireless network using the Setup Wizard? -
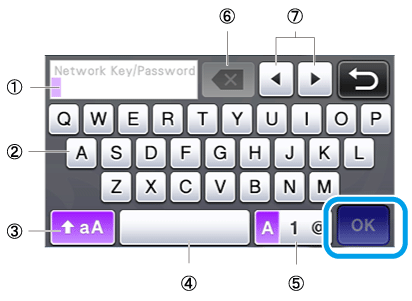
Type in the Network Key (Password) noted in step 4, and then touch the "OK" key.
(1)
(2)
(3)
(4)
(5)
(6)
(7)
Character input display Character keys
Uppercase/lowercase selection key
Space key
Letter/number/special character selection key
Backspace key (Deletes the character at the cursor’s position.)Cursor keys (Move the cursor to the left or right.)
-
When the message shown below appears, touch the "Yes" key.

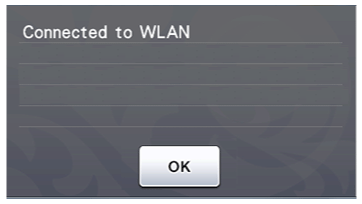
The following screen appears and a connection is established.
Touch the "Next" key, and then continue with the registration with CanvasWorkspace for your machine.
For details on the procedure, refer to How can I transfer the created/edited data between CanvasWorkspace and my machine via a wireless network? (ScanNCut Online Setting)
If you have already completed the registration with CanvasWorkspace for your machine, touch the "OK" key to finish the setup.
-
If a connection was not successfully established, "Connection Fail : Err-XX" appears.
Check the error code, and click the link below for the error code to see the solutions. -
While connected, the strength of the signal is indicated by the blue icon
 in the upper left corner of screens such as the pattern category selection screen.

: Strong signal 
: Medium signal 
: Weak signal
-
If a connection was not successfully established, "Connection Fail : Err-XX" appears.
After your wireless network has been set up, your machine will connect to the wireless network each time the machine is turned on. However, "WLAN Enable" in the network settings screen must remain set to "ON".
