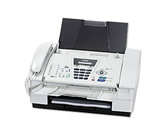
FAX-1840C
FAQs & Troubleshooting |
I'm using Windows® 2000 or XP. When printing from Microsoft Word, the document does not print on the paper size that I selected in the printer driver. What should I do?
An updated printer driver is available that will resolve this issue. Please download and install the new printer driver following the instructions listed below:
Before installing the update printer driver, uninstall the current printer driver installed into your computer:
Uninstall the current printer driver
-
For Windows® 2000 users/ Windows® XP users set to the Classic View:
Click Start, Settings and then Printers.
For Windows® XP users with set to Category View:
Click Start, Printers and Faxes. -
Right click on the icon with your printer name and select Properties.
-
Click the Port tab and write down the port name for your printer.
-
Click the boxed "X" on the upper right corner to close the window.
-
Delete the icon with your printer name.
-
Click the File menu and Server Properties.
-
Click the Driver tab.
-
Select your printer name from the list and click Remove.
-
Click OK.
-
Restart your computer.
If the "Found New Hardware Wizard" screen appears after restarting your computer, select Cancel to exit.
Installing the updated printer driver
-
Right click on a blank area on your Desktop, click New and then click FOLDER. A folder titled "New Folder" will appear on your Desktop.
-
Right click the folder, click RENAME from the drop down options and type BROTHER.
-
The Brother End-User License Agreement will appear. If you agree to the terms, click I ACCEPT.
-
"File Download" will appear. Click SAVE. "Save as" will appear.
-
From the "SAVE IN" drop down menu, click DESKTOP. Double click the "Brother" folder and then click SAVE. This will begin the download of the printer driver.
-
Once the download is complete, either the download window will disappear or you will see "Download complete" message. If "Download complete" appears, click Close.
If the License Agreement window is still open, click the red boxed "X" on the upper right corner to close the window.
-
Go to your Desktop, double click the "Brother" folder.
*Note for English driver Users:
Two folders, "UK-ENG" and "US-ENG" will be created.
-The "UK-ENG" folder contains drivers written in English.
-The "US-ENG" folder contains drivers written in American English.
Locate the executable file named "bh32axxx" (where xxx indicates your language) (.exe may appear at the end of the file name). -
Double click " bh32axxx (.exe)" to extract the file. "Zip Self-Decompression" will appear.
-
Leave the file name in the window as is and click DECOMPRESS (X). "The decompression process was successful" will appear.
-
Click OK.
-
For Windows® 2000 Users:
Click on Start => Settings => Printers => Add Printer.
For Windows® XP Professional Users:
Click on Start => Printers and Faxes => Add a printer.
For Windows® XP Home Edition Users:
Click on Start => Control panel => Printer and other hardware => Printer and Faxes => Add a printer.
Then click on Next. -
Select Local printer for the target printer and click on Next.
-
Select the port name that you made a note of on Step 3 of the uninstall procedure above and click on Next.
-
Click on Have Disk.
-
Type the directory where the extracted files exist OR click on Browse.
-
Click on the drop down menu labeled "Look In" and select Desktop. Double click the "Brother" folder.
-
Click on Open.
-
Click on OK.
-
Select the model name and click on Next.
-
Name the printer and select as the default printer and click on Next.
-
Set "Do not share this printer" or "Share as XXX" and click on Next.
-
The Test print dialog appears. Click Yes.
-
Click on Finish.
Content Feedback
To help us improve our support, please provide your feedback below.
