QL-1050N
FAQs & Troubleshooting |
I cannot print from the printer in a network-shared environment.
It could be that the correct printer driver for the client computer's Operating System has not been installed before using the printer in a network-shared environment.
This problem may occur if the printer port is not selected during the installation of the Brother Printer Driver & Software Package or Driver Deployment Wizard in this condition.

To avoid this problem, make sure you install the printer driver for the client Operating System to the server Operating System first.
To solve this problem, follow the instructions below after you have installed the driver from the included installer CD or by downloading from the Brother support website to your computer:
-
Uninstall the printer driver on the client computer using the printer driver uninstallation tool.
Included installer CD
Insert the CD-ROM, right-click <CD drive> and select [open], and the double-click the file, [<CD drive>:\Tools\Ptsweep\"printer name"\32bit( or 64bit)\ptsweep.exe].
Download from this website
Go to the [Downloads] section of this website to download the Printer Driver Information Cleanup Tool.- Quit all applications.
- Double-click the downloaded file and extract it.
- Double-click "ptsweep.exe" to start up the tool.
- Check the list of models, and then click Run.
- A message will appear indicating that the information was deleted.
- Click OK and restart the computer.
-
Install the appropriate printer driver for the client computer's Operating System on the Server computer.
- Open the printer folder. (See "How to open the Devices and Printers window".)
-
For Windows 11 / Windows 10 / Window 8 / Windows 7 users:
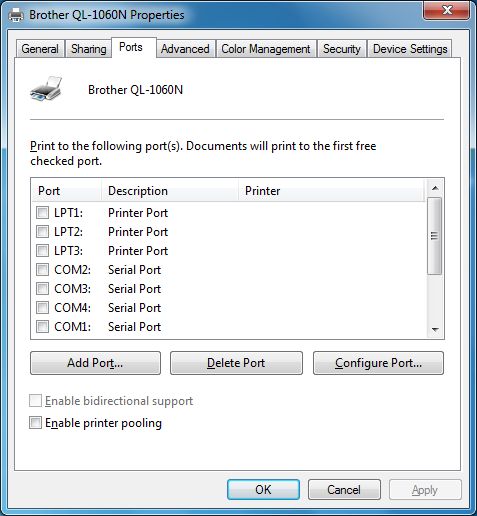
Right-click the printer icon, and then click "Printer Properties".
For Windows Vista / Windows XP users:
Right-click the printer icon, and then click "Properties". -
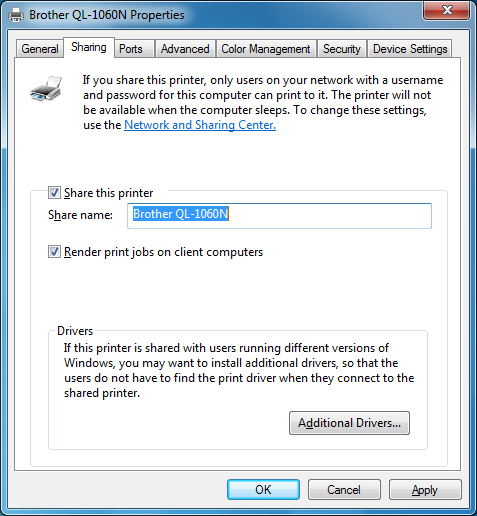
Open the Sharing tab and click "Additional Drivers".

-
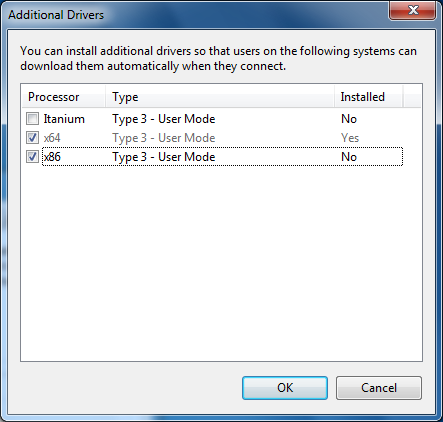
Check the check box as follows.
Check "x86" if the client computer's Operating System is 32bit.
Check "x64" if the client computer's Operating System is 64bit.

- Click OK.
-
A new dialog window will open.
Click Browse and select the folder where the printer driver exists from the drop-down list box in the DRIVES field to select the folder where the printer driver exists. - Click Open.
- Click OK.
-
Reinstall the printer driver to the client computer.
For Windows 11 / Windows 10 / Windows 8 / Windows 7 / Windows Vista 32 bit SP2 Users:
- You must be logged on as an Administrator.
- If the "User Account Control" prompt is displayed, click Continue.
- If the "Windows Security Alert" prompt is displayed, click "Install this driver software anyway".
- Click "Add a printer" in the [Devices and Printers] folder (printer folder for Windows Vista 32 bit SP2).
- Click "Add a network, wireless or Bluetooth printer".
- Click "The printer that I want isn't listed".
- Select "Select a shared printer by name" and input the Network Shared Printer name, e.g. \\server\[model name]
- Click Next.
- The Test Print dialog appears. Click Finish.
- Click "Add a printer" in the printer folder.
- Click Next.
- Select "A network printer or a printer attached to another computer" and click Next.
- Select "Connect to this printer" and then input the Network Shared Printer name, e.g. \\server\[model name]"
- Click Next.
- If you want to use the printer as the default printer, select "Yes".
- Click Next.
- Click Finish.
- After finishing the installation, try printing again.
