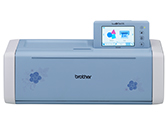
SDX325
FAQs & Troubleshooting |
How to Install the Roll Feeder
In order to install the roll feeder for cutting, the cutting machine must be prepared, and preparations must be made to install the roll feeder and rolled material onto the machine.
Installing the roll feeder
-
Pull the feeder release lever (on the right side of the machine) toward you.
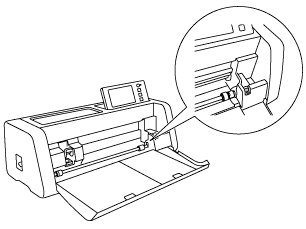
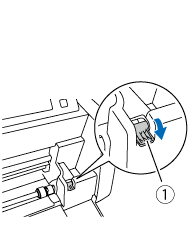
(1) Feeder release lever
-
Grab the feed roller and feed roller lock dial, and then, while holding the feed roller in place, rotate the feed roller lock dial toward the back to the unlock position(
 ).
).
>> The feed roller can be slid.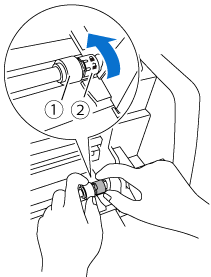
(1) Feed roller
(2) Feed roller lock dial
-
Slide the feed roller from
 to
to  .
.
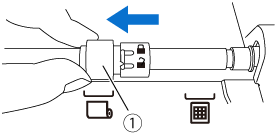
(1) Feed roller
-
Grab the feed roller and feed roller lock dial, and then, while holding the feed roller in place, rotate the feed roller lock dial toward you to the lock position(
 ).
).
>> The feed roller is locked in place.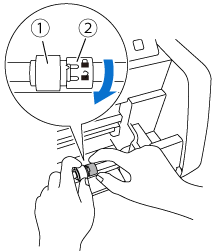
(1) Feed roller
(2) Feed roller lock dial
-
Return the feeder release lever (on the right side of the machine) to its original position.
>>Only the right side of the shaft is lowered, and the shaft is locked.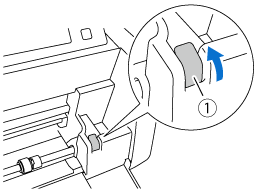
(1) Feeder release lever
-
Prepare a base attachment.
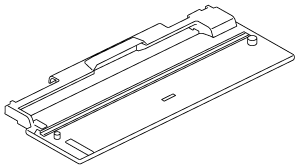
-
Install the base attachment so that its end hooks onto the shaft.
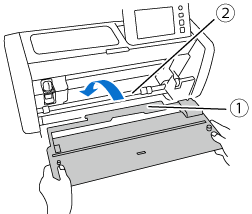
(1) Base attachment
(2) Shaft-
If the feed roller is not correctly positioned, the base attachment cannot be installed correctly.
Make sure that the feed roller is moved to the position for using the roll feeder. - Press on the base attachment to firmly secure it to the shaft.
- Make sure that the base attachment is secure against the front tray cover.
-
If the feed roller is not correctly positioned, the base attachment cannot be installed correctly.
-
Prepare a roll holder.
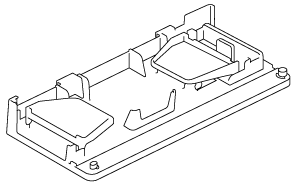
-
Place the roll holder down so that its hooks fit into the holes in the front tray cover.
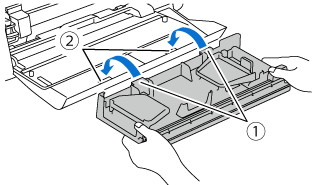
(1) Hooks on roll holder
(2) Holes in front tray cover
-
Flip up the guide plate on each side of the roll holder.
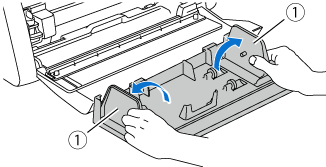
(1) Guide plate
-
Insert the material so that the pin on the left guide plate fits into the paper core of the material, and then place the roll on the four support rollers.
Be sure to load the material so that it unrolls from the top and the side to be cut faces up.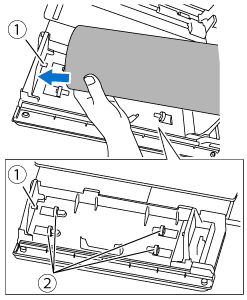
(1) Pin on guide plate
(2) Support rollers
-
While squeezing the adjustment lever, slide the right guide plate against the roll to correctly align the left edge of the material.
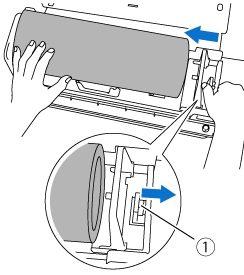
(1) Adjustment lever The material is correctly loaded when there is a gap of about 2 to 3 mm between the guide plate and the right side
of the roll. After aligning the left edge of the material, adjust the guide plate.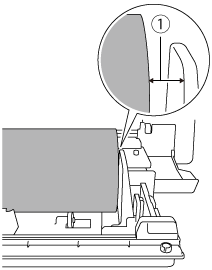
(1) Gap of about 2 to 3 mm
Before inserting the material into the roll feeder, make sure that the end of the material is evenly trimmed and the both corners are at right angles.
| 【The left and right edges of the material are parallel, and both corners are at right angles】 | |||
|
|
 |
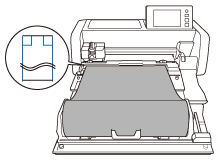 |
|
|
|
|||
As shown below, if the left and right edges of the material are not parallel or both corners are not at right angles when the material feeds, it loses contact with the feed roller, causing the material to become skewed and feed incorrectly. |
|||
| 【The left and right edges of the material are not parallel】 | |||
|
|
 |
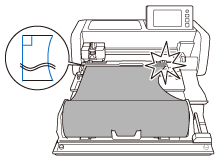 |
|
| 【The left and right edges of the material are parallel, and both corners are not at right angles】 | |||
|
|
 |
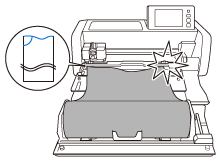 |
|
|
|
 |
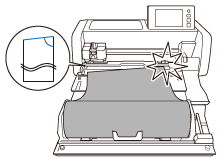 |
|
The following procedure can be checked that the end of the material is evenly trimmed to meet all these conditions.
-
Pull the end of the material until it reaches the guide channel.
Check that the side to be cut faces up.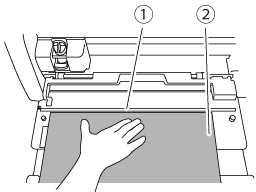
(1) Guide channel
(2) Material
-
Make sure the left edge of the material is aligned with the rolled material guide and the end of the material is perfectly aligned with the guide channel.
【When aligned】There is no need to evenly trim the end of the material.
Feed the material into the machine. For details, see “Feeding the Material”
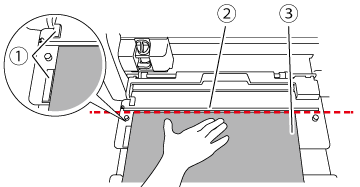
(1) Rolled material guide
(2) Guide channel
(3) Material
【When not aligned】The end of the material must be evenly trimmed.
For details, see “Using the trimmer blade to trim the end of the material”
After trimming the end of the material, go to “Feeding the Material” .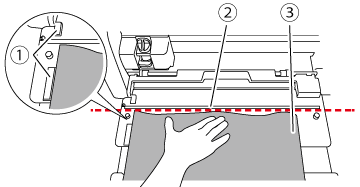
(1) Rolled material guide
(2) Guide channel
(3) Material
Feeding the Material
While keeping the left edge of the material aligned with the rolled material guide, lightly insert the material under the left and right feed rollers. While holding the material inserted under the feed rollers so that the material does not shift, press ![]() in the operation panel.
in the operation panel.
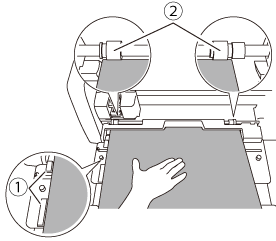 |
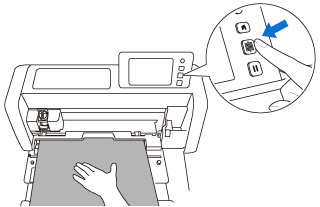 |
||
| (1) Rolled material guide (2) Feed rollers |
|||
>>When the material is fed into position, preparation of the roll feeder is completed. At this time, make sure that the left and right feed rollers completely pass over the material.
After feeding the material, retrieve the data on the cutting machine and cut.
For details, refer to “Retrieving Roll Feeder Data On the Machine and Cutting”.


