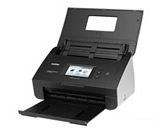
ADS-2500We
FAQs & Troubleshooting |
Load Documents
The Automatic Document Feeder(ADF) can hold up to 50 pages and feeds each sheet individually. Use 80 g/m2 (20 lb) paper and always fan the pages before placing them in the ADF.
Follow the steps below to load documents.
For Standard-size Documents and Documents with Facing Pages
For Business Cards and Plastic Cards
For Documents Longer than Standard-size
For Documents not printed on Standard-size paper
For Receipts, Clippings, Photos and Other Documents
Standard-size Documents and Documents with Facing Pages
-
Adjust the Documents Guide (1) to fit the width of your document.

-
Fan the pages several times along both the long edge and the short edge.

-
Align the edges of the pages.

-
Position the page so that the leading edges are aligned at a slight angle in the feed direction.

-
Place your document, face down, top edge first in the ADF between the Guides until feel it touch the inside of the machine gently.

Business Cards and Plastic Cards
-
Adjust the Documents Guide (1) to fit the width of your document.

-
Place your card, face down, top edge first, and lengthwise in the ADF between the Guides until you feel it touch the inside of the machine.

- Load only one plastic card at a time.
- Certain types of plastic cards may be scratched when scanned. To prevent damage to the card, we recommend using the Plastic Card Carrier sheet.
Documents Longer than Standard-size
-
Adjust the Documents Guides (1) to fit the width of your document.

-
Place your document, face down, top edge first in the ADF between the Guides until you feel it touch the inside of the machine.

- Load only one document at a time.
- Support the document with your hand if the document is longer than the Top Cover.
Documents not printed on Standard-size paper
-
Fold your document in half and insert it into the Carrier Sheet.

Set the document in the center of the Carrier Sheet and align the top of the document with the top of the Carrier Sheet.
-
Adjust the Document Guides (1) to fit the width of the Carrier Sheet.

-
Place Carrier Sheet in the ADF between the Guides until you feel it touch the inside of the machine.

Receipts, Clippings, Photos,and Other Documents
Make sure documents with ink or correction fluid are completely dry.
-
Insert the document into the Carrier Sheet.

- Set the document in the center of the Carrier Sheet and align the top of the document with the top of the Carrier Sheet.
-
You can fold the receipt in two places so that it overlaps and then insert it into the Receipt Carrier Sheet if the receipt is longer than the Receipt Carrier Sheet.

-
Adjust the Document Guides (1) to fit the width of the Carrier Sheet.

-
Place the Carrier Sheet in the ADF between the Guides until you feel it touch the inside of the machine.