MFC-J4510DW
FAQs & Troubleshooting |
Copy onto Ledger- or A3-size paper
Although your Brother machine cannot make copies of a Ledger- or A3-size document, it can copy onto Ledger- or A3-size paper with one of the following formats.
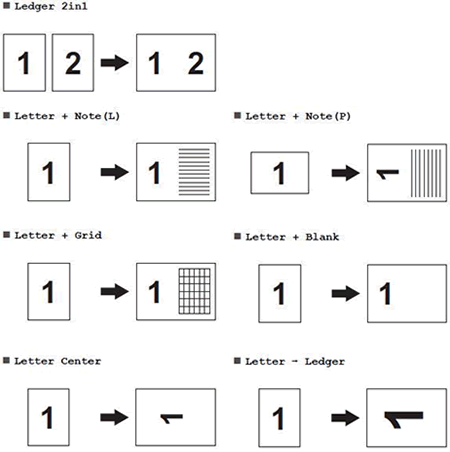
You can also make 2 in 1 and enlarged copies onto Ledger- or A3-size paper.
To copy onto Ledger- or A3-size paper, do one of the following:
Copy using the ADF:
Copy using the flat scanner glass:

You can also make 2 in 1 and enlarged copies onto Ledger- or A3-size paper.
- You can only use plain Ledger- or A3-size paper.
- If you are producing multiple color copies, you cannot use Ledger 2in1, Letter + Note(L), Letter + Note(P), Letter + Grid, and Letter + Blank.
- (P) stands for Portrait, which means that the short edge of the paper will be the top of the page you print.
- (L) stands for Landscape, which means that the long edge of the paper will be the top of the page.
- You can only enlarge a copy when using Letter => Ledger.
Copy using the ADF:
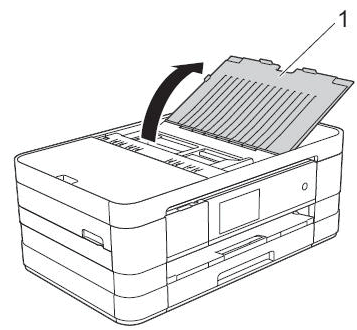
- Lift up and unfold the ADF Document Support (1).
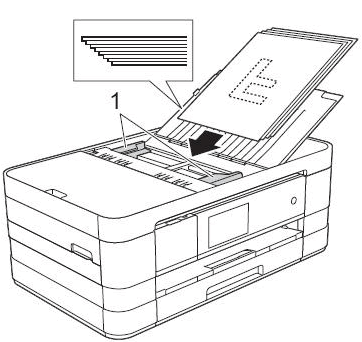
- If you are using two documents, fan the pages well.
- Place the document(s) you want to copy into the ADF face down, top edge first until you feel it touch the roller.
After you put your document(s) in the ADF, the Brother machine's LCD should display ADF Ready for a few seconds.
- Adjust the paper guides (1) to fit the width of your document(s).
- Do one of the following:
- If the Touchscreen currently shows the More screen, go to Step 6.
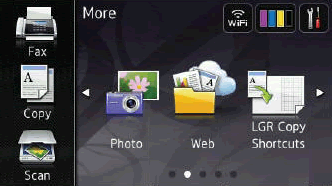
- If the Touchscreen currently shows the Home or Shortcut screen, follow these steps:
- Swipe left or right, or press the Left or Right arrow key to display the More screen.
- Go to Step 6.
- If the Touchscreen currently shows the More screen, go to Step 6.
- Press LGR Copy Shortcuts.
- If information appears on the Touchscreen, read it and press OK.
- Follow the on-screen instructions to load Ledger- or A3-size paper.
- Swipe left or right to display Ledger 2in1, Letter => Ledger, Letter + Note(L), Letter + Note(P), Letter + Grid, Letter + Blank, or Letter Center.
- Press the option you want.
- Press OK.
- Use the dial pad to enter the number of copies you want to make.
You can make up to 99 copies at once.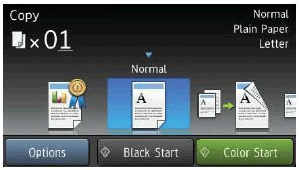
- Do one of the following:
- If you want to change more settings, go to Step 14.
- If you do not want to change more settings, go to Step 18.
- Press Options.
- Press the setting you want to change.
- Press your new option.
- Do one of the following:
- Repeat Steps 14 through 16 to change other settings as needed.
- If you are finished changing copy settings, follow these steps:
- Press OK.
- Go to Step 18.
- Do one of the following:
- Press Black Start to make a black and white copy.
- Press Color Start to make a color copy.
Copy using the flat scanner glass:
- Lift the document cover.
- Place the document you want to copy face down on the flat scanner glass.
Use the document guide lines in the upper-left corner of the flat scanner glass to help you position your document.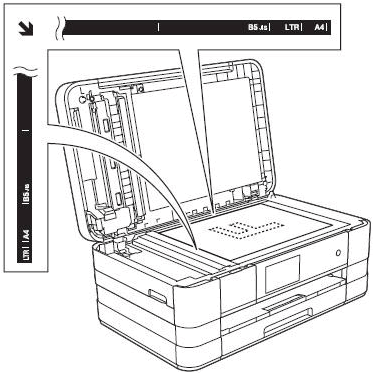
- Close the document cover.
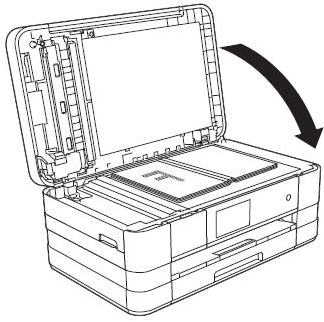
If you are scanning a book or thick document, do not slam or press on the document cover.
- Do one of the following:
- If the Touchscreen currently shows the More screen, go to Step 5.
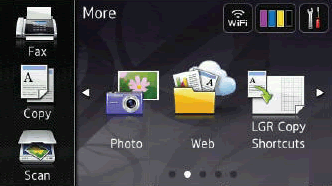
- If the Touchscreen currently shows the Home or Shortcut screen, follow these steps:
- Swipe left or right, or press the Left or Right arrow key to display the More screen.
- Go to Step 5.
- If the Touchscreen currently shows the More screen, go to Step 5.
- Press LGR Copy Shortcuts.
- If information appears on the Touchscreen, read it and press OK.
- Follow the on-screen instructions to load Ledger- or A3-size paper.
- Swipe left or right to display Ledger 2in1, Letter => Ledger, Letter + Note(L), Letter + Note(P), Letter + Grid, Letter + Blank, or Letter Center.
- Press the option you want.
- Press OK.
- Use the dial pad to enter the number of copies you want to make.
You can make up to 99 copies at once.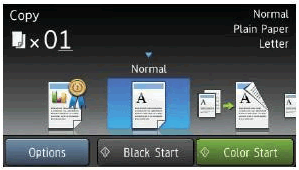
- Do one of the following:
- If you want to change more settings, go to Step 13.
- If you do not want to change more settings, go to Step 17.
- If you want to change more settings, go to Step 13.
- Press Options.
- Press the setting you want to change.
- Press your new option.
- Do one of the following:
- Repeat Steps 13 through 15 to change other settings as needed.
- If you are finished changing copy settings, follow these steps:
- Press OK.
- Go to Step 17.
- Do one of the following:
- Press Black Start to make a black and white copy.
- Press Color Start to make a color copy.
If you selected Ledger 2in1, go to Step 18.
- After the machine has scanned the page, press Yes.
- Remove the first page from the scanner glass.
- Place the second page on the scanner glass.
- Press OK to scan the second page.
- After the machine has scanned both pages, press No to make your copies.
Content Feedback
To help us improve our support, please provide your feedback below.
