MFC-J6925DW
FAQs & Troubleshooting |
Load photo paper
- If you want to load standard paper, click here to see how to load standard paper.
- If you want to load envelopes, click here to see how to load envelopes.
Follow the steps below to load photo paper in your Brother machine's paper tray:
NOTE: Illustrations shown below are from a representative product and may differ from your Brother machine.
- Before loading, press the corners and sides of the Photo, Photo L and Photo 2L paper to make them as flat as possible.
If Photo (10 x 15 cm)/(4 x 6 in.) or Photo L (89 x 127 mm)/(3.5 x 5 in.) or Photo 2L (13 x 18 cm)/(5 x 7 in.) paper is "double-feeding," put only one sheet of Photo or Photo L paper in the paper tray at a time.
- Do one of the following:
- If you load Photo L (89 x 127 mm)/(3.5 x 5 in.) in the paper tray, lift up the Photo L stopper (1).
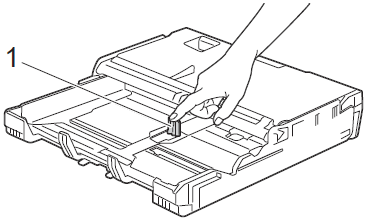
- If you load Photo (10 x 15 cm)/(4 x 6 in.) or Photo 2L (13 x 18 cm)/(5 x 7 in.) in the paper tray, open the output paper tray cover. Gently press the paper length guide (1) to fit the paper size, and then close the output paper tray cover.
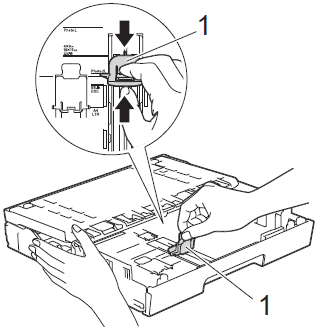
- If you load Photo L (89 x 127 mm)/(3.5 x 5 in.) in the paper tray, lift up the Photo L stopper (1).
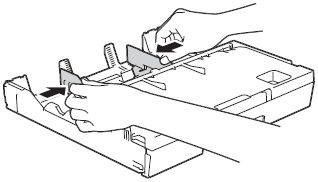
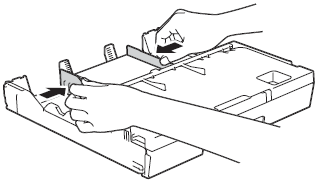
- Gently press the paper side guides to fit the paper size.
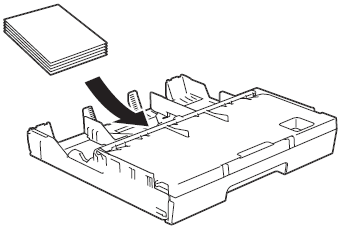
- Put Photo, Photo L, or Photo 2L paper in the paper tray print side down.
- Gently adjust the paper side guides to fit the paper. Make sure the paper side guides touch the sides of the paper.
Content Feedback
To help us improve our support, please provide your feedback below.
