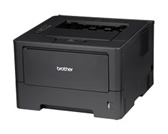
HL-5440D
FAQs & Troubleshooting |
Clean the drum unit
Please follow the steps below to clean the drum unit.
- DO NOT put a toner cartridge or a toner cartridge and drum unit assembly into a fire. It could explode, resulting in injuries.
-
DO NOT use flammable substances, any type of spray, or an organic solvent/liquid containing alcohol or ammonia to clean the inside or outside of the machine. Doing so could cause a fire or electrical shock. Instead, use only a dry, lint-free cloth.

- Be careful not to inhale toner.
NOTE: Illustrations shown below are from a representative product and may differ from your Brother machine.
-
Print the drum dot check sheet.
For the models with machine's display (hereinafter called LCD):- Make sure the machine is in Ready mode.
- Press the Up or Down arrow key to select Machine Info.. Press OK.
- Press the Up or Down arrow key select Drum Dot Print. Press OK to print the drum dot check sheet.
- Make sure that the front cover is closed and the power cord is plugged in.
- Turn on the machine and wait until the machine is in Ready mode.
- Press Go two times. The machine will print the drum dot check sheet.
- Leave the machine turned on for 10 minutes for the internal fan to cool the extremely hot parts inside the machine.
- Turn off the machine's power switch.
-
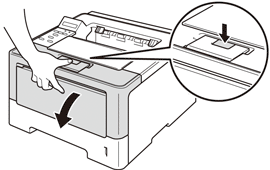
Press the front cover release button and then open the front cover.
-
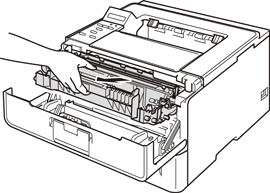
Take out the drum unit and toner cartridge assembly.
-
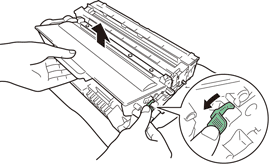
Push down the green lock lever and take the toner cartridge out of the drum unit.
-
Turn the drum unit as shown in the illustration. Make sure that the drum unit gear (1) is on the left hand side.
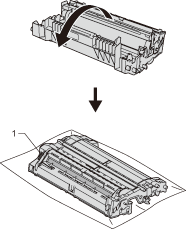
-
Use the numbered markers next to the drum roller to find the mark. For example, a dot in column 2 on the check sheet would mean that there is a mark in the "2" region of the drum.
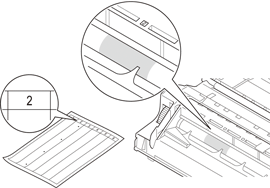
-
Turn the drum unit gear toward you by hand while looking at surface of the suspected area.
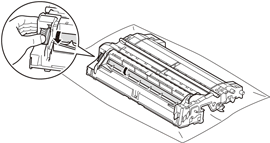
-
When you have found the mark on the drum that matches the drum dot check sheet, wipe the surface of the drum gently with a cotton swab until the mark on the surface comes off.
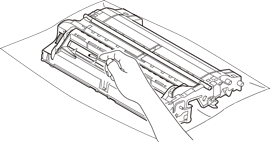
DO NOT clean the surface of the photosensitive drum with a sharp object or any liquids.
-
Put the toner cartridge back into the drum unit until you hear it lock into place. If you put the cartridge in properly, the green lock lever on the drum unit will lift automatically.
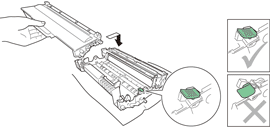
Make sure that you put in the toner cartridge properly or it may separate from the drum unit.
-
Put the drum unit and toner cartridge assembly back into the machine.
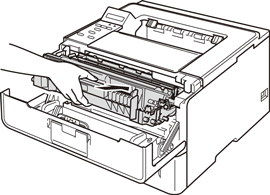
- Close the front cover of the machine.
- Turn on the machine's power switch.
Content Feedback
To help us improve our support, please provide your feedback below.
