MFC-J285DW
FAQs & Troubleshooting |
Set up a Group for Broadcasting faxes.
If you regularly want to send the same fax to multiple recipients, you can do it easily by setting up a Group. Groups allow you to send the same fax message to multiple numbers using a process called Broadcasting.
You can store 6 small Groups on your Brother machine or assign up to 78 numbers to a large Group. Every fax number you want to include in your Group must first be stored as its own Speed Dial number, and each Group uses one Speed Dial location.
This solution includes two options for setting up Groups:
-
If you want to set up Groups from your machine's control panel, see OPTION 1: SETTING UP A GROUP FROM THE CONTROL PANEL.
- If your machine is connected to the computer with the Brother software installed, you can set up Groups from your computer by following OPTION 2: SETTING UP A GROUP FROM A COMPUTER.
OPTION 1: SETTING UP A GROUP FROM THE CONTROL PANEL
STEP A: Print an Address Book
-
Press
 (Settings).
-
Press the Up or Down arrow key to display Print Reports.
-
Press Print Reports.
-
Press Address Book.
-
Press Alphabetical Order or Numeric Order.
-
Press Start.
-
Press
 (Home).
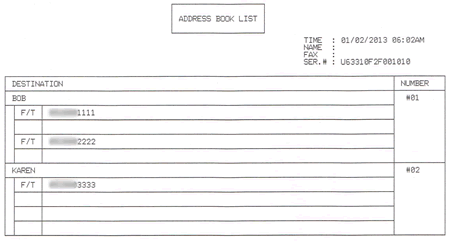
The above image is a sample of an Address Book with two Speed Dial numbers already assigned.
STEP B: Set up a Group
-
Press
 (Fax).
-
Press
 (Address).
-
Press Alphabetical or Numerical.
-
Press More.
-
Press the Up or Down arrow key to display Setup Groups.
-
Press Setup Groups.
-
Enter the Group name (up to 16 characters) using the keyboard on the Touchscreen. Press OK.
-
When the Touchscreen displays the next available Group number and name will be assigned to the next available Speed Dial location.
-
Add Speed Dial numbers to the Group by pressing them to display a red checkmark. Press OK. If you want to list the numbers in alphabetical order, press
 .
.
-
When the Touchscreen displays the Group Name and numbers, press OK to confirm.
-
Do one of the following:
-
To store another Group for broadcasting, repeat STEP 4 through 10.
-
To finish storing Groups for broadcasting, press
 (Home).
-
To store another Group for broadcasting, repeat STEP 4 through 10.
CONFIRM THE GROUP BY PRINTING AN ADDRESS BOOK
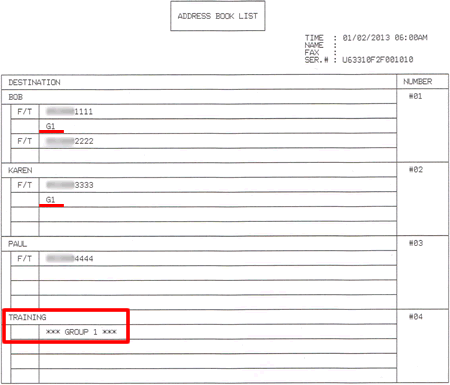
In the above image, one Group has been successfully created and named TRAINING. You can determine the numbers assigned to a Group from the Group column. If "G1" appears in a number's Group column, that number was stored into Group 1 (TRAINING).
When you broadcast a fax, each number in the Group is dialed individually. After the document is scanned into memory, the machine dials the first number in the Group, transmits the fax, hangs up, and then dials the second number in the Group. This process is repeated until every number in the Group is dialed.
If a sending to one number is unsuccessful because the line is busy or the line condition prevents the fax from being sent, the Brother machine will disconnect and dial the next number in the Group. Once all numbers in the Group have been dialed, the Brother machine will attempt to dial the unsuccessful number(s) again.
After the Brother machine has dialed (and redialed, if the initial attempt to send was unsuccessful) all of the numbers in a Group, it will print a broadcast report that displays which numbers in the Group were transmitted successfully and which ones failed. This report prints automatically and cannot be disabled.
OPTION 2: SETTING UP A GROUP FROM A COMPUTER
-
Do one of the following:
-
(Windows 7)
On the computer, left-click Start => (All) Programs => Brother => [model name] => Remote Setup.
-
(Windows 8)
On the Start screen, click
Click . If
. If  is not on the Start screen, right-click somewhere on an empty spot, and then click All apps from the bar.
 (Brother Utilities), and then click the drop-down list and choose your model name (if not already chosen). Click Tools in the left navigation bar, and then click Remote Setup.
 -
(Windows 10, Windows 11)
On the computer, left-click or
or  (Start) => (All apps =>) Brother =>
  (Brother Utilities).
Click the drop-down list and choose your model name (if not already chosen). Click Tools in the left navigation bar, and then click Remote Setup.
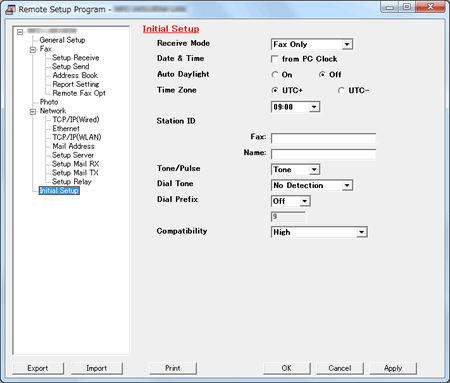
The Remote Setup window appears on your desktop.
-
(Windows 7)
-
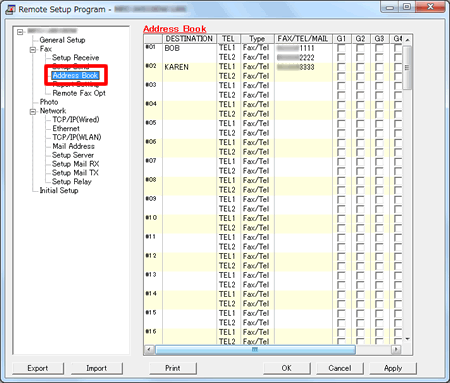
Click Address Book.
-
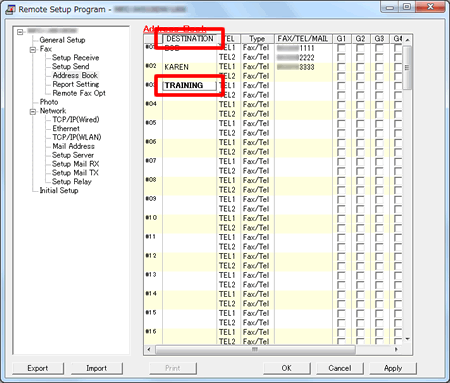
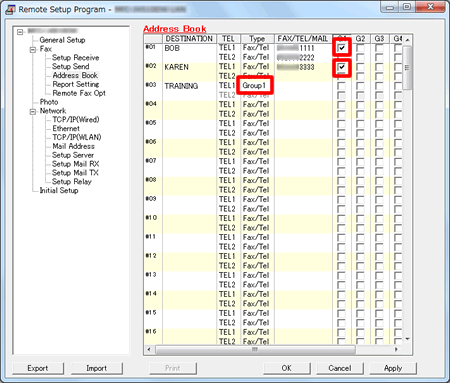
Left-click an empty field in the Destination column next to a vacant Address Book number.
-
Use the computer's keyboard to enter the name or company name.
-
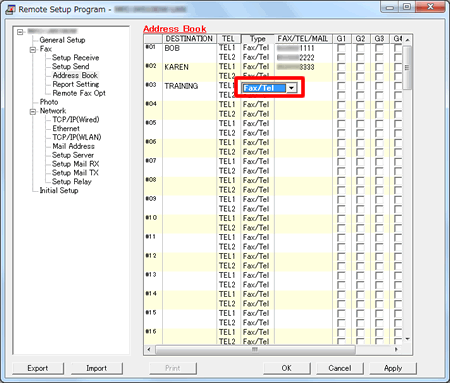
Double-click Fax/Tel in the same row as the name and click the drop-down menu arrow on the right-hand side of the field.
-
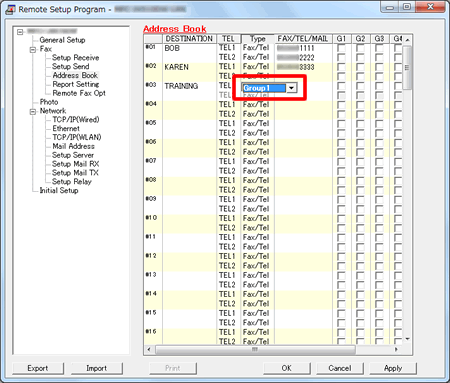
Left-click a Group number from the drop-down menu to choose it.
-
Place a check to the left of the numbers you want to store in the Group.
-
For example, place a check in the G1 column for numbers you want to save in Group 1 and place a check in the G2 column for numbers you want to save in Group 2.
-
For example, place a check in the G1 column for numbers you want to save in Group 1 and place a check in the G2 column for numbers you want to save in Group 2.
-
Do one of the following:
-
To store another Group, repeat STEP 3 through 7.
- To finish storing Groups, click Apply and wait as the information is uploaded into the Brother machine.
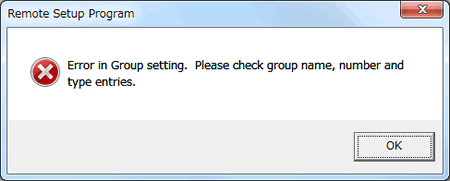
If an error message stating "Error in Group setting. Please check group name, number and type entries" appears, the Group number assigned is already being used, a check was placed in a Group field where a Speed Dial number is not stored, or a Group has been assigned to another Group. Left-click OK and double check the setup of the Group.
-
To store another Group, repeat STEP 3 through 7.
-
Left-click Print at the bottom right of the Remote Setup window to confirm setup of the Group.
- Left-click OK to close the Remote Setup screen.
