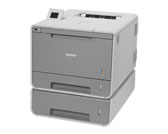
HL-L9200CDWT
FAQs & Troubleshooting |
Load paper in the paper tray
The machine can feed paper from the standard paper tray or the multi-purpose tray or optional lower tray. The paper capacity of the paper trays, acceptable paper size and paper type differ depending on the tray.
> Click here to see details of the paper specifications.
STEP I : Loading paper in the paper tray
NOTE: Illustrations shown below are from a representative product and may differ from your Brother machine.
Click the link below for your case and follow the steps:
- Printing on plain paper, thin paper or recycled paper from the standard paper tray
- Printing on plain paper, thin paper, recycled paper, bond paper, or glossy paper from the MP tray
- Printing on thick paper, labels and envelopes from the MP tray
Printing on plain paper, thin paper or recycled paper from the standard paper tray
-
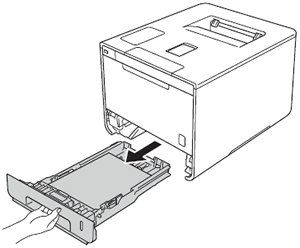
Pull the paper tray completely out of the machine.
-
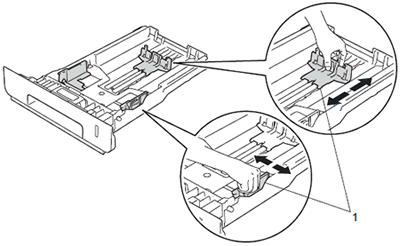
While pressing the blue paper-guide release levers (1), slide the paper guides to fit the size of paper you are loading in the tray. Make sure that the guides are firmly in the slots.
-
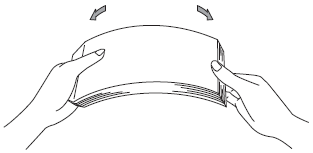
Fan the stack of paper well to avoid paper jams and misfeeds.
-
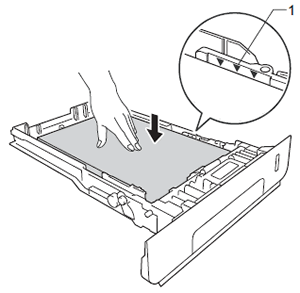
Load paper in the tray and make sure:
-
The paper is below the maximum paper mark
 (1).
(1).
Over filling the paper tray will cause paper jams. - The side to be printed on is face down.
-
The paper guides touch the sides of the paper so it will feed correctly.
-
The paper is below the maximum paper mark
- Put the paper tray firmly back in the machine. Make sure that it is completely inserted into the machine.
-
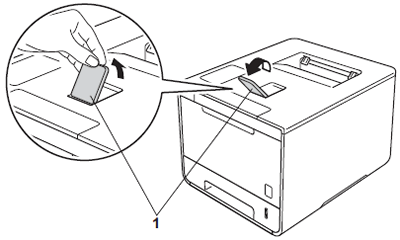
Lift up the support flap (1) to prevent paper from sliding off the face-down output tray, or remove each page as soon as it comes out of the machine.
> Go to STEP II to set the paper size and paper type for your Brother machine.
Printing on plain paper, thin paper, recycled paper, bond paper, or glossy paper from the MP tray
-
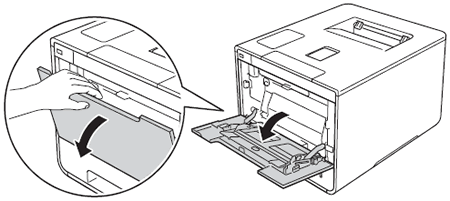
Open the MP tray and lower it gently.
-
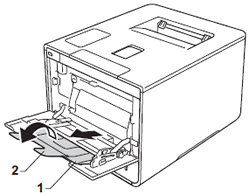
Pull out the MP tray support (1) and unfold the flap (2).
-
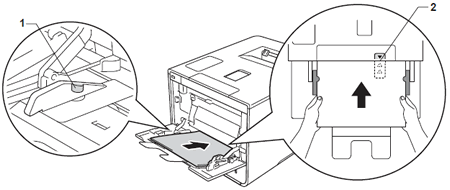
Load paper in the MP tray, making sure:
- The paper trays under the maximum paper tab (1).
-
The paper's leading edge (top of paper) is positioned between the
 and
and  arrows (2).
 - The side to be printed on must be face up with the leading edge in first.
-
The paper guides touch the sides of the paper so it will feed properly.
-
Lift up the support flap (1) to prevent paper from sliding off the face-down output tray, or remove each page as soon as it comes out of the machine.

> Go to STEP II to set the paper size and paper type for your Brother machine.
Printing on thick paper, labels and envelopes from the MP tray
When the back cover (face-up output tray) is pulled down, the machine has a straight paper path from the MP tray through to the back of the machine. Use this paper feed and output method when you print on thick paper, labels, or envelopes.
-
Before loading, press the corners and sides of the envelopes to make them as flat as possible.

-
Open the back cover (face-up output tray).
.gif)
-
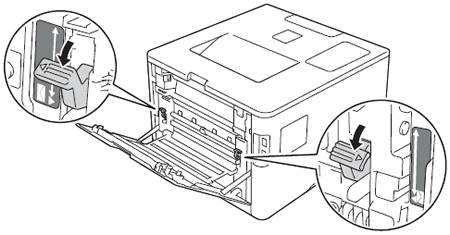
(For printing envelopes only)
Pull down the two grey levers, one on the left side and one on the right side, toward you as shown in the illustration.
-
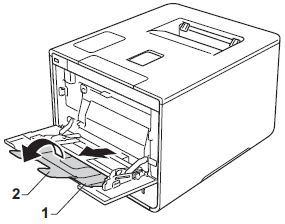
Open the MP tray and lower it gently.

-
Pull out the MP tray support (1) and unfold the flap (2).
-
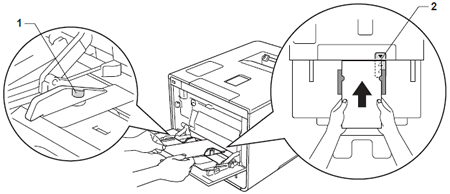
Load paper, labels, or envelopes in the MP tray, making sure:
- The number of envelopes in the MP tray does not exceed three.
- The paper, labels or envelopes stay under the maximum paper tab (1).
-
The paper's leading edge (top of paper) is positioned between the
 and
and  arrows (2).
 -
The side to be printed on is face up.
> Go to STEP II to set the paper size and paper type for your Brother machine.
STEP II : Setting the paper size and paper type
Select the appropriate Paper Size and Media Type in the printer driver and your Brother machine.
