VR
FAQs & Troubleshooting |
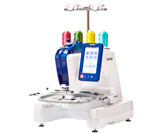
How do I thread the machine? (Threading the upper thread)
Upper threading
When threading the upper thread, carefully follow the instructions. If the upper threading is not performing correctly, the thread may break or become tangled, causing the needle to bend or break.
It is recommended that rayon or polyester embroidery thread be used (120 den/2, 135 dtex/2, 40 weight (in Americas and Europe), #50 (in Japan)).
The path that the embroidery machine should be threaded is indicated by a line on the machine. Be sure to thread the machine as indicated.
-
Place the thread spool on any spool pin among the 4 positions. Push the spool cap onto the spool pin as far as possible to secure the thread spool.

(1)Spool cap (2)Thread spool
(3)Spool pin
When using small spools of thread, be sure to place the included spool mat on the spool pin before placing the spool on the pin.

(1)Spool mat (2)Small spool
(3)Spool cap
-
Pass the thread from the back to the front through the hole in the thread guide just above the spool.

(1)Hole in the thread guide above the spool
-
Pull the thread toward you through the inside of the front hole in the thread guide.

(1)Front hole in the thread guide -
Hold the thread with both hands, and then pass it under the guide plate from the left.

(1)Guide plate -
Wind the thread clockwise once around the thread tension disc.

(1)Thread tension disc Make sure that the thread is securely caught in the thread tension disc.

(1)Pass around here. -
Pass the thread through the middle thread guide under the guide plate from the left.

(1)Guide plate -
Pass the thread along the slot to pass it through the thread take-up lever hole from the right side.

(1)Thread take-up lever -
Drawing it down through the slot in the thread guide, then through the hole in the cover.

(1)Hole in the cover -
Use the included threader to pass the thread through the needle bar thread guide.

(1)Needle bar thread guide (2)Needle changing tool (Threader)
Threading the needle
Use the automatic threading mechanism to thread the needle.
-
Press the “Automatic Threading” button.

>> The hook on the automatic threading mechanism passes through the eye of the needle.- If the needle is not fully inserted, the hook of the automatic threading mechanism will not pass through the eye of the needle during automatic needle threading, and the hook may bend or the needle cannot be threaded.
- If the hook of the automatic threading mechanism is bent or damaged, contact your authorized Brother dealer.
- While the hook of the automatic threading mechanism is passed through the eye of the needle, do not rotate the handwheel, otherwise the automatic threading mechanism may be damaged.
To avoid damage, the automatic threading mechanism may return to the back position when you turn the handwheel.
-
Pull out about 150 mm (6 inches) of thread. Then, as shown in the illustration, pass the thread under the fork of the automatic threading mechanism from the right, and then catch the thread with the hook that passes through the eye of the needle.

(1)Hook (2)Fork
When catching the thread with the hook, be careful that the thread does not become loose.
-
Pass the thread under the guide on the presser foot.

(1)Guide on presser foot (2)Notch in guide on presser foot
Make sure that the thread securely passes through the notch in the guide on the presser foot.
-
Securely pass the thread through the groove in the thread cutter, and then lightly pull the thread to cut it.

(1)Groove in thread cutter - If the thread is not correctly passed through the groove in the thread cutter, the message “Wiper error” appears and the needle cannot be threaded. Be sure to securely pass the thread through the groove.
- If enough thread is not pulled out, the thread cannot be pulled through the thread cutter.
-
Press the “Automatic Threading” button.

- The threader moves back away from the needle. The thread is pulled through the needle eye.
- The wiper comes out and catches the thread between the needle and the threader.
- The threader goes back to the original home position.
>> This completes the upper threading.If the thread is not taut, it may come out of the thread tension disc. After upper threading is finished, check again to make sure that the thread is correctly passed into the thread tension disc. (Refer to step 5 on Upper threading.)