FS60X
FAQs & Troubleshooting |
How do I adjust a stitch width or length?
This machine is preset with the default settings for the stitch width and stitch length for each stitch.
- After adjusting the stitch width, slowly turn the handwheel toward you (counterclockwise) and check that the needle does not touch the presser foot. If the needle hits the presser foot, the needle may bend or break.
- If the stitches are bunched together, increase the stitch length. Continuing to sew with the stitches bunched together may result in the needle bending or breaking.
Setting the stitch length
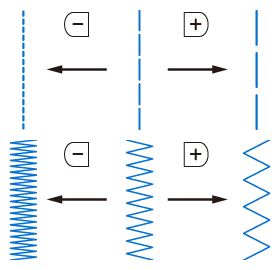
The stitch length can be adjusted to make the stitch coarser (longer) or finer (shorter).
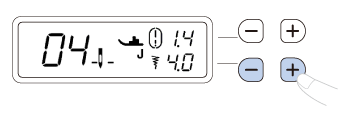
Press ![]() or
or ![]() of the stitch length keys to increase or reduce the stitch length.
of the stitch length keys to increase or reduce the stitch length.


- The setting value changes until it reaches the maximum or minimum value.
-
 around
  disappears when changed from the standard setting.
Setting the stitch width
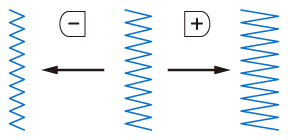
The stitch width (zigzag width) can be adjusted to make the stitch wider or narrower.
Press ![]() or
or ![]() of the stitch width keys to increase or reduce the stitch width.
of the stitch width keys to increase or reduce the stitch width.


- The setting value changes until it reaches the maximum or minimum value.
- If a straight stitch or triple stretch stitch is selected, changing the stitch width changes the needle position. Increasing the width moves the needle to the right; reducing the width moves the needle to the left.
-
 around
  disappears when changed from the standard setting.
 -
If
 appears to the right of
  , the stitch width cannot be adjusted.
Content Feedback
To help us improve our support, please provide your feedback below.
