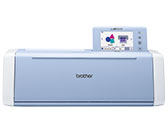
SDX1200
FAQs & Troubleshooting |
Not all of the material to be cut is cut. Some areas remain uncut.
Possible Cause (or Result)
|
The material being cut is not compatible with this machine. Or, the blade appropriate for the material being cut is not used. |
|
| The cutting pressure (“Cut Pressure”) is incorrect. | |
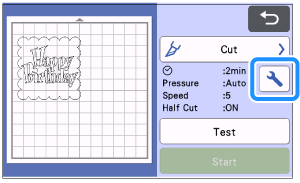
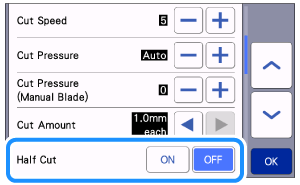
| Case3: | The Half Cut setting is ON. |
| Case4: | The material to be cut was thick or hard. |
| Case5: | The spacing between arranged patterns is too small. |
| Case6: | The material extends from the adhesive area of the mat. |
| Case7: | The blade is loose. |
| Case8: | Dust or lint has accumulated in the holder. |
| Case9: | Fabric was cut without using a sheet for fabric cutting. |
| Case10: | A fabric is not firmly attached to a mat that has a high tack adhesive fabric support sheet on its adhesive side. |
| Case11: | An iron-on fabric appliqué contact sheet is not firmly attached to a fabric. |
| Case12: | Masking tape is attached to the mark sensor and its vicinity. |
To purchase consumables or options, contact the retailer who sold you this machine or the nearest authorized service center.
Solution
Case 1
Check that the material being cut is compatible with this machine. Check that an appropriate blade for the material being cut is used.
For details on the compatible material or the appropriate blade, refer to Mat, Cutting Blade and Material Combinations.
Case 2
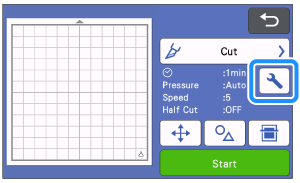
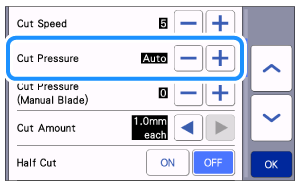
The cutting pressure may be too light.
Touch ![]() in the settings screen once to increase the cut pressure, and then try again.
in the settings screen once to increase the cut pressure, and then try again.
 |
 |
Before making your project, perform test/trial cut with the same material.
For details, refer to How do I perform trial cutting? (Test Cut) .
Be careful not to increase the pressure too much. Otherwise, the blade may break. If the pressure is too strong, the material may not be cut cleanly. In addition, the blade may be cut through the mat or may cause decrease in adhesive strength.
Case 3
Check that the Half Cut setting is OFF.
 |
 |
Case 4
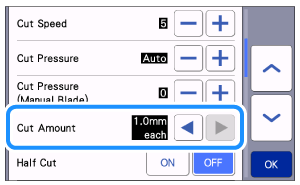
Change the Cut Amount setting from 1.0mm each to 0.5mm each, and try again. It may be possible to improve performance and for best results on thick or harder material adjust the cutting depth to 0.5mm. The Cut Amount is the depth of the cut in each pass. This allows the machine to cut less material each pass for a cleaner cut.
 |
 |
Case 5
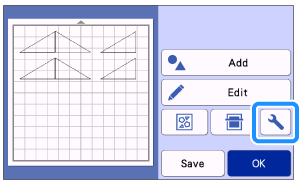
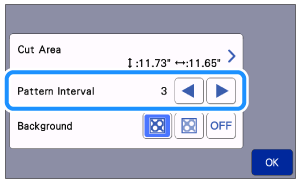
The patterns may not be cleanly cut if the pattern spacing is too small.
Change Pattern Interval setting to more than 3, or change pattern arrangement by using the auto layout function.
【Pattern Interval】
 |
 |
【Auto layout function】
 |
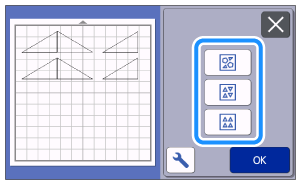 |
Case 6
Check that the material is placed within the cutting area (grid area) on the adhesive side.
Do not attach any material over the scanning marks in the illustration below. Otherwise, a mat may not be correctly recognized or a pattern cannot be cut cleanly. Place the material within the cutting area (grid area) on the adhesive side.
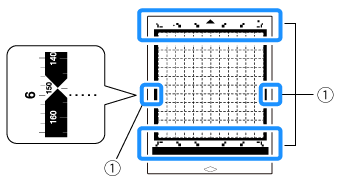 |
(1) Scanning marks |
Case 7
Check that the blade is loose. If it is loose, turn the cap to the right to tight it securely.
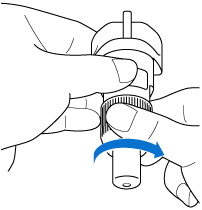
Case 8
If material cuttings, lint or dust accumulate in the holder, it may not operate correctly.
Clean the holder after every use.
For details, refer to Care and Maintenance (Cleaning the Holder) and Care and Maintenance (Cleaning Inside the Machine).
Case 9
Attach a high tack adhesive fabric support sheet to a mat or affix an iron-on fabric appliqué contact sheet to a fabric before cutting it.
For details, see Cut a thin fabric for the quilt piece or Cut the fabric other than quilt pieces
Case 10
Firmly attach the fabric to the mat pressing the handle of the included spatula across the surface of the fabric.
For details, see Cut a thin fabric for the quilt piece
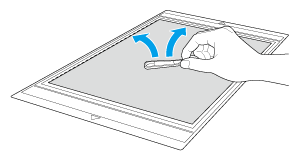
Case11
Iron the entire contact sheet to affix it firmly to the wrong side of the fabric.
For details, see Cut the fabric other than quilt pieces
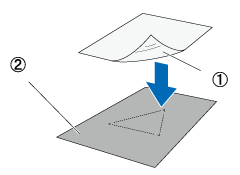 |
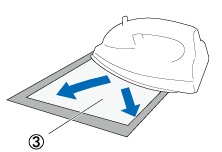 |
|
|
(1) Glossy side of contact sheet (2) Wrong side of fabric |
(3) Backing |
Case12
If tape is affixed to the area surrounded marked with blue in the figure below, affix it in a place other than that.
The machine may not detect the thickness of the material correctly and may not cut.
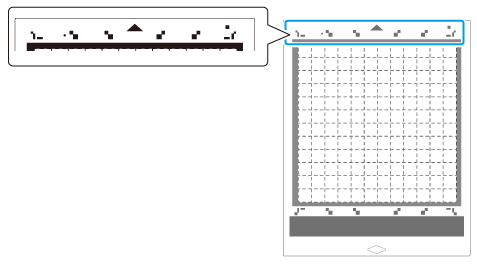
【 If a material still cannot be cut cleanly even though you tried the above operation 】
- The blade may be worn. Replace the blade with a new one.
- The mat’s adhesive strength may have been decreased, or the material is not secured properly. Replace the mat with a new one.
