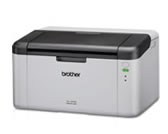
HL-1210W
FAQs & Troubleshooting |
Setup a Brother machine on a wireless (Wi-Fi) network using the supplied CD-ROM without a USB cable.
This FAQ explains how to configure your Brother machine for a wireless network using the CD-ROM without a USB cable. (The computer must be on your wireless network.)
Before configuring the wireless settings:
Confirm that you have already set up your router and computer. If not, set up your network firstly.
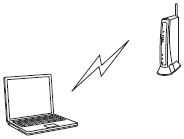
You must know your wireless network settings of the WLAN access point/router. Check and record the Network Name (SSID: Service Set ID, ESSID: Extended Service Set ID).
Click here to see how to find SSID from your computer.
Configure the wireless settings:
Follow the steps below.
NOTE: The screens may differ depending on operating system being used and your Brother machine.
- Place the Brother machine as close to the network access point/router as possible with minimal obstructions.
- Make sure your Brother machine is ON.
- Make sure your computer is ON and you are logged on with Administrator rights.
-
Put the supplied CD-ROM into your CD-ROM drive.
If you do not have the CD-ROM:
(Windows)
Go to Downloads section of this website and download Full Driver & Software Package. First, follow the installation instructions on the download page. Once the installation screen appears, follow the steps from STEP c for Windows users below.(Macintosh)
Go to Downloads section of this website and download Full Software Package. First, follow the installation instructions on the download page. Once the installation screen appears, follow the steps from STEP c for macOS 10.7 - 10.14 below.
If you do not find Full Software Package, download Wireless Setup Wizard. Follow the installation instructions on the download page.
After setting up your Brother machine, download Printer Driver. Follow the installation instructions on the download page.
If you do not find Printer Driver, download Brother iPrint&Scan from the App Store.(Windows)
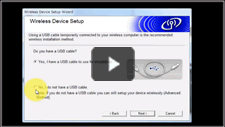
You can see the steps with video clips.
- The clip is being streamed from YouTube. (Opens in a new window.)
- Your machine may alter what is displayed on this video.
-
The installation screen will appear automatically. If prompted, choose your model and language.
-
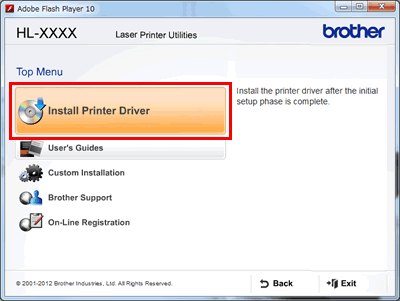
Click Install Printer Driver.
NOTE: When the User Account Control screen appears, click Allow or Yes.
- When the License Agreement window appears, click Yes if you agree to the License Agreement.
-
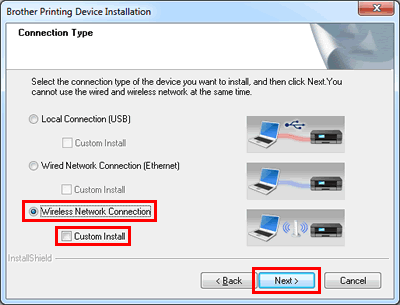
Choose Wireless Network Connection without checking Custom Install. Click Next.
-
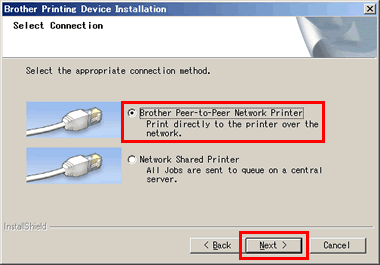
Choose Brother Peer-to-Peer Network Printer, and then click Next.
-
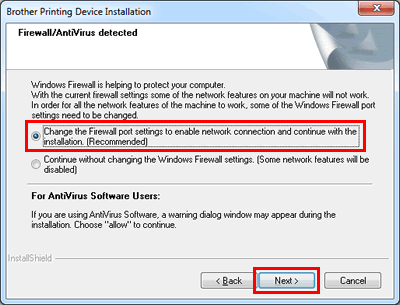
When the Firewall/AntiVirus detected screen appears, choose Change the Firewall port settings to enable network connection and continue with the installation. (Recommended) and then click Next. Continue to STEP 5.
(macOS 10.7 - 10.14)
- Double-click the BROTHER icon on your desktop.
-
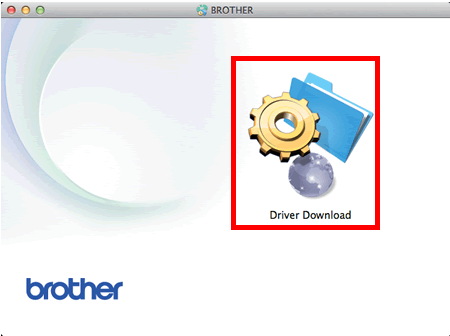
Double-click the Driver Download icon.
-
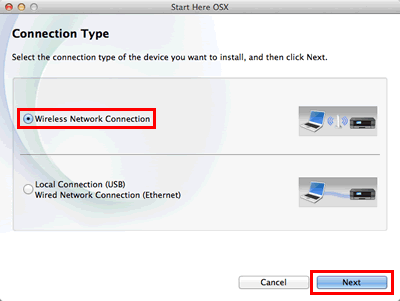
Choose Wireless Network Connection and then click Next.
-
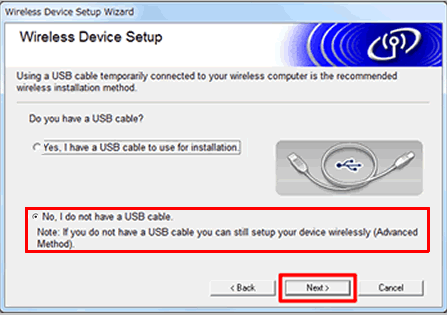
When the Wireless Device Setup screen appears, choose No, I don't have a USB cable, and then click Next.
-
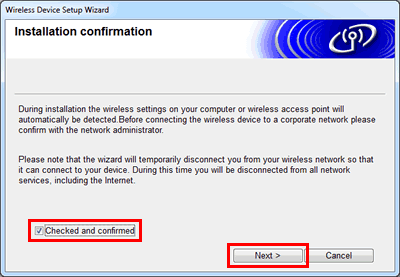
Confirm the message on the screen. Check the Checked and confirmed box and click Next.
-
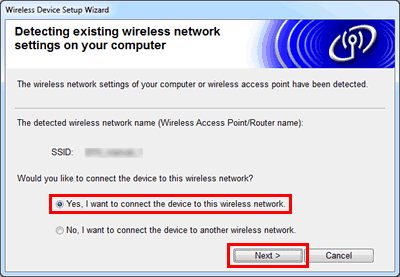
Your Network Name (SSID, ESSID) will be displayed. Choose Yes and then click Next.
-
When the Enable Wireless screen appears, you should now enable wireless networking on the device using its control panel. Follow the steps on the right side of the screen.
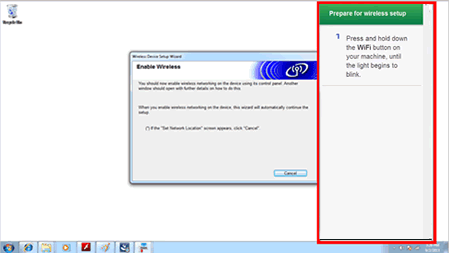
- Press and hold the WiFi button on your machine for about 2 seconds, until the light begins to blink.
-
The WiFi button will light up when connected.
You have completed Wireless Setup on your Brother machine.
-
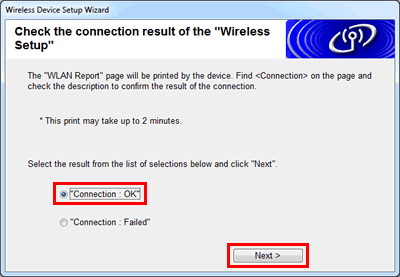
Get back to your computer. Choose Connection: OK and click Next.
-
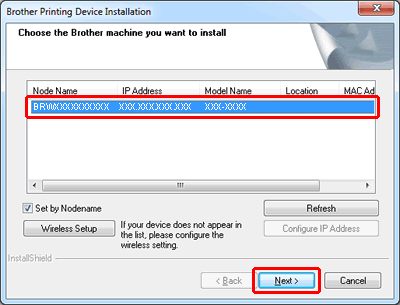
Choose the Brother machine you want to install.
Then click Next and follow the on-screen instructions to install the printer driver for network connection. Even if you have printed with USB connection, you need to install the printer driver for network connection.
-
The drivers and software installation starts.
Follow the on-screen instructions to finish the installation.
