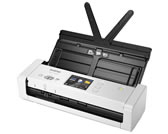
ADS-1700W
FAQs & Troubleshooting |
Send Scanned Data to an Email Server
Before using this feature, you must first configure your Email Server settings using Web Based Management. See Related Information:Send an Email Securely.
- Load your document.
- Press
 or
or  to display [to Email Server], and press it.
 - Do one of the following to enter the destination email address:
- Manually enter the email address.
- Select an email address from the Address Book:
- Press [Address Book].
- Press
 or
or  until you find the name you are looking for.
 - Press the name from the result.
- Press [OK].
- Press [OK].
- To change the scan settings, press [Options]. Configure the following settings, and then press [OK]:
- [2-sided Scan]
- [Scan Type]
- [Resolution]
- [File Type]
- [Document Size]
- [File Size]
- [Edge Fill For Plastic Card]
- [Skip Blank Page]
- [Advanced Settings]
- [Set New Default]
- [Factory Reset]

- To configure other settings, press [Advanced Settings].
- To save the settings as a shortcut, press [Save as Shortcut].
- If signed PDF was selected from the [File Type] drop-down list, you must configure the certificate settings using Web Based Management.
- [Edge Fill For Plastic Card] is only available when scanning from the Card Slot.
- Press [Start].The machine starts scanning, and then sends the scanned document to the email address directly.
Content Feedback
To help us improve our support, please provide your feedback below.
