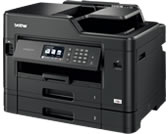
MFC-J2730DW
FAQs & Troubleshooting |
Send Scanned Data to an Email Server
To use this feature, go to the Brother Solutions Center at support.brother.com, click Downloads on your model page and download the Internet Fax Install Tool.
To send scanned data to an email server, you must configure your machine to communicate with your network and mail server. You can configure these items from the machine's control panel, Web Based Management, Remote Setup, or BRAdmin Professional.
MFC-J2330DW/MFC-J5330DW
- Load your document.
- Press .
- Do one of the following to enter the destination email address:
- To enter the email address manually, press [Manual], and then enter the email address using the character buttons on the LCD. When finished, press [OK].
- If the email address is stored in the machine's address book, press [Address Book], and then select the email address.
Press [OK].
- Confirm the email address, and then press [Next].
- Do one of the following:
- To change the settings, press [Options], and then go to the next step.

- To set your own default settings: after making changes to settings, press the [Set New Default] option, and then press [Yes].
- To restore the factory settings: press the [Factory Reset] option, and then press [Yes].
- Press [Start] to start scanning without changing additional settings.
The machine starts scanning. If using the machine's scanner glass, follow the LCD instructions to complete the scanning job.
- Select the scan settings you want to change, and then press [OK].OptionDescriptionScan Type
Select the scan type for your document.
ResolutionSelect the scan resolution for your document.
File TypeSelect the file format for your document.
Document SizeSelect your document size.
Scan Long Paper (ADF)(Available only for certain models)
Scan a long document using the ADF.
BrightnessSelect the brightness level.
ContrastSelect the contrast level.

- To save the settings as a shortcut, press [Save as Shortcut]. You will be asked if you want to make this a One Touch Shortcut. Follow the LCD instructions.
- Press [Start].The machine starts scanning. If using the machine's scanner glass, follow the LCD instructions to complete the scanning job.
MFC-J2730DW/MFC-J5730DW/MFC-J5930DW
- Load your document.
- Press
 [Scan].
 - Swipe left or right to display
 [to E-mail Server], and press it. The icon moves to the middle of the touchscreen and is highlighted in blue.
 - Press
 [to E-mail Server].
 - Do one of the following to enter the destination email address:
- To enter the email address manually, press [Manual], and then enter the email address using the character buttons on the LCD. When finished, press [OK].
- If the email address is stored in the machine's address book, press [Address Book], and then select the email address.
Press [OK].
- Confirm the email address, and then press [Next].
- Do one of the following:
- To change the settings, press [Options], and then go to the next step.

- To set your own default settings: after making changes to settings, press the [Set New Default] option, and then press [Yes].
- To restore the factory settings: press [Factory Reset], and then press [Yes].
- Press [Start] to start scanning without changing additional settings.
The machine starts scanning. If using the machine's scanner glass, follow the LCD instructions to complete the scanning job.
- Select the scan settings you want to change, and then press [OK].OptionDescription2-sided Scan
(Available only for certain models)
Select the 2-sided scan mode.
Scan TypeSelect the scan type for your document.
ResolutionSelect the scan resolution for your document.
File TypeSelect the file format for your document.
Document SizeSelect your document size.
Scan Long Paper (ADF)(Available only for certain models)
Scan a long document using the ADF.
BrightnessSelect the brightness level.
ContrastSelect the contrast level.

- To save the settings as a shortcut, press [Save as Shortcut]. You will be asked if you want to make this a One Touch Shortcut. Follow the LCD instructions.
- Press [Start].The machine starts scanning. If using the machine's scanner glass, follow the LCD instructions to complete the scanning job.
