MFC-9970CDW
FAQs & Troubleshooting |
Clean the scanner to improve the copy or fax quality (video instructions available)
Follow the steps below to clean the scanner:
NOTE: Illustrations shown below are from a representative product, and may differ from your Brother machine.
DO NOT use cleaning materials that contain ammonia, alcohol, any type of spray, or any type of flammable substance to clean the outside or inside of the machine. Doing this may cause a fire or electrical shock.

- Turn off the machine's power switch. Unplug the telephone line cord first (if applicable), disconnect all cables, and then unplug the power cord from the AC power outlet.
-
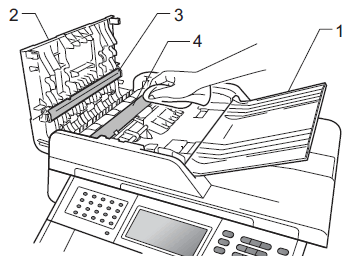
Unfold the ADF document support (1) and then open the ADF cover (2). Clean the white bar (3) and the scanner glass strip (4) underneath it with a soft lint-free cloth moistened with water. Close the ADF cover (2) and fold the ADF document support (1).
-
Lift the document cover (1). Clean the white plastic surface (2) and scanner glass (3) underneath it with a soft lint-free cloth moistened with water.
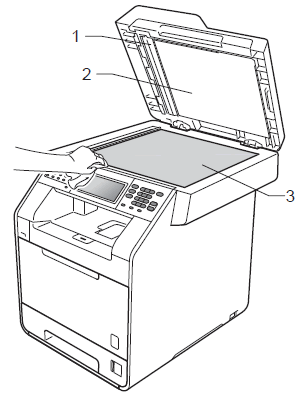
-
In the ADF unit, clean the white bar (1) and the glass strip (2) underneath it with a soft lint-free cloth moistened with water.
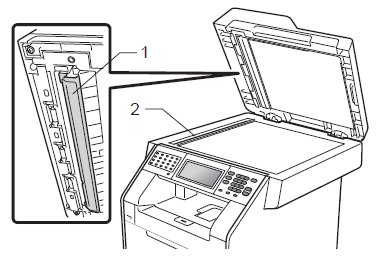
- Run your finger tip over the glass to see if you can feel anything on it. If you feel dirt or debris, clean the glass again concentrating on that area. You may need to repeat the cleaning process three or four times. To test, make a copy after each cleaning.
- Plug the machine's power cord back into the AC power outlet first, connect all cables, and then plug in the telephone line cord (if applicable). Turn on the machine's power switch.
If your printed document has black lines down the page when you make a copy using the ADF (Automatic Document Feeder), please try the following:
-
Clean the scanner glass strip.
This type of line is typically caused by dirt or correction fluid on the scanner glass strip. Please wipe the scanner glass strip to remove them. -
If you can't find any dirt or stain on the scanner glass strip, please try the following:
-
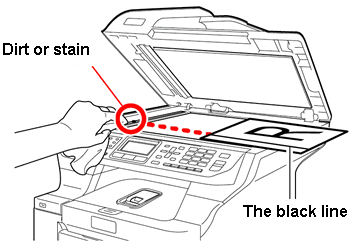
Place the printed document on the scanner glass as shown in the illustration below. Make sure to put the document face up. The black line down the page on the printed document will help you to find where there is dirt or stain on the scanner glass strip.
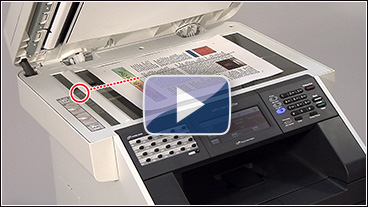
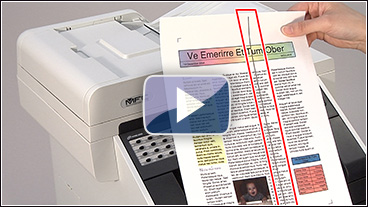 Click here to see this step with video.
* This movie is being streamed from YouTube. (Opening new window.) -
Carefully run your finger tip over the scanner glass strip to see if you can feel anything on it. If you feel something, clean it carefully with a soft lint-free cloth moistened with water.
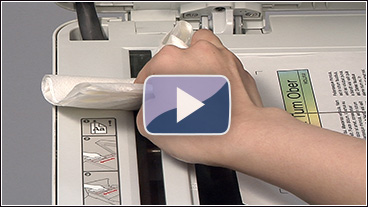 Click here to see this step with video.
* This movie is being streamed from YouTube. (Opening new window.) - Make a copy using the ADF to see if the printed document has no black line.
-
Place the printed document on the scanner glass as shown in the illustration below. Make sure to put the document face up. The black line down the page on the printed document will help you to find where there is dirt or stain on the scanner glass strip.
|
|
Video Instructions |
|
* This movie is being streamed from YouTube. |
