HL-4040CN
FAQs & Troubleshooting |
How do I clear the message "Print Unable 32" from the LCD display?
The message "Print Unable 32" or "Machine Error 32" will appear on the LCD display if paper or labels are stuck inside the printer or drum unit.
Follow the instruction below to clear this error.
DO NOT use flammable substances or any type of spray to clean the inside or outside of the machine.
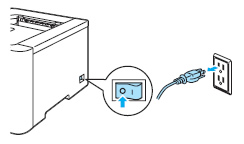
- Power off the printer using the On/Off switch located on the right side of the printer.
-
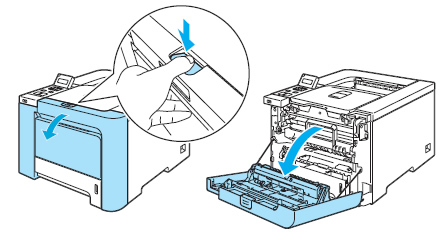
Press the front cover release button and then open the front cover.
-
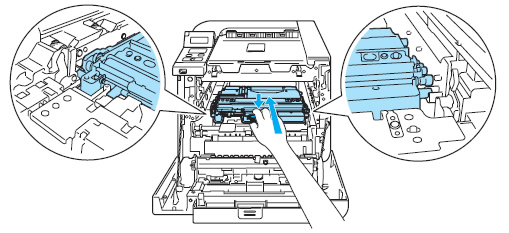
Pull out the drum unit as follows:
- Hold the green handle of the drum unit. Lift the drum unit up and then pull it out until it stops.
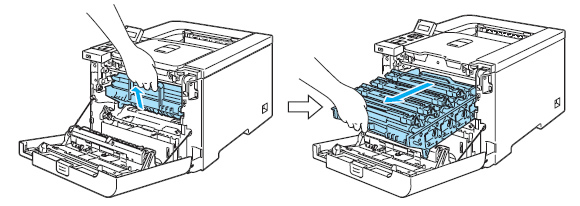
- Release the gray lock lever (1) that is on the left side of the printer. Pull the drum unit completely out of the printer using the green handles on the drum unit.
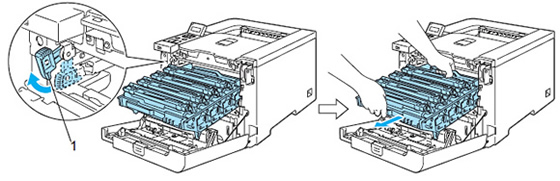
Hold the green handles of the drum unit when you carry it. DO NOT hold the sides of the drum unit.
- We recommend that you place the drum unit on a clean, flat surface with a piece of disposable paper underneath it in case you accidentally spill or scatter toner.
- To prevent damage to the printer from static electricity, DO NOT touch the electrodes shown in the illustration.
- Hold the green handle of the drum unit. Lift the drum unit up and then pull it out until it stops.
-
After the drum unit has been removed, carefully look inside the printer and remove any paper, scraps of paper or labels.
-
Remove the 4 toner cartridges from the drum unit. Hold the handle of the toner cartridge and pull it out of the drum unit. Repeat this for each of the toner cartridges.
We recommend that you place the toner cartridges on a clean, flat surface with a piece of disposable paper underneath it in case you accidentally spill or scatter toner.
-
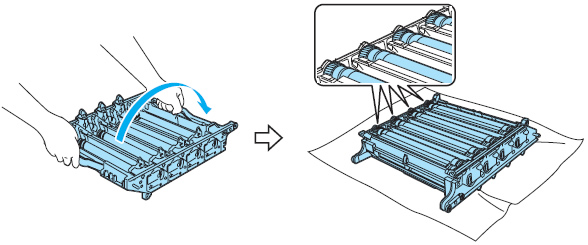
There will be four open slots on the drum unit where the toner cartridges were installed. Examine the openings and the black roller in each slot for pieces of paper or labels and remove them. Also inspect the right and left sides of the drum unit for pieces of paper or labels.
-
Turn the drum unit over and check for pieces of paper or labels that may be stuck in or on the black rollers.
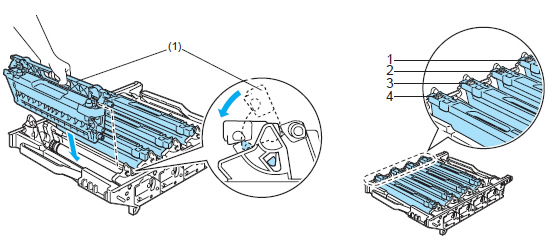
- Turn the drum unit back over and reinstall the toner cartridges. Hold the handles of the toner cartridges and then slide them into the drum unit. Make sure you match the toner cartridge color to the same color label on the drum unit. Fold the toner cartridge handles down once the cartridges are in place.
1. C- Cyan, 2. M- Magenta, 3. Y- Yellow, 4. K- Black
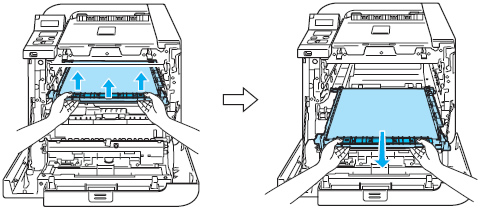
- Hold the green parts of the belt unit with both hands and lift the belt unit up, then pull it out. Check the bottom of the belt unit for paper that may be stuck to the belt surface.
We recommend that you put the belt unit on a clean, flat surface with a piece of disposal paper underneath it in case you accidentally spill or scatter toner.
-
Remove the waste toner box from the printer using the green handle.
Handle the waste toner cartridges carefully in case you accidentally spill or scatter toner. If toner scatters on your hands or clothes, wipe or wash it off with cold water at once.
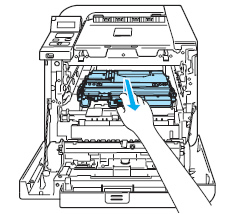
- Look inside the printer, especially towards the back, for pieces of paper or labels. A piece of paper or label may be stuck near the roller located deep at the bottom of the printer. Check the roller and remove any paper or labels in the printer.
- DO NOT use a sharp object to avoid the damage of the roller. It may cause the printing problem.
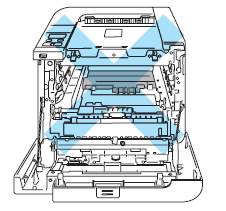
- DO NOT touch some internal parts shaded in the illustrations. Those parts will be extremely hot after you have used.
- Put the waste toner box back in the printer using the green handle.
- Put the belt unit back in the printer. Match the
 mark on the belt unit to the
  mark on the printer.

- Put the drum unit back in the printer as follows.
- Make sure that the gray lock lever (1) is in the up position and put the drum unit in the printer. Push down the gray lock lever (1).

When you put the drum unit in the printer, match the green guides (1) of the drum unit handle to the green arrows (2) on both sides of the printer.

-
Push the drum unit in until it stops.
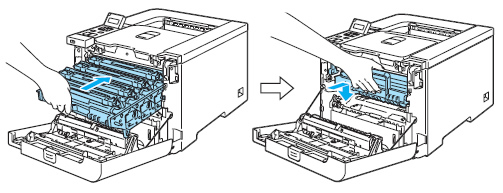
- Make sure that the gray lock lever (1) is in the up position and put the drum unit in the printer. Push down the gray lock lever (1).
-
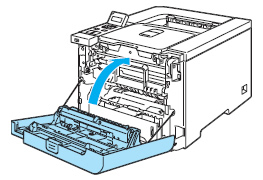
Close the front cover.
-
Power the printer back on.
-
If the message still remains, power the printer off and back on.
-
If the message still remains, your printer is in need of repair. Contact your dealer or Brother Customer Service.