Innov-is F420
FAQs & Troubleshooting |
How do I design a stitch with MY CUSTOM STITCH function?
With the MY CUSTOM STITCH function, you can sew stitch patterns that you design yourself.
Drawing a sketch of the pattern
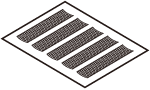
Prepare a grid sheet set.
-
Draw a sketch of the pattern on the grid sheet set.
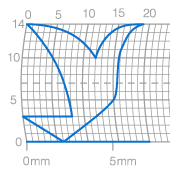
Draw the pattern as one continuous line and with the start point and the end point of the design at the same height.

-
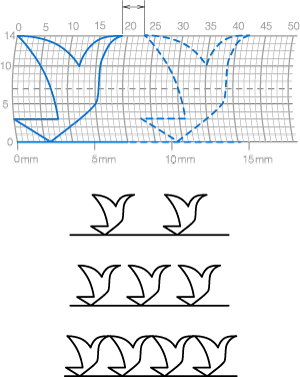
If the pattern will be repeated, determine the space between the repeating patterns.
-
Mark the points in the pattern that are positioned at intersections in the grid, and then link those points with a continuous straight line.

-
Determine the sewing order.
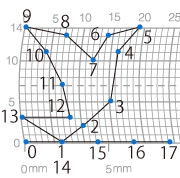
For a more attractive stitch, close the pattern by intersecting the line.
Entering the pattern data
-
Attach monogramming foot “N”.

-
Press
 on the operation panel as many times as necessary until
  is displayed, and press "9" "7".
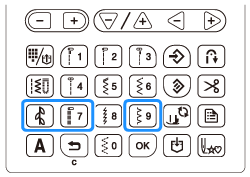
The MY CUSTOM STITCH screen is displayed. -
Check the grid sheet set, and specify the coordinates of the first point. Specify the coordinates using the “-” and “+” keys, and press "OK".
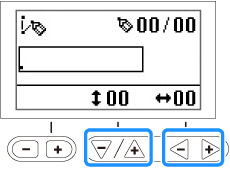
- Specify the coordinates of the second point, and then press "OK".
-
Specify whether single stitching or triple stitching will be sewn between the points.
Select either of them using the “-” or “+” key, and then press "OK".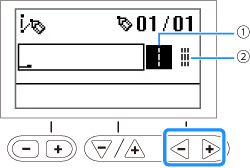
(1) Single stitching
(2) Triple stitching
-
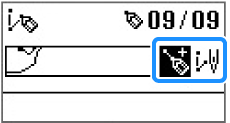
Select whether to finish editing the pattern and return to the sewing screen or to continue editing.
Select either of them using the “-” or “+” key, and then press "OK".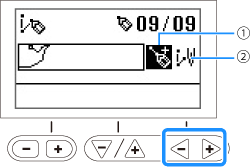
(1) Continue editing
(2) Finish editing
-
Repeat steps 4 through 6 to specify each point.
-
To correct an entered point, press
 when the screen appears as shown below.
Press once to highlight the last point in white.
Press again to select the previous point.
To select the next point, press "OK".
After selecting the point to be corrected, you can move it using the “-” and “+” keys.
-
The last point can be deleted by pressing "0" while the point appears black in the screen where
 is displayed.
-
To correct an entered point, press
-
After all points have been entered, select
 .
. -
Specify the various stitching settings, such as reverse/reinforcement stitching, in the same way as with other stitches.
The pattern you entered can be stored for later use. For details, refer to “Saving a pattern” in the operation manual.
Content Feedback
To help us improve our support, please provide your feedback below.