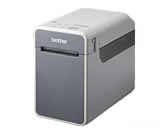
TD-2135N
FAQs & Troubleshooting |
How do I connect my computer to the printer using the Wireless Direct mode?
- Download Software/Document Installer from the [Downloads] section of this website and then start the installer. P-touch Editor, Printer Setting Tool, and other software are installed in addition to the printer driver.
-
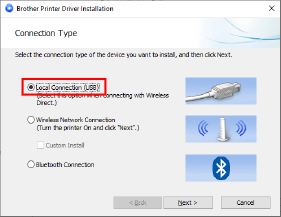
When the dialog box for selecting the connection method is displayed after the printer driver installation starts, select [Local Connection (USB)].
Click [Next], and then follow the installer instructions.
-
When the installation is finished, press and hold the Feed button (
 ) for five seconds to enable the Bluetooth and Wi-Fi function of the printer.
 -
Change the settings of the printer.
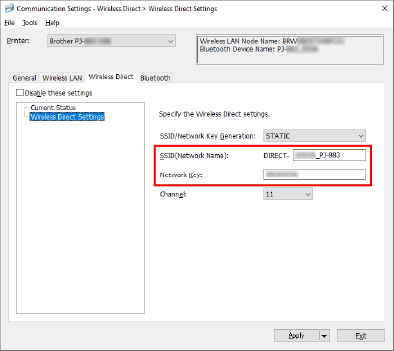
Start the Printer Setting Tool on your computer, and click [Communication Settings]. Confirm the SSID (Network Name) and password (Network Key) in the [Wireless Direct] tab, and then select [Wireless Direct] for [Selected Interface] in [Communication Settings] in the [General] tab.
-
From your computer, select the SSID you confirmed in step 4 and connect to the printer.
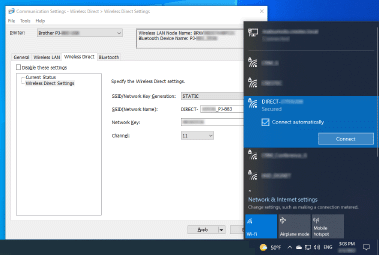
- The factory setting for the SSID is "DIRECT-[the last five digits of the product serial number]_[model name]".
- If you are prompted to enter a password, enter the password (Network Key) you confirmed in step 4.
- For Windows 10 or later, check [Connect automatically].
- It may take several minutes until the connection is finished.
-
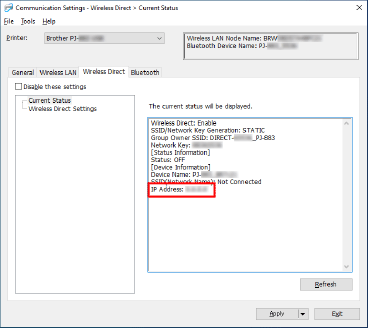
Start the Printer Setting Tool on your computer again, and click [Communication Settings].
Confirm the IP address in [Current Status] in the [Wireless Direct] tab.
-
Open the [Devices and Printers] window. (For more information about opening the window, click here.)
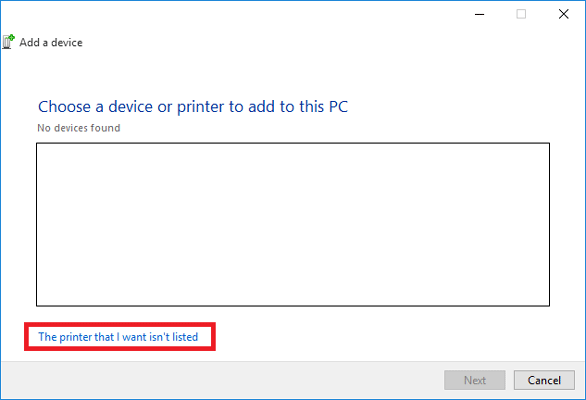
Click [Add a printer].
Click [The printer that I want isn't listed] on the bottom of the window instead of selecting the displayed printer icon for your model.
- Select [Create a new port] - [Standard TCP/IP Port], and then click [Next].
- Enter the IP address you confirmed in step 6, and then click [Next]. The computer will start searching for the TCP/IP port.
- When the dialog box with [Which version of the driver do you want to use?] appears, select [Use the driver that is currently installed (recommended)], and then click [Next]. Confirm the printer name, and then click [Next]. You have finished connecting your computer to the printer.
- Open the [Devices and Printers] window again, click the [Ports] tab in the [Printer Properties] dialog box, confirm that the IP address for the printer is the same as the address you confirmed in step 6 and that the [Standard TCP/IP Port] option (not WSD port) is selected.
- Start P-touch Editor to create and print labels.
Content Feedback
To help us improve our support, please provide your feedback below.
