CM900
FAQs & Troubleshooting |
Line Embossing
Precautions
- With line embossing, only use paper with a thickness of 0.5 mm or less or metal sheets with a thickness of 0.2 mm or less.
- Product image for illustration purposes only. Actual product may vary.
-
Cutting mats corresponding to this product were renovated, and the mat design, name, type, function, etc. were changed.
Refer to "Important Information about the Mat".
-
With the tab on the embossing mat at the bottom left, attach the green side to the standard mat or the middle tack adhesive mat.
・We recommend attaching it to a new cutting mat.
・Attach the embossing mat so it does not extend from the attaching area of the cutting mat.
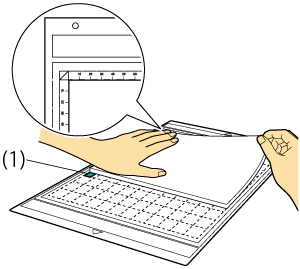
(1) tabs of mat -
Peel the protective sheet from the embossing mat, and then attach the material (side to be embossed facing down) to the mat.
・Position the material so the area to be embossed fits within the embossing mat.

< With metal sheets >
Peel the protective sheet from the embossing mat, and then attach the metal sheet (with the protective sheets attached and the tabs at the bottom) to the mat.
- Using a metal sheet without the protective sheets, may result in damage of the emboss tool or the cutting machine.
- Before cutting the metal sheet, emboss it, and then peel off both protective sheets. Before embossing the remainder of the metal sheet, affix a protective sheet to each side.
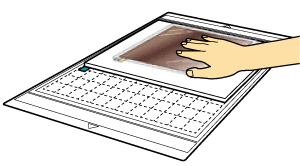
(1) tabs -
Recall the embossing pattern in the cutting machine, and then feed in the mat and click
 to scan the material.
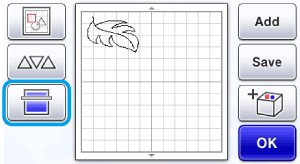
-
Press
 in the operation panel.
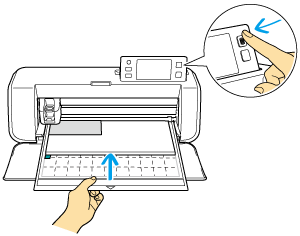
- Embossing patterns can also be downloaded from CanvasWorkspace.
- Flip asymmetrical (mirror image) patterns to create the embossed effect on the front surface of the material.
- Position the pattern so it does not extend from the material. If the embossing tool touches the embossing mat, the mat may be damaged.
-
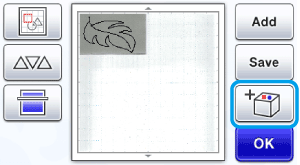
If the pattern extends out of the scanned material shown on the LCD display screen, adjust the position of the pattern, or touch
 and adjust the pattern size.
-
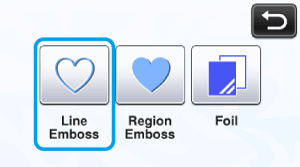
Touch
 , and then select “Line Emboss”.

-
Remove the holder cap.
-
Select the embossing tool according to the line thickness that you want to emboss, and then insert the embossing tool into the embossing tool holder so that ▼ on the tool aligns with ▲ on the holder.
After securing the holder cap, insert the holder into the cartridge.
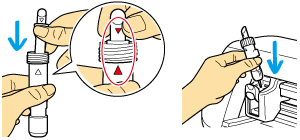
Before inserting the holder into the cartridge, check if the tool moves up and down in the holder. If the tool moves, remove the cap, and then attach it again. -
Touch
 , and then specify the setting for “Emboss Pressure”.
The recommended embossing pressure differs depending on the material and embossing tool diameter. Refer to the following table when adjusting the setting.
Material Thickness Embossing Pressure 1.5 mm tool 3 mm tool Paper (thick) 0.25mm 4 4 Metal sheets (included) 0.1mm 0 0 Paper (thin) 0.1mm -6 -4

- This table of values provides general guidelines. Before making your project, perform trial embossing with the same material.
- If the desired embossing effect is not achieved, adjust the embossing pressure. The embossing effect differs depending on the type and thickness of the material.
- Some materials may tear if the embossing pressure is too strong or the embossing speed is too fast.
-
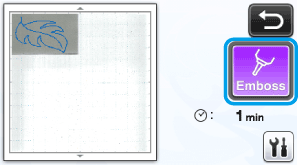
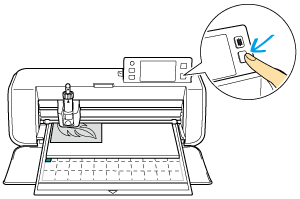
Touch the “Emboss” key, and then press the “Star t/ Stop” button to start embossing.
-
Use the spatula to carefully peel the material from the embossing mat.

< With metal sheets >
Remove the metal sheet (with the protective sheets attached) from the embossing mat.

Peel both of the protective sheets from the metal sheet by using the tabs.
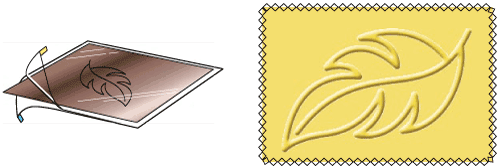
When peeling the metal sheet from the protective sheets, do not touch the edges of the metal sheet, otherwise injuries may result.
Content Feedback
To help us improve our support, please provide your feedback below.
