MFC-9840CDW
FAQs & Troubleshooting |
I have upgraded the Operating System to Windows 7. How can I install "PaperPort™ 11SE" ?
You can install "PaperPort™ 11SE" from the CD-ROM supplied with your machine. Please follow the Step1, 2 and 3 below to install "PaperPort™ 11SE".
There are three steps for installing "PaperPort™ 11SE". You need to install three kinds of software: PaperPort, Microsoft Visual C++ 2005 Redistributable Package (depending on your machine) and PaperPort Image Printer.
Step1: Installing PaperPort
-
Put the supplied CD-ROM into your CD-ROM drive. If the Brother screen appears automatically, close the screen.
-
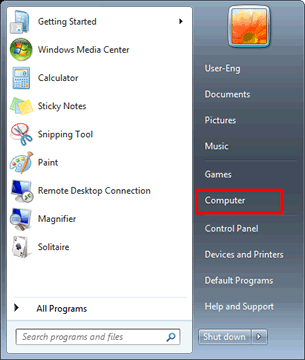
Click on Start and then Computer.
-
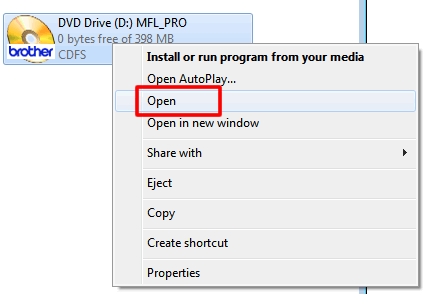
Right-click on CD-ROM icon and select Open.
-
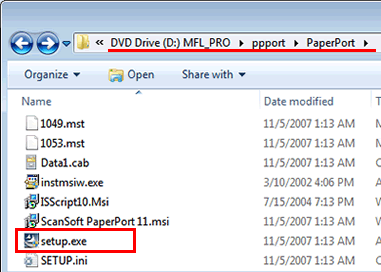
Open the ppport folder and then the PaperPort folder. Double-click setup.exe.
- The installation will start. Please follow the installation screen directions.
- For DCP-9040CN, DCP-9045CDN, MFC-9440CN, MFC-9840CDW users:
You do NOT need to follow Step2. Please skip Step 2 and go onto the Step 3.
- For Users of other machines:
Please continue to Step 2 and follow the instructions.
Step2: Installing Microsoft Visual C++ 2005 Redistributable Package
Installation steps vary depending on the version of your Windows 7. Please follow the steps below for your Windows 7 version.
[For 32bit users]
-
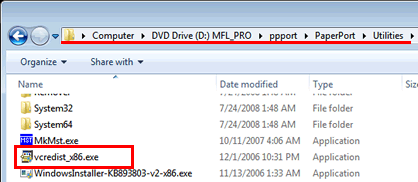
Open the Utilities folder. Double-click vcredist_x86.exe.
-
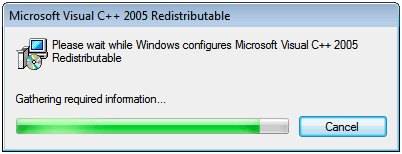
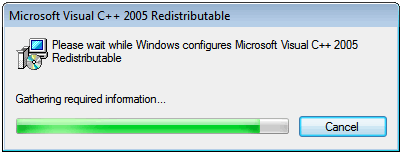
A window will appear. After finishing installation the window will close.
[For 64bit users]
-
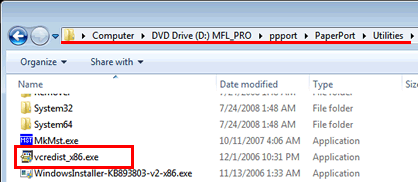
Open the Utilities folder. Double-click vcredist_x86.exe.
-
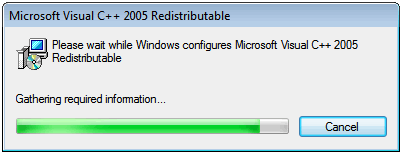
A window will appear. After finishing installation the window will close.
-
Open the System64 folder. Double-click vcredist_x64.exe.

-
A window will appear. After finishing installation the window will close.
Step3: Installing PaperPort Image Printer
Installation steps vary depending on the version of your Windows 7. Please follow the steps below for your Windows 7 version.
[For 32bit users]
-
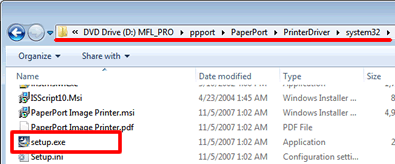
Go back to the PaperPort folder. Open the PrinterDriver folder, and then the sytem32 folder.
-
Double-click setup.exe.
- The installation will start. Please follow the installation screen directions.
[For 64bit users]
-
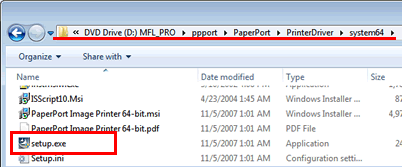
Go back to the PaperPort folder. Open the PrinterDriver folder, and then the system64 folder.
-
Double-click setup.exe.
- The installation will start. Please follow the installation screen directions.
