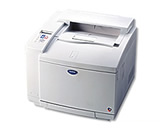
HL-2600CN
FAQs & Troubleshooting |
How do I replace the OPC belt cartridge?
Follow the steps below to replace the OPC Belt Cartridge.
For the order number (Order No.) of the OPC Belt Cartridge, please refer to the User's guide provided with your Brother Printer or the Consumables & Options page of your model on Brother Solutions Center. To visit Consumables & Options page, click your model name link (e.g. HL-XXXX * ) on the top section and then click "Consumables & Options" link on the opened page. * XXXX stands for your model name.
- Press the Power button to turn the printer off.
- Open the Front Cover, and then open the Top Cover.
- Pull the green Belt Cartridge Lock Levers on both sides toward you to release the lock.

- Remove the OPC Belt Cartridge from the printer.

- Remove the Tension Release Pins from both sides of the new OPC Belt Cartridge.

- Remove the protective sheet from the new OPC Belt Cartridge. Do not touch the green part of the OPC Belt Cartridge.

- Insert the new Belt Cartridge into the printer guides with the flat side facing you.

- Press the Belt Cartridge Lock Levers on both sides of the OPC Belt Cartridge to the rear to lock the cartridge into the printer.
- Close the Front Cover and the Top Cover.
- Press the Power button to turn the printer On.
- Press any of the Menu buttons (+,-, Set or Back) to take the printer Off Line.
- Press + or - until "RESET MENU" appears.
- Press Set to proceed to the next menu level, and then press + or - until "PARTS LIFE" appears.
- Press Set, and then press + until "OPC BELT" appears.
- Press Set, and then pressGo. Then printer is now in the READY state.
Content Feedback
To help us improve our support, please provide your feedback below.
