PE-DESIGN 10
FAQs & Troubleshooting |
Embroidery (PES) files are not displayed as thumbnails in Windows Explorer. (Windows 7 and Windows Vista)
Check the following solutions when embroidery files are not displayed properly as thumbnails in Windows Explorer.
STEP1: Checking the setting of "Folder and search options"
The setting for diplaying thumbnails in Windows Explorler may not be correct.
Try the following steps to check the setting for it in the Folder Options dialog box.
-
Open the folder where embroidery files are not displayed as thumbnails using Windows Explorer.
-
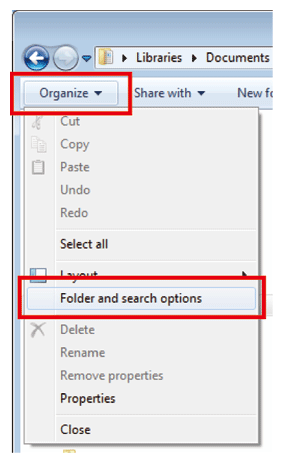
On the toolbar, click Organize, and then click Folder and serach options.
-
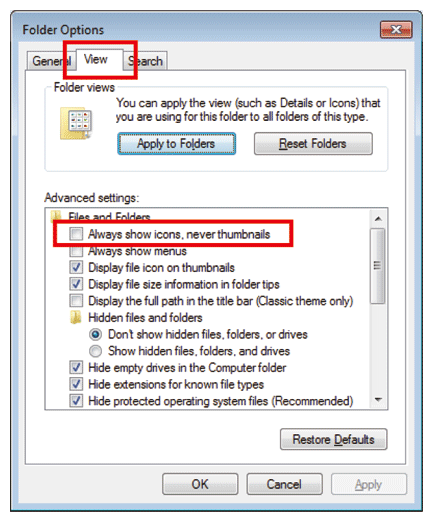
The Folder Options dialog box appears.
-
Click the View tab.
-
Check the setting of "Always show icons, never thumbnails".
If it's checked, uncheck this option ("Always show icons, never thumbnails").
- Click OK.
- If you unchecked the option for "Always show icons, never thumbnails", check whether embroidery files can be displayed properly as thumbnails in Windows Explorer.
- When the setting of the option for "Always show icons, never thumbnails" has already been unchecked, go to STEP2 "Clearing the Thumbnail Cache using Disk Cleanup".
STEP2: Clearing the Thumbnail Cache using Disk Cleanup
The thumbnail cache may have become corrupted.
Try the following steps to clear the thumbnail cache using Disk Cleanup.
-
Click Start button.
-
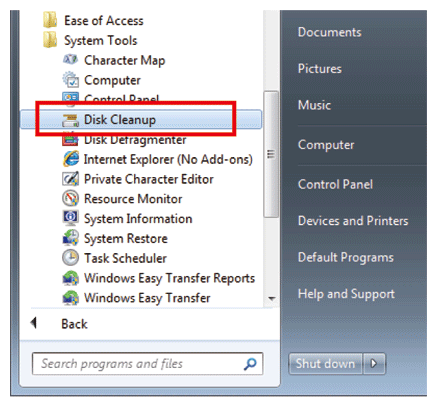
Then click All Programs, then click Accessories, then click System Tools, and then click Disk Cleanup.
-
If the Disk Clean Options dialog box appears, choose whether you want to clean up your own files only or all of the files on your computer. (This dialog box will appear on Windows Vista only)
-
If the Disk Cleanup: Drive Selection dialog box appears, select the drive that you want to clean up, and then click OK.
-
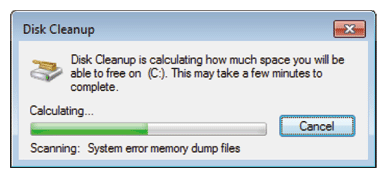
If the Disk Cleanup is scanning your drive first, wait until it has completed.
-
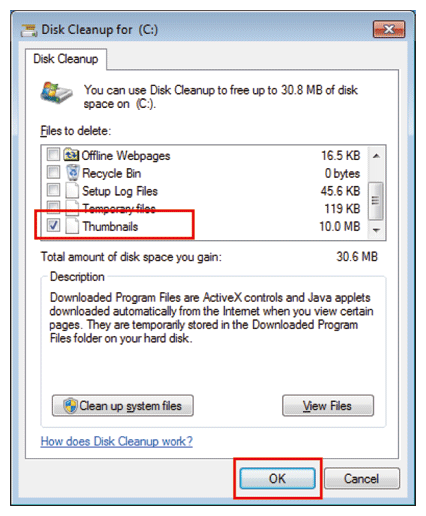
The Disk Cleanup dialog box appears.
-
Select the checkbox for Thumbnails at the "Files to delete" box, and then clikc OK.
-
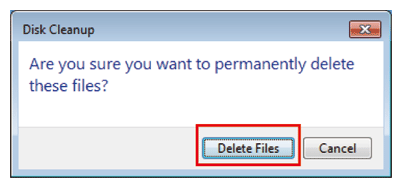
The message "Are you sure you want to permanently delet these files?" appears. Click Delete Files.
-
Disk Cleanup program starts. When the cleanup is completed, the dialog box is closed automatically.
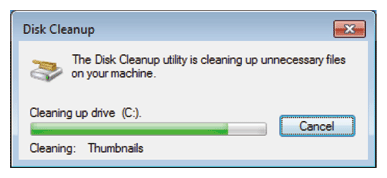
The operation for Disk Cleanup was completed.
Check whether embroidery files can be displayed properly as thumbnails in Windows Explorer.
