HL-4570CDW
FAQs & Troubleshooting |
Clean the drum unit
If your printout has colored spots at 94 mm (3.7 in.) intervals, the drum may have foreign material, such as glue from a label stuck on the drum surface. Follow the steps below to clean the drum unit.
DO NOT use cleaning materials that contain ammonia, alcohol, any type of spray, or any type of flammable substance to clean the outside or inside of the machine. Doing this may cause a fire or electrical shock.

- Make sure the machine is in the ready state.
- Press + or - to choose Machine Info.. Press OK.
- Press + or - to choose Drum Dot Print. Press OK to print out the drum dot check sheet.
- Turn off the machine's power switch. Disconnect all interface cables, and then unplug the AC power cord.
- Press the front cover release button and then open the front cover.
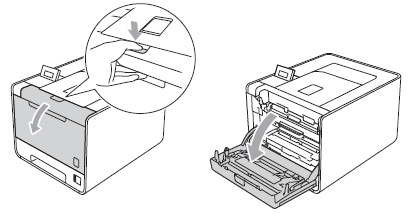
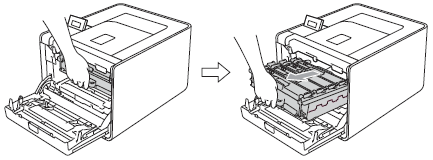
- Hold the green handle of the drum unit. Pull the drum unit out until it stops.
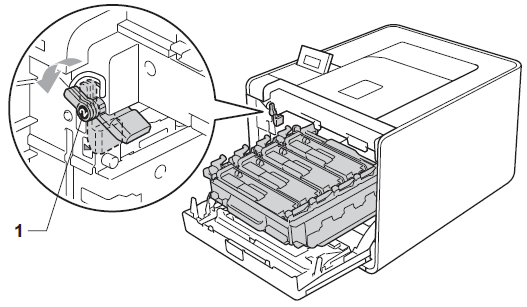
- Turn the green lock lever (1) at the left of the machine counterclockwise to the release position.
- Holding the green handles of the drum unit, lift the front of the drum unit and remove it from the machine.
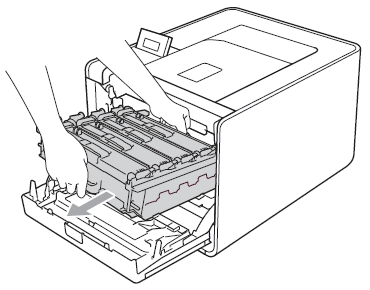
- Be careful not to inhale toner.
- We recommend that you place the drum unit and/or toner cartridge on a clean, flat surface with a piece of disposable paper underneath it in case you accidentally spill or scatter toner.
- Handle the toner cartridge carefully. If toner scatters on your hands or clothes, wipe or wash it off with cold water at once.
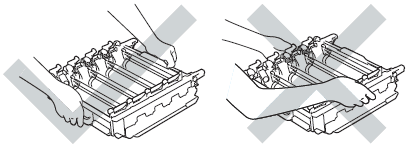
- Hold the green handles of the drum unit when you carry it. DO NOT hold the sides of the drum unit.
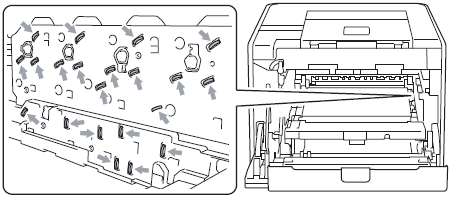
To prevent damage to the machine from static electricity, DO NOT touch the electrodes shown in the illustration.
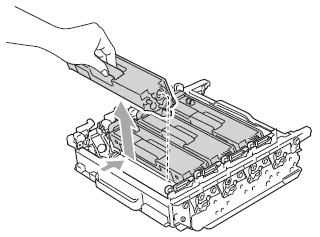
- Hold the handle of the toner cartridge and slightly push it to unlock. Then pull it out of the drum unit. Repeat this for all the toner cartridges.
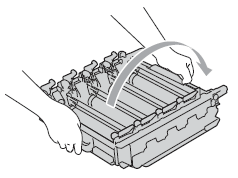
- Turn the drum unit over by holding the green handles.
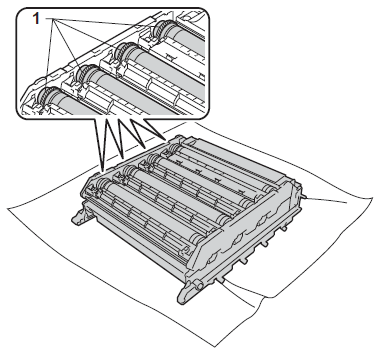
- Make sure that the drum unit gears (1) are on the left hand side.
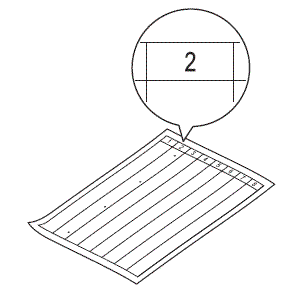
- Check the drum dot check sheet printed in Step 3.
- Dot Color problem: The color of printed dots is the color of the drum you should clean.
- Dot location: The sheet has eight numbered columns. The number of the column with the printed dot in it is used to find the dot position on the drum.
- Confirm suspected area of the appropriate color drum by using the numbers beside the drum which relate to the numbers of column.
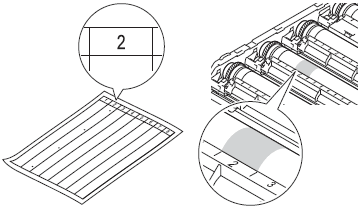
- Turn the drum unit gear toward you by hand while looking at surface of the suspected area.
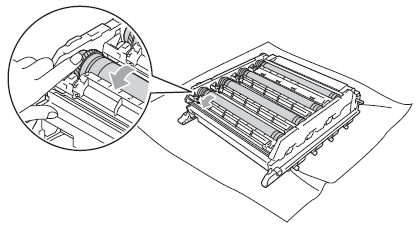
- When you have found the mark on the drum that matches the drum dot check sheet, wipe the surface of the drum gently with a cotton swab until the mark on the surface comes off.
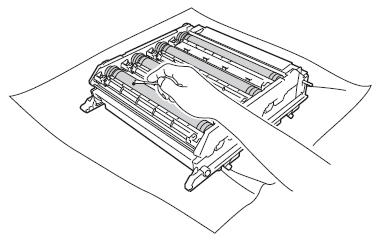
DO NOT clean the surface of the photosensitive drum with a sharp object.
- Hold the handle of the toner cartridge and slide it into the appropriate colored section of the drum unit until it clicks into place.
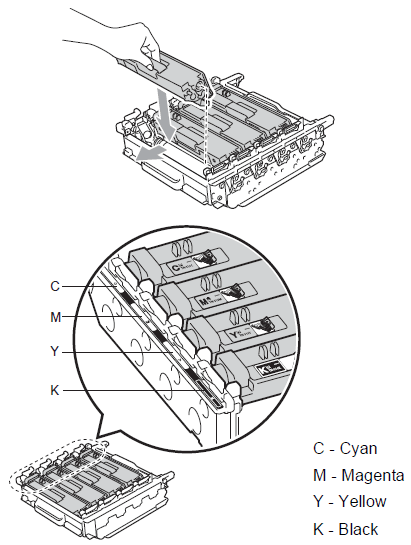
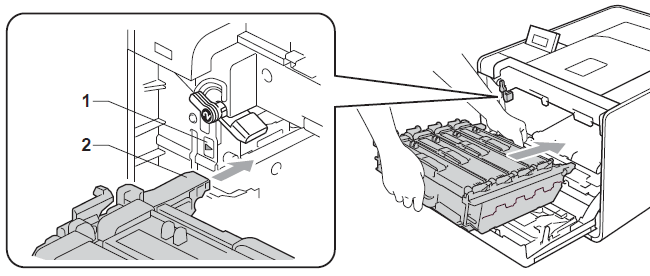
- Make sure the green lock lever (1) is in the release position as shown in the illustration.
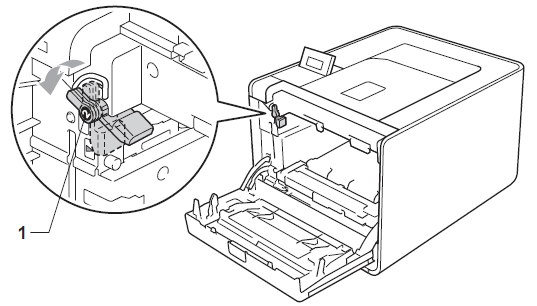
- Match the guide ends (2) of the drum unit to the
 marks (1) on both sides of the machine, then gently slide the drum unit into the machine until it stops at the green lock lever.
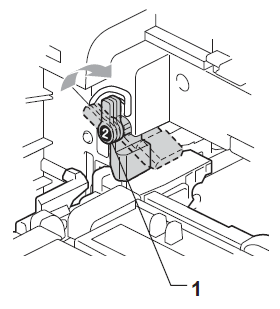
- Turn the green lock lever (1) clockwise to the lock position.
- Push the drum unit in until it stops.
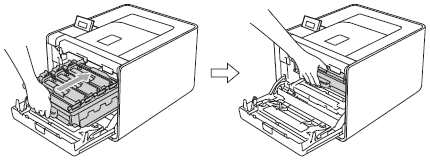
- Close the front cover of the machine.
- Connect interface cables and then plug the machine back in. Turn on the power switch.
Content Feedback
To help us improve our support, please provide your feedback below.
