MFC-J6910DW
FAQs & Troubleshooting |
How do I load paper in paper tray#2?
Follow the steps below to load paper in paper tray#2.
You can only use plain paper sizes Ledger, Letter, Legal, Executive, A3 or A4 in Tray #2.
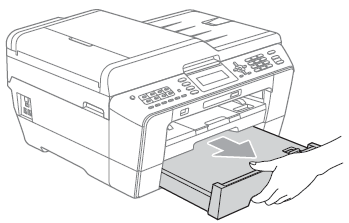
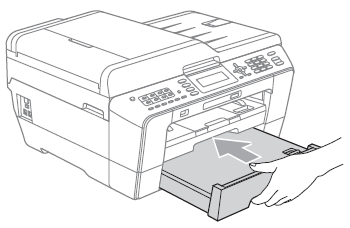
- Pull the paper tray completely out of the machine.
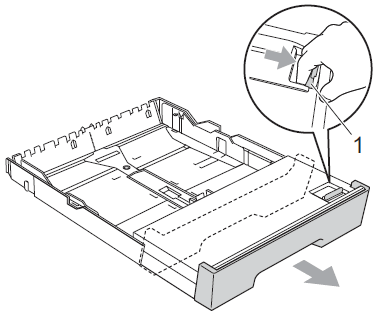
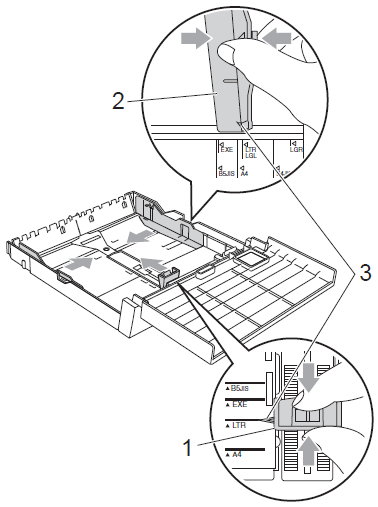
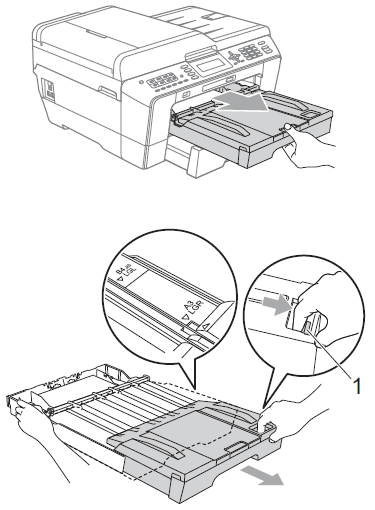
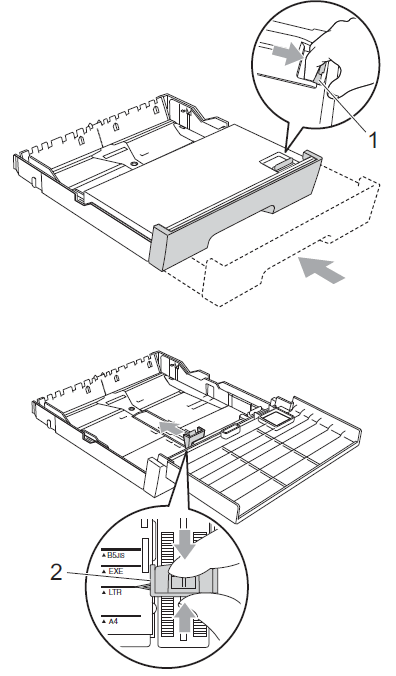
- If you are using Ledger, Legal or A3 size paper, press the universal guide release button (1) as you slide out the front of the paper tray until it clicks.
- You can check if the length of the tray is adjusted properly by opening the paper tray cover.
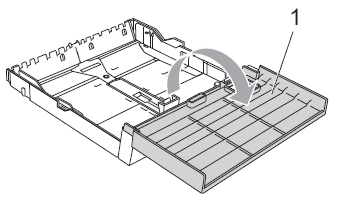
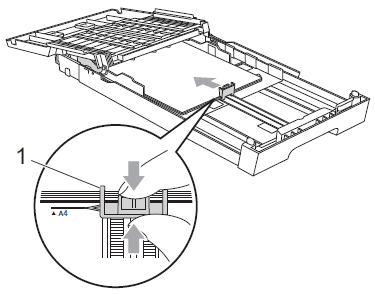
- Open the paper tray cover (1).
- Using both hands, gently press and slide the paper length guide (1) and then the paper side guides (2) to fit the paper size.
Make sure that the triangular marks (3) on the paper length guide (1) and paper side guides (2) line up with the marks for the paper size you are using.
- Fan the stack of paper well to avoid paper jams and misfeeds.
Always make sure that the paper is not curled.
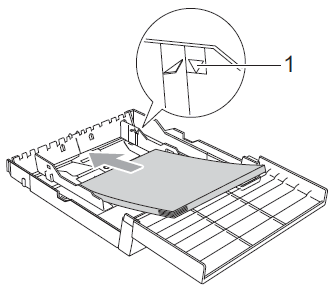
- Gently put the paper into the paper tray print side down and top edge in first.
Check that the paper is flat in the tray and below the maximum paper mark (1).
Over filling the paper tray may cause paper jams.
- Using both hands, gently adjust the paper side guides so they touch the sides of the paper stack.
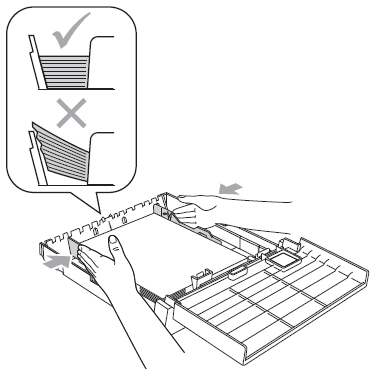
- Be careful that you do not push the paper in too far; it may lift at the back of the tray and cause feed problems.
- When adding new sheets of paper into the tray, DO NOT just slide the new sheets of paper on top of the paper in the tray. We recommend that you set new paper after the last paper is fed in the paper feed tray and the paper tray is empty.
- Close the paper tray cover.
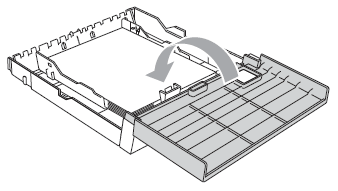
- Slowly push the paper tray back into the machine.
- Do one of the following:
- If you are using Ledger, Legal or A3 size paper, go to step 10.
When you are using large size paper in Tray #2, you may need to extend Tray #1 out over Tray #2 to prevent printed pages from falling off the output tray.
- If you are using Letter, Executive or A4 size paper, go to step 13.
- If you are using Ledger, Legal or A3 size paper, go to step 10.
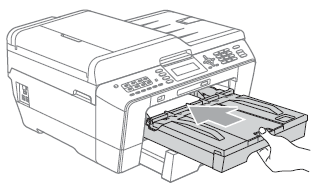
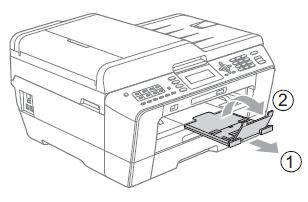
- Pull tray #1 out of the machine.
Press the universal guide release button (1) as you slide out the front of the paper tray.
- Open the output paper tray cover and adjust the paper length guide (1) for the paper.
- Close the output paper tray cover and slowly push the paper tray into the machine.
- Pull out the paper support (1) until it clicks and unfold the paper support flap (2).
If you are finished using Ledger, Legal or A3 size paper and want to use a smaller paper size, take the paper out of the tray. Then shorten the tray by pressing the universal guide release button (1). Adjust the paper length guide (2) to fit the paper size you are going to use. Then put the smaller paper into the tray.
Content Feedback
To help us improve our support, please provide your feedback below.