FS60X
FAQs & Troubleshooting |
How to sew reverse stitches or reinforcement stitches
Reverse/reinforcement stitches are generally necessary at the beginning and end of sewing.
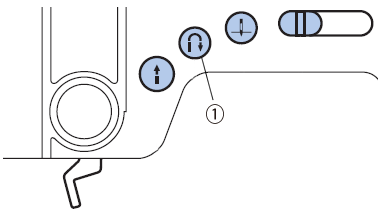
Depending on the selected stitch, reverse or reinforcement stitches are sewn while ![]() (Reverse/Reinforcement stitch button) is pressed continuously.
(Reverse/Reinforcement stitch button) is pressed continuously.
 |
(1) |
-
When any of the following stitches (reverse stitch patterns) is selected, pressing
 (Reverse/Reinforcement stitch button) will sew reverse stitches.
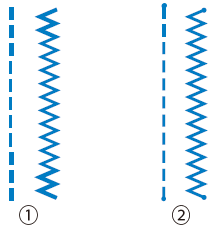
With reverse stitches, the stitching is sewn in the opposite direction.Stitch Stitch name 
Straight stitch (Left) 
Straight stitch (Middle) 
Zigzag stitch
-
When any other stitch is selected, pressing
 (Reverse/Reinforcement stitch button) will sew reinforcement stitches.
With reinforcement stitches, 3 to 5 stitches are sewn at the same place.
(1) Reverse stitch
(2) Reinforcement stitch
- The stitch number varies depending on the models.
- For details on information about reverse stitches and reinforcement stitches, refer to "Stitch Chart".
Content Feedback
To help us improve our support, please provide your feedback below.
