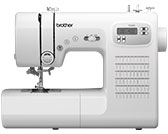
FS60X
FAQs & Troubleshooting |
How do I wind the bobbin? (For models equipped with the fast bobbin winding system)
Be sure to use the included bobbins (part code: SA156, SFB: XA5539-151) or the same type.
SA156 is Class 15 type bobbin.
 |
(1) 11.5 mm (7/16 inch) |
-
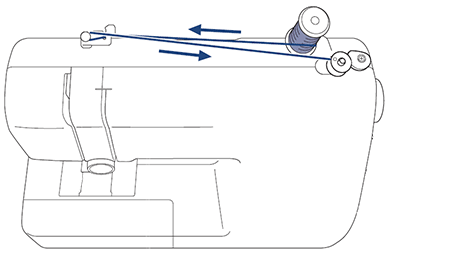
Pull up the spool pin as far as possible, and put a spool of thread on this pin.
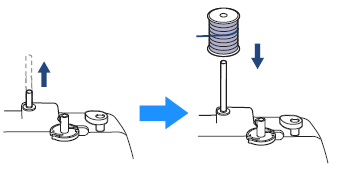
Make sure that the thread unwinds as shown.If the spool of thread is not in the right place, the thread may tangle on the spool pin.
-
Pass the thread under the thread guide and around the pretension disk, front to back.
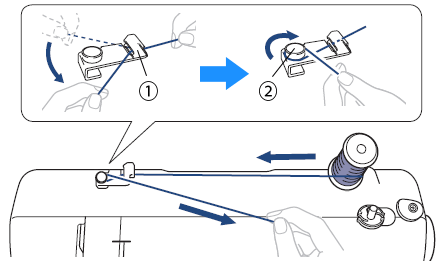
(1) Thread guide (2) Pretension disk Make sure that the thread passes under the pretension disk.
-
Set the bobbin on the bobbin winder shaft, and then slide the shaft to the right.
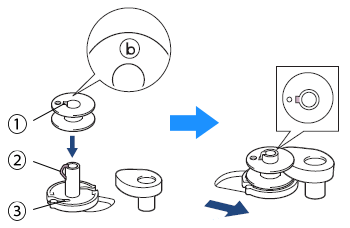
(1) Notch
(2) Projection
(3) Slit (cutter)
Make sure the notch fits the projection.
Checking the orientation of the bobbin will be helpful in later procedures. By placing the bobbin into the bobbin case in the same orientation that it was on the bobbin winder shaft, the bobbin can be installed with the correct winding direction of the bobbin thread.
The "b" mark on one side of the bobbin included with this machine can be used as a reference.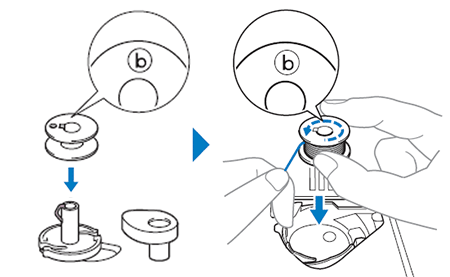
-
Wind the thread clockwise around the bobbin five or six times.
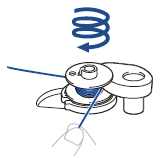
Be sure to wind the thread clockwise around the bobbin, otherwise the thread will become wrapped around the bobbin winder shaft.
Pass the thread through the slit in the bobbin winder seat.
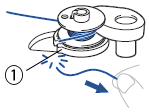
(1) Slit (with built-in cutter) Be sure to cut the thread as described. If the bobbin is wound without cutting the thread using the cutter built into the slit in the bobbin winder seat, the thread may become tangled in the bobbin or the needle may bend or break when the bobbin thread starts to run out.
-
Turn on the machine.

-
Slide the sewing speed controller to adjust the bobbin winding speed.
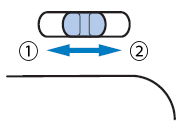
(1) Slower
(2) Faster -
Press the Start/Stop button once to wind the thread around the bobbin.
* When the foot controller is plugged in, press the foot controller.
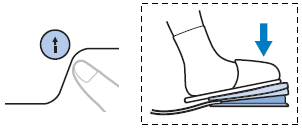
We recommend winding stretch thread, such as transparent nylon thread, at a low speed since the thread may stretch.
-
When the bobbin seems full and begins spinning slowly, press the Start/Stop button once to stop the machine.
* When the foot controller is plugged in, take your foot off the foot controller to stop the machine.
-
Cut the thread.

-
Slide the bobbin winder shaft to the left and remove the bobbin.
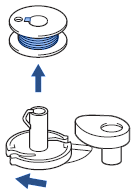
- Make sure you follow the instructions carefully. If you do not cut the thread completely and the bobbin is wound, when the thread runs low, it may tangle around the bobbin and cause the needle to break.
-
Not winding the bobbin properly may cause the thread tension to loosen, and may break the needle.
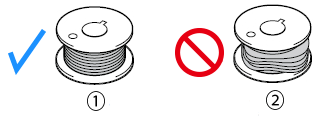
(1) Wound evenly
(2) Wound poorly
