3034D
FAQs & Troubleshooting |
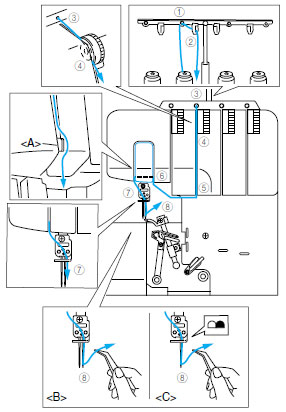
Threading the right needle
Run the thread in the sequence illustrated below, following the pink color and the numbers next to each threading point.
-
Pull the thread off the spool and directly up through the thread holder
 and the thread plate
  on the thread tree from back to front.
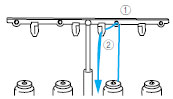
-
Pass the thread thourgh the hole
 on the top of machine.
Pass the thread through the tension disc
 which is in the channel next to the pink tension adjustment dial.
-
Guide the thread down the channel and across through the threading points
 next to the pink color marks following the numerical order in the accompanying illustration.
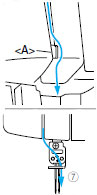
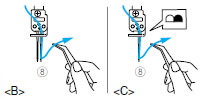
Make sure the thread is through the right of the separater <A>.
-
Bring the thread down through the needle bar thread guide and through the right needle
 from front to back.
(<B>: two needles/ <C>: one needle)