QL-550
FAQs & Troubleshooting |
How do I create name badges by joining "First Name" and "Last Name" fields together?
Follow the instructions below:
-
Preparing the database

e.g. Creating name badges using the following Excel file.

-
Connecting the database
- Click [File] --> [Database]--> [Connect...]
- Find the directory and select the prepared Excel file.
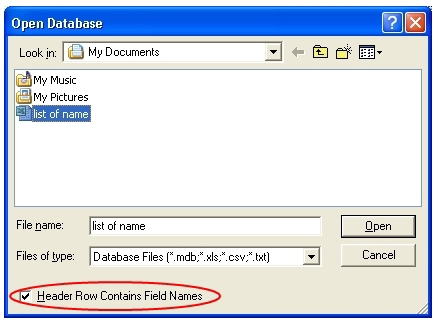
If the file being used contains multiple sheets, the Select Table dialog box appears. Select the sheet that you wish to link to the layout.
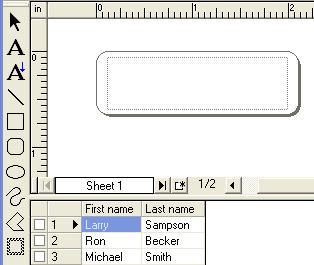
-
Joining "First name" and "Last name" fields together
Joining fields allows you to easily arrange the merged object in the layout.
For example, when you merge "First name" field and "Last name" field without joining fields, the following problems may occur depending on the volume of data.
If the size of the text object for "First name" field is adjusted to the length of "Michael", an extra space will be inserted between "Ron" and "Becker".


Meanwhile, if the size of the text object for "First name" is adjusted to the length of "Ron", the size of "Michael" will shrink.


If the two fields of "First name" and "Last name" are joined, these problems will be solved.


- Click on the database window (the connected database) to display "Database" on the menu bar.
-
Click [Database] --> [Connect Fields...]
The "Define Joined Fields" dialog box appears.
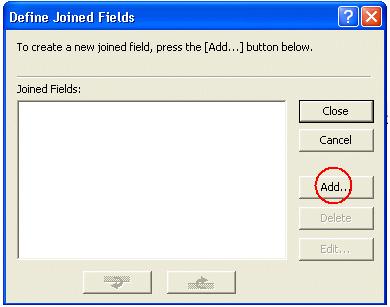
-
Click
 .
. -
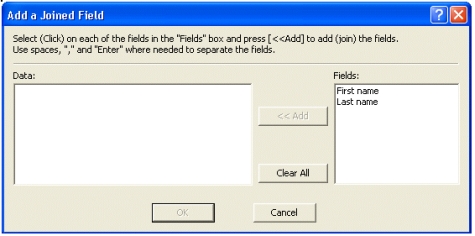
The "Add a Joined Field" dialog box appears.
-
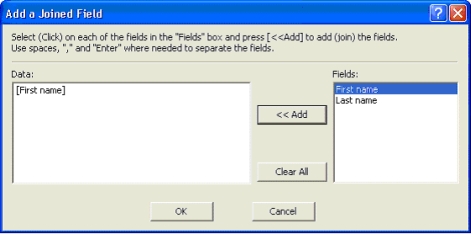
In the "Fields:" list box, select the "First name" field and then click
 .
.
-
In the same way, select the "Last name" field and then click
 .
.
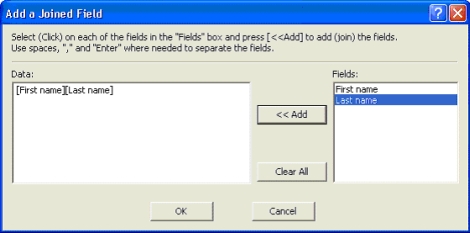
In the "Data:" edit box, insert a space between the "[First name]" and "[Last name]" fields.
Click .
. -
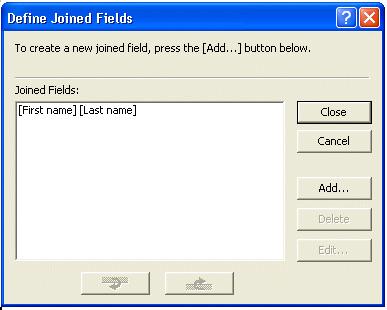
The "Define Joined Fields" dialog box appears, showing the joined fields.
Click .
.
To spread a joined field over multiple lines, type "\n".
"\n" can be entered either by typing in the text or holding down the Ctrl key while pressing the Enter key. -
Merging text into a layout
- Click [Database]--> [Merge into Layout…] or [Insert]-- >[Database field].
-
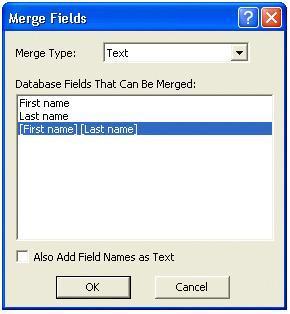
The "Merge fields" dialog box appears.
Select "Text" from the "Merge Type" pull-down menu, and select "[First name] [Last name]" from the "Database Fields that Can Be Merged" list box.
-
Click
 .
.
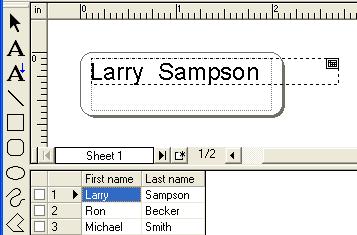
The two fields of [First name] and [Last name] joined have been merged.
-
Adjusting the merged data
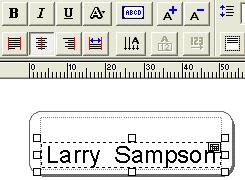
Adjust the height, size and position of the merged object.


Align the text of the object along its horizontal center by clicking .
.
-
Editing label object
In the layout area, type in "VISITOR" above the merged object, and adjust the position, size, and font of the text object.

-
Printing
- Click [File] --> [Print…]
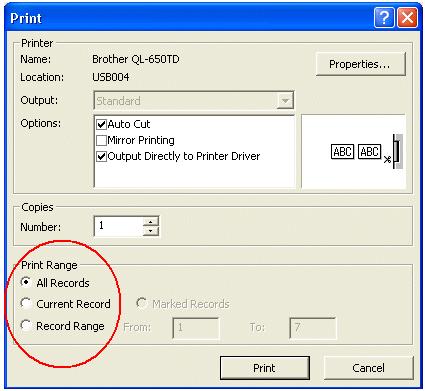
- The Print dialog box appears.
-
Under "Print Range", select the desired print range.
-
Click

For details on selecting a record range, refer to the following table.
Print Range Records to be printed All Records Print all records. Current Record Print the current record. Marked/Selected Record(s) Print only the marked records. Record Range Print records in the range specified by "From" and "To".
Content Feedback
To help us improve our support, please provide your feedback below.
