Innov-is XP2
FAQs & Troubleshooting |
How do I thread my machine ?
- Be sure to thread the machine properly. Improper threading can cause the thread to tangle and break the needle, leading to injury.
- When using the walking foot, the side cutter or accessories not included with this machine, attach the accessory to the machine after threading the machine.
- The automatic threading function can be used with home sewing machine needle sizes 75/11 through 100/16.
- When threads such as transparent nylon monofilament or speciality threads are used it is not recommended to use the needle threader.
- The automatic threading function cannot be used with the wing needle or the twin needle.
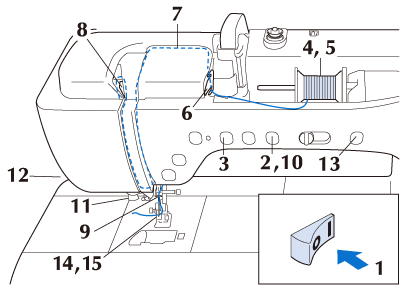
-
Turn the main power to ON.
-
Press the Presser Foot Lifter button to raise the presser foot.

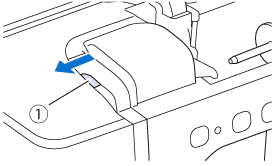
(1) Upper thread shutter >> The upper thread shutter opens so the machine can be threaded. This machine is equipped with an upper thread shutter, allowing you to check that the upper threading is performed correctly.
-
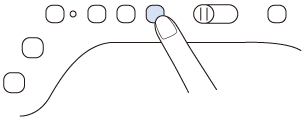
Press the Needle Position button to raise the needle.
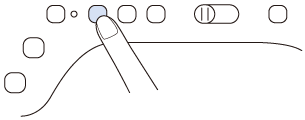
If you try to thread the needle automatically without raising the needle, the thread may not thread correctly.
-
Pivot the spool pin so that it angles upward. Set the thread spool on the spool pin so that the thread unwinds from the front of the spool.
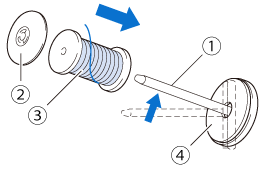
(1) Spool pin
(2) Spool cap
(3) Thread spool
(4) Spool felt
-
Push the spool cap onto the spool pin as far as possible, then return the spool pin to its original position.
- If the thread spool and/or spool cap are set incorrectly, the thread may tangle on the spool pin and cause the needle to break.
- Use the spool cap (large or medium) or the thread spool insert (mini king thread spool) that is closest in size to the thread spool. If a spool cap smaller than the thread spool is used, the thread may become caught in the slit on the end of the spool and cause the needle to break.
-
When sewing with fine, cross-wound thread, use the small spool cap, and leave a small space between the cap and the thread spool.
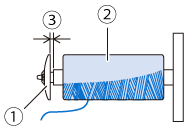
(1) Spool cap (small)
(2) Thread spool (cross-wound thread)
(3) Space -
If a spool of thread whose core is 12 mm (1/2 inch) in diameter and 75 mm (3 inches) high is inserted onto the spool pin, use the thread spool insert (mini king thread spool).
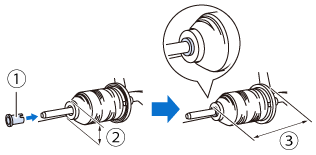
(1) Thread spool insert (mini king thread spool)
(2) 12 mm (1/2 inch)
(3) 75 mm (3 inches)
-
While holding the thread with both hands, pull the thread up from under the thread guide plate.
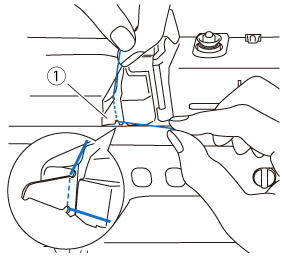
(1) Thread guide plate
-
While holding the thread in your right hand, pass the thread through the thread guide in the direction indicated.
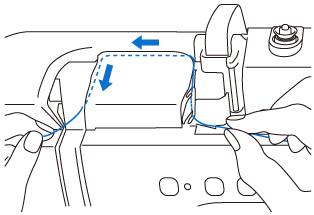
-
Guide the thread down, up, then down through the groove, as shown in the illustration.

Look in the upper groove area to check if the thread catches on the thread take-up lever visible inside the upper groove area.
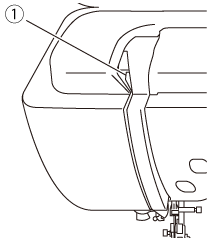
(1) Look in the upper groove area
-
Pass the thread through the needle bar thread guide (marked 6) by holding the thread with both hands and guiding it as shown in the illustration.
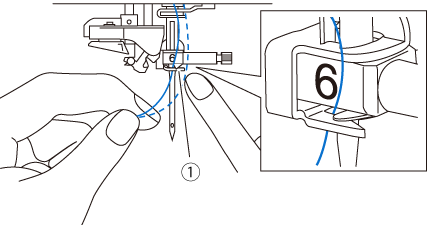
(1) Needle bar thread guide
-
Press the Presser Foot Lifter button to lower presser foot.

-
Pass the thread through the thread guide disks (marked 7). Make sure that the thread passes through the groove in the thread guide.
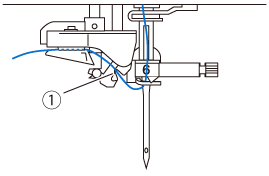
(1) Groove in thread guide
-
Pull the thread up through the thread cutter to cut the thread, as shown in the illustration.
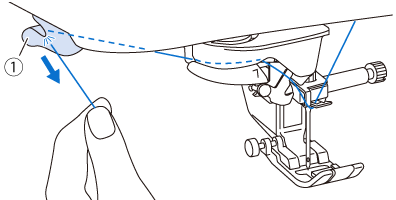
(1) Thread cutter When using thread that quickly winds off the spool, such as metallic thread, it may be difficult to thread the needle if the thread is cut. Therefore, instead of using the thread cutter, pull out about 80 mm (approx. 3 inches) of thread after passing it through the thread guide disks (marked 7).
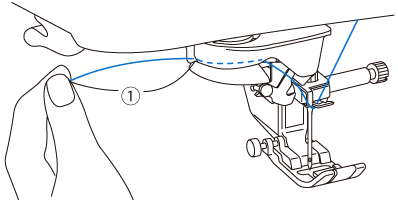
(1) 80 mm (approx. 3 inches) or more
-
Press the Automatic Threading button to have the machine automatically thread the needle.
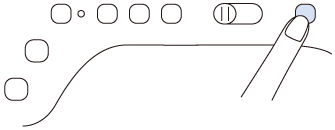
>> The thread passes through the eye of the needle.When the Automatic Threading button is pressed, the presser foot will be automatically lowered. After threading is finished, the presser foot moves back to the position before the Automatic Threading button was pressed.
-
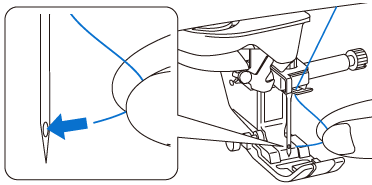
Carefully pull the end of the thread that was passed through the eye of the needle.
* If a loop was formed in the thread passed through the eye of the needle, carefully pull on the loop of thread through to the back of the needle.
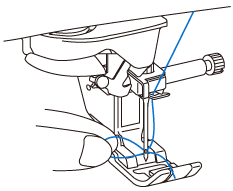
Pulling the loop of thread gently will avoid needle breakage.
-
Pull out about 100-150 mm (approx. 4-6 inches) of the thread, and then pass it under the presser foot toward the rear of the machine.
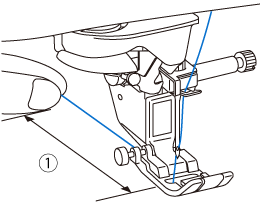
(1) About 100-150 mm (approx. 4-6 inches) >> Raise the presser foot lever if the presser foot is lowered. Some needles cannot be threaded with the needle threader. In this case, instead of using the needle threader after passing the thread through the needle bar thread guide (marked 6), manually pass the thread through the eye of the needle from the front.
