DCP-J4110DW
FAQs & Troubleshooting |
Load paper in the paper tray.
Click the link below for your case and follow the steps:
- Loading paper in paper tray
- Loading smaller paper (envelopes)
- Loading smaller paper (Photo, Photo L)
- Loading paper in the manual feed slot
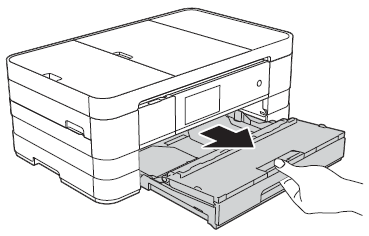
- Pull the paper tray completely out of the machine.
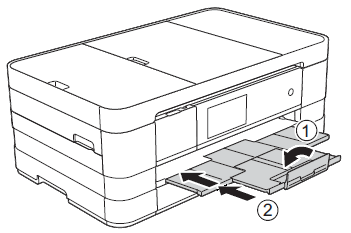
- If the paper support flap (1) is open, close it, and then close the paper support (2).
- When you load a different paper size in the tray, you will need to change the paper size setting in the machine at the same time.
- If the paper support flap (1) is open, close it, and then close the paper support (2).
- Open the output paper tray cover (1).
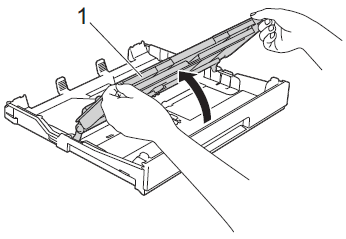
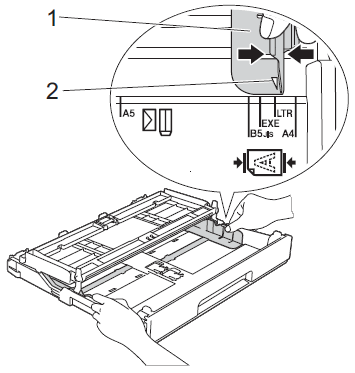
- Gently press and slide the paper guides (1) to fit the paper size. Make sure that the triangular mark (2) on the paper guide (1) lines up with the mark for the paper size you are using.
- Fan the stack of paper well to avoid paper jams and misfeeds.
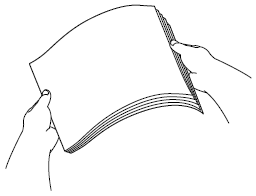
Always make sure that the paper is not curled or wrinkled.
- Gently put the paper into the paper tray print side down. Check that the paper is flat in the tray.
- Using Letter, A4 or Executive
Landscape orientation
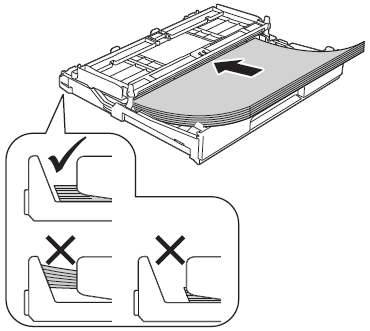
Be careful not to push the paper in too far; it may lift at the back of the tray and cause paper feed problems.
- If you are using paper that is 148 x 210mm (5.8 x 8.3in.) or smaller, you must load the paper in portrait orientation.
- If you want to add paper before the tray is empty, remove the paper from the tray and combine it with the paper you are adding. Always fan the stack of paper well before loading it in the tray. If you add paper without fanning the stack, the machine may feed multiple pages.
- Using Letter, A4 or Executive
- Gently adjust the paper guides (1) to fit the paper. Make sure the paper guides touch the sides of the paper.
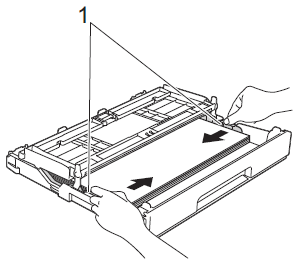
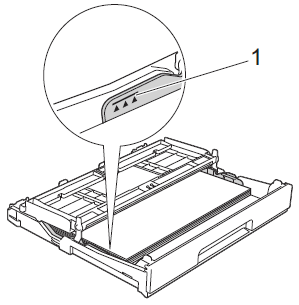
- Check that the paper is flat in the tray and below the maximum paper mark (1). Overfilling the paper tray may cause paper jams.
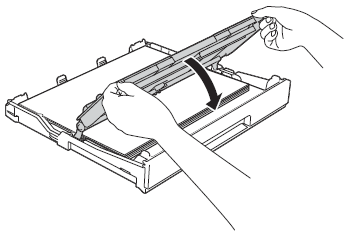
- Close the output paper tray cover.
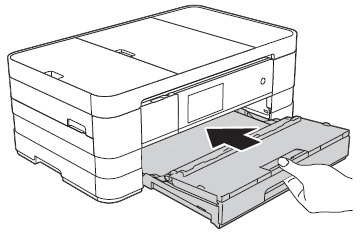
- Slowly push the paper tray completely into the machine.
- While holding the paper tray in place, pull out the paper support (1) until it clicks, and then unfold the paper support flap (2).
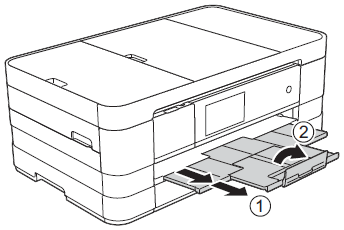
If you are using paper that is longer than Letter size paper or envelopes with the flap on the short edge, close the paper support flap.
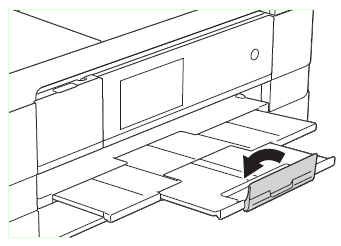
Loading smaller paper (envelopes)
- Before loading, press the corners and sides of the envelopes to make them as flat as possible.
If envelopes are "double-feeding," put one envelope in the paper tray at a time.
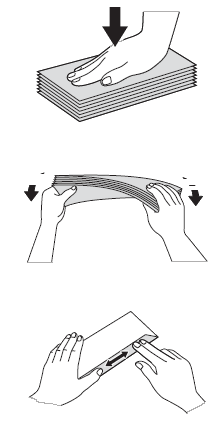
- Put envelopes in the paper tray with the address side down. If the envelope flaps are on the long edge, load the envelopes with the flap on the left, as shown in the illustration. Gently press and slide the paper guides (1) to fit the size of the envelopes.
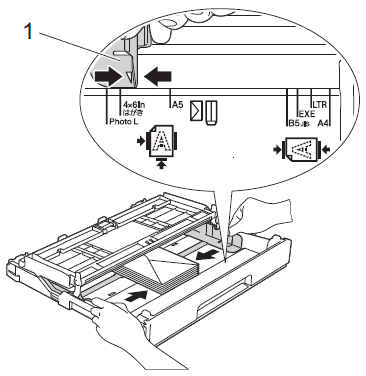
- Close the output paper tray cover.
- If you are using envelopes with the flap on the short edge, insert envelopes in the paper tray as shown in the illustration.
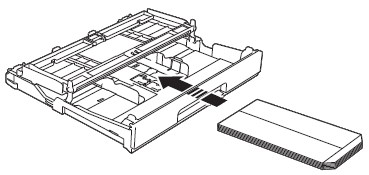
- If you are using envelopes with the flap on the short edge, close the paper support flap.
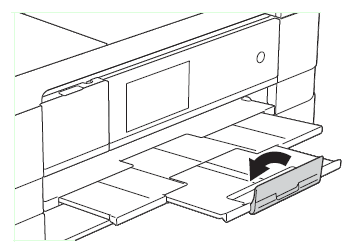
- If you are using envelopes with the flap on the short edge, insert envelopes in the paper tray as shown in the illustration.
Loading smaller paper (Photo, Photo L)
- Before loading, press the corners and sides of the Photo and Photo L paper to make them as flat as possible.
If Photo (10 x 15 cm (4 x 6 in.)) or Photo L (89 x 127mm (3.5 x 5 in.)) paper is "double-feeding," put one sheet of Photo or Photo L paper in the paper tray at a time.
- Do one of the following:
- If you put Photo L (89 x 127mm (3.5 x 5 in.)) in the paper tray, lift up the Photo L stopper (1).
- If you put Photo (10 x 15 cm(4 x 6 in.)) in the paper tray, lift up the Photo stopper (2).
Gently press and slide the paper guides (3) to fit the paper size.
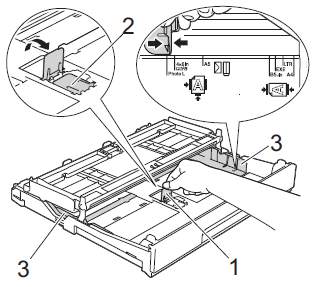
- If you put Photo L (89 x 127mm (3.5 x 5 in.)) in the paper tray, lift up the Photo L stopper (1).
- Close the output paper tray cover.
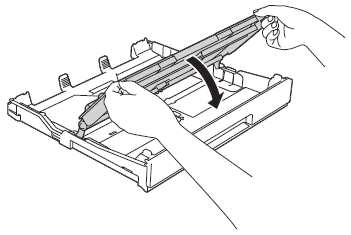
- Put Photo or Photo L paper in the paper tray print side down.
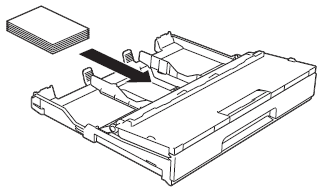
- Open the output paper tray cover (1).
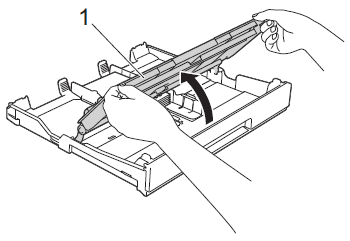
- Gently adjust the paper guides (1) to fit the paper. Make sure the paper guides touch the sides of the paper.
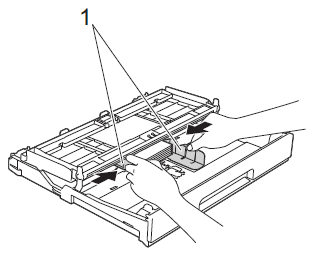
- Close the output paper tray cover.
Loading paper in the manual feed slot
- Open the manual feed slot cover.
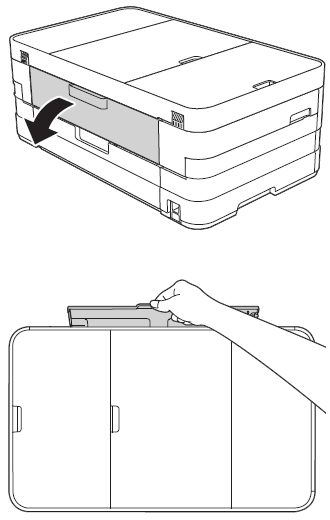
- The machine automatically turns on Manual Feed mode when you put paper in the manual feed slot.
- If you are using paper that is longer than Letter size or envelopes with the flap on the short edge, close the paper support flap.
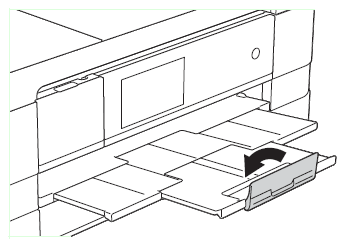
- The machine automatically turns on Manual Feed mode when you put paper in the manual feed slot.
- Slide the manual feed slot paper guides to match the width of the paper you are going to use.
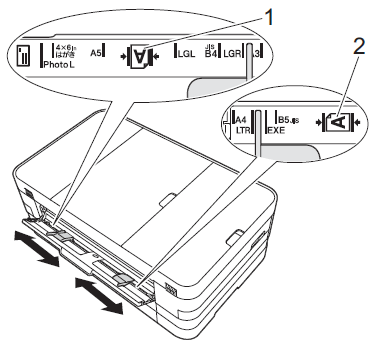
The paper mark (1) in portrait orientation is on the right side of the manual feed slot, and the mark (2) in landscape orientation is on the left side of it. When you slide the paper guides, confirm that they are in these positions.
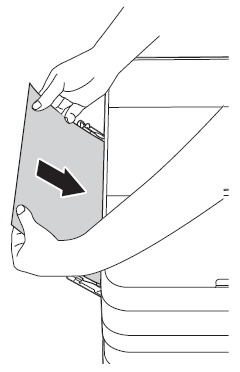
- Put only one sheet of paper in the manual feed slot with the side to be printed on face up.
- Using Ledger, A3, Legal, A5, A6, envelopes, Photo, Photo L, Photo 2L or Index Card.
Portrait orientation
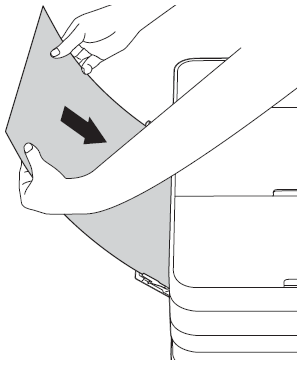
- Using Letter, Executive or A4.
Landscape orientation
- Do not put more than one sheet of paper in the manual feed slot at any one time. Doing this may cause a paper jam. Even if you are printing multiple pages, do not feed the next sheet of paper until the Touchscreen shows a message instructing you to feed the next sheet.

- Do not put paper in the manual feed slot when you are printing from the paper tray. Doing this may cause a paper jam.
- Using Ledger, A3, Legal, A5, A6, envelopes, Photo, Photo L, Photo 2L or Index Card.
- Using both hands, gently adjust the manual feed slot paper guides to fit the paper.
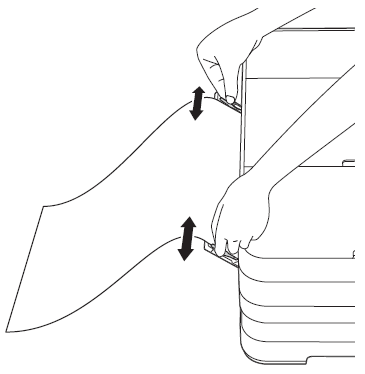
- Do not press the paper guides too tightly against the paper. Doing this may cause the paper to fold.
- Place the paper in the center of the manual feed slot between the paper guides. If the paper is not centered, pull it out and insert it again at the center position.
- Do not press the paper guides too tightly against the paper. Doing this may cause the paper to fold.
- Using both hands, put one sheet of paper in the manual feed slot until the front edge touches the paper feed roller. Let go of the paper when you hear the machine pull in a short distance. The Touchscreen will show Manual Feed Slot ready..
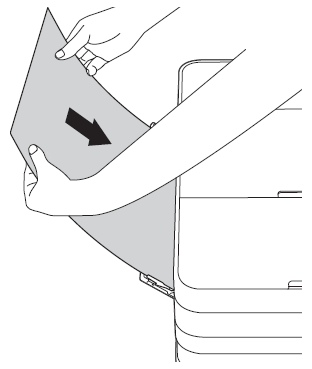
- When loading an envelope or a sheet of thick paper, push the envelope into the manual feed slot until you feel it grab the envelope.
- When you are feeding Legal, Ledger or A3 size paper in the manual feed slot, the machine holds the printed page after printing so that the page does not fall. Once printing is complete, pull out the printed page and press OK.
- When loading an envelope or a sheet of thick paper, push the envelope into the manual feed slot until you feel it grab the envelope.
- If the data does not fit on one sheet, the Touchscreen will prompt you to load another sheet of paper. Place another sheet of paper in the manual feed slot, and then press OK on the Touchscreen.
- Make sure printing has finished before you close the manual feed slot cover.
- When paper is placed in the manual feed slot, the machine always prints from the manual feed slot.
- Paper inserted in the manual feed slot while a test page, fax or report is being printed will be ejected.
- During the machine's cleaning process, paper you place in the manual feed slot will be ejected. Wait until the machine finishes its cleaning, and then put the paper into the manual feed slot again.
- Make sure printing has finished before you close the manual feed slot cover.
