QL-820NWB
FAQ 및 문제 해결 |
How do I install/change the label roll?
To install a new label roll:
-
Make sure that the printer is turned Off.
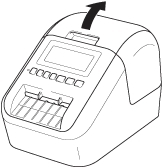
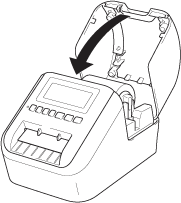
Hold the printer by the front, and firmly lift the DK Roll Compartment Cover to open it.
-
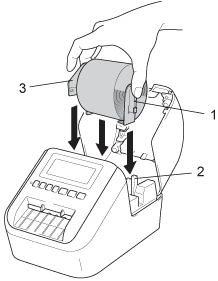
Place the DK Roll into the Roll Spool Guide.
- Make sure that the Roll Spool Arm (1) is inserted firmly in the Roll Spool Guide (2).
-
Make sure that the Stabilizer (3) slides into the notch of the printer.
-
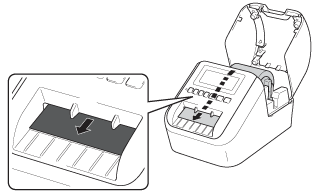
Thread the DK Roll through the printer.
- Align the edge of the DK Roll with the upright edge of the Label Output Slot.
- Insert the first label into the slot inside the compartment.
-
Push the label through the Label Output Slot until the end reaches the mark, as shown.
-
Close the DK Roll Compartment Cover.
When you press the Power ( ) Button to turn the printer On, the end of the DK Roll aligns automatically.
Do not leave any printed labels in the printer. Doing so will cause the labels to jam.
To remove a label roll:
-
Make sure that the printer is turned Off.
Hold the printer by the front, and firmly lift the DK Roll Compartment Cover to open it.
-
Hold the label roll by the spool arms and pull the inserted DK Roll up.
- Close the DK Roll compartment cover.
내용 피드백
지원을 개선하는 데 도움이 되도록 아래에 피드백을 제공하십시오.