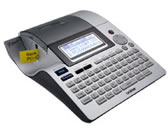
PT-2700
FAQ 및 문제 해결 |
The tape got jammed or stuck in the printer.
Follow the steps below to remove the jammed tape carefully so as not to damage the printer.
-
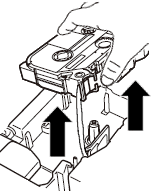
Pull the tape cassette straight up from the tape cassette compartment.
Some extra length of tape may come out from the tape cassette.
-
Pull the jammed tape slowly to remove it from the printer.
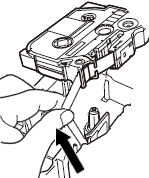
If you pulled out excessive length of tape, cut the tape with scissors only when the ink ribbon has not come out. Check that the end of the tape feeds under the tape guide, and then reinstall the tape cassette.
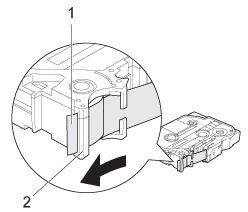
1. End of tape
2. Tape guide
Check the following to prevent the tape from jamming in the printer.
-
Do not to use the tape cassette of which the end of the tape is off the tape guide.
Check that the end of the tape feeds under the tape guide as shown below.
1. End of tape
2. Tape guide
-
Make sure that the underside of the tape cassette is completely touching the base of the compartment.
If the tape is not installed correctly, the top and base layers of the laminated tape may become misaligned or the tape jam may occur.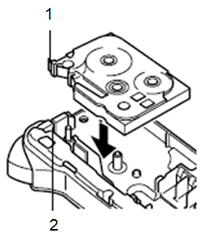
1. End of tape
2. Tape exit slot
-
Be sure to use the tape cassette without slack in the ink ribbon.
If there is slack in the ink ribbon, turn the spool as shown below to remove any slack.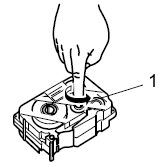
1. Spool - Do not block the tape slot while printing.
- Do not cut the tape while printing.
내용 피드백
지원을 개선하는 데 도움이 되도록 아래에 피드백을 제공하십시오.
