MFC-J2310
FAQ 및 문제 해결 |
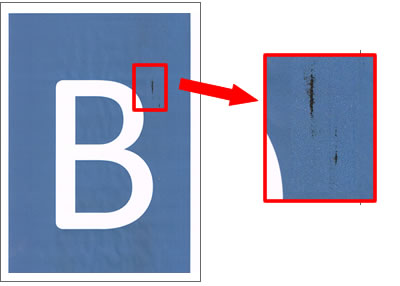
Stains appear at the end of the printed/ copied documents.
Depending on the paper you are using, stains may appear at the end of the printed/ copied documents (as shown in the illustration below).
You can improve this issue by changing the Density (for copy)/ Color Density (for print) setting.
To ensure the highest print quality when copying/ printing high-quality documents and photos, we recommend:
- Setting the Quality (for copy)/ Print Quality (for print) to Best.
- Using glossy paper for photos.
Click the link applicable to your case and follow the steps:
Print quality is also affected by the type and brand of paper used as well as the selected print or copy settings. In order to achieve optimum print quality, it is important to use the recommended paper for the type of document you are printing.
Click here to see information about Genuine Brother supplies.
- Load your document.
- Press
 (Copy).
- Press Options.
- Press the Up or Down arrow key to display Density.
- Press Density.
- Choose [-2] the density of copies.
- Press OK.
- Press Black Start or Color Start.
Changing the Print Quality for print
(Windows)
- Open Printing Preference. (Click here to see the details of how to open Printing Preferences.)
- Click the Advanced tab.
- Click Color Settings.
- Check the Color Enhancement (True2Life) option and change Color Density to [-2]. Press OK.
- Press OK.