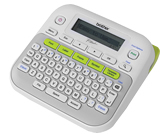
PT-D210
FAQs & Troubleshooting |
How to use the Pattern Label function
To use the Pattern Label function,
-
Press the [Template Library] key (
 /
/  ).
).
[Select Category] is displayed.
-
Press the [Cursor] key (
 ) until [Patterns] is displayed.
-
Press the [OK] key (
 ).
).
[Select Design] is displayed.
-
Press the [Cursor] key (
 ) until your desired design is displayed.
-
Press the [OK] key (
 ).
).
[Set Label Length] is displayed.
-
Press [Cursor] key (
 ) until your desired length is displayed. (30 - 999 mm / 1.2″ - 39.0″)
The tape length can also be specified using the number keys.
-
Press the [OK] key (
 ).
).
[Print] is displayed.
-
Press the [OK] key (
 ).
).
[Copies:] is displayed.
-
Press [Cursor] key (
 ) to select your desired number of copies. (1 - 9)
The number of copies can also be specified by pressing a number key.
-
Press the [OK] key (
 ).
).
- Templates are only available when using 12 mm / 0.47″ wide tape cassettes.
- You cannot save labels created using templates to memory.
Content Feedback
To help us improve our support, please provide your feedback below.
