PR-650/650C
FAQs & Troubleshooting |
Hooping the Fabric
Hooping the fabric in the extra-large and large embroidery frames
Embroidering large pieces of fabric or heavy clothing
Embroidering small pieces of fabric
Embroidering the corner of fabric
Embroidering narrow pieces of fabric, such as ribbon
<Hooping the fabric in the extra-large and large embroidery frames>
-
Loosen the screw on the outer frame.
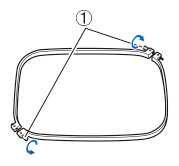
(1) Screw
-
Place the embroidery side of the fabric facing up, on top of the outer frame.
Either side of the outer frame can be used as the front.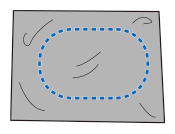
-
Press the inner frame into the outer frame by first inserting the inner frame corner 1. Gently pull the fabric in the direction indicated by arrow 2 until the fabric is taut and insert corner 2. Gently pull fabric in the direction indicated by arrow 3 and then insert corner 3. Gently pull the fabric in the direction indicated by arrow 4 and insert corner 4.
Be sure that there are no wrinkles in the fabric after it is stretched in the embroidery frame.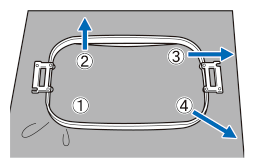
-
While stretching the fabric even more, securely tighten the screw so that the fabric remains taut.
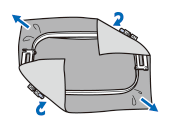
After stretching the fabric and gently tightening the corner screw(s) enough to hold the fabric in place, the fabric should make a drum-like sound if gently tapped with a finger.
Be sure to position the inner and outer frames together so that all sides (top and bottom) are even.

(1) Outer frame
(2) Inner frame
(3) Right side of fabric
(4) Top of inner and outer frames are even
Using the included disc-shaped screwdriver, firmly tighten the screw(s).
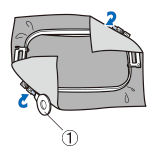
(1) Disc-shaped screwdriver
To correctly frame the fabric in the embroidery frame, we recommend using a flat surface.
In order to hoop the fabric so that the pattern will be sewn in the correct position, use the guidelines on the embroidery sheet to accurately stretch the fabric in the frame.
-
With a fabric marker, mark the area of the fabric you want to embroider.
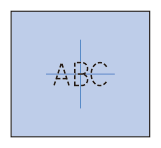
-
Place the embroidery sheet on the inner frame. Align the guidelines on the embroidery sheet with the marks that you drew on the fabric.
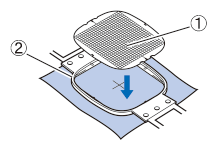
(1) Guidelines
(2) Inner frame
-
Gently stretch the fabric, so that there are no folds or wrinkles.
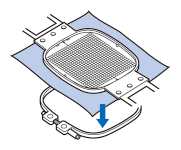
-
Press the inner frame into the outer frame. Remove the embroidery sheet.
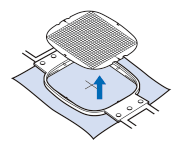
<Embroidering large pieces of fabric or heavy clothing>
When embroidering large pieces of fabric or heavy pieces of clothing, use a clothespin or binder clip to fasten the excess fabric to the embroidery frame so that it does not hang down from the frame. Embroidering with excess fabric handing down from the embroidery frame may prevent the frame from moving properly and may result in a misaligned pattern.
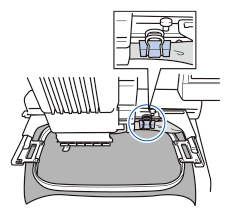
Use a clothespin or binder clip to fasten the excess fabric to the embroidery frame.
<Embroidering small pieces of fabric>
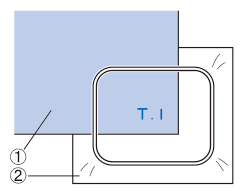
When embroidering pieces of fabric that are smaller than the embroidery frame, use spray fabric adhesive to attach the fabric to stabilizer (backing) hooped in the embroidery frame.
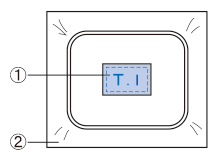
(1) Fabric
(2) Stabilizer (backing)
<Embroidering the corner of fabric>
When embroidering the corner of a piece of fabric, use spray fabric adhesive to attach the corner of the fabric to stabilizer (backing), and then hoop the stabilizer (backing) in the embroidery frame.
(1) Fabric
(2) Stabilizer (backing)
<Embroidering narrow pieces of fabric, such as ribbon>
When embroidering narrow pieces of fabric, use spray fabric adhesive to attach the fabric to stabilizer (backing), and then hoop the stabilizer (backing) in the embroidery frame. With fabrics where you do not wish to use spray adhesive, clamp both ends of the fabric, together with the stabilizer (backing), in the embroidery frame.
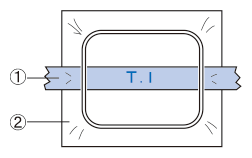
(1) Ribbon
(2) Stabilizer (backing)
