MFC-L8900CDW
FAQs & Troubleshooting |
Install the Tower Tray Unit.
To install the Tower Tray Unit, you need the Tower Tray Connector (TC-4000).
Follow the steps below.
-
The Tower Tray Unit can be installed only when the Lower Tray Unit is NOT installed to the machine.
-
For MFC/DCP users
- Be careful not to pinch your fingers when you put the machine down. DO NOT carry the machine with the Lower Tray Unit installed. You may be injured or cause damage to the machine because the Lower Tray Unit is not securely attached to the machine.
- This machine is heavy. To prevent possible injuries, at least two people should lift the machine.
NOTE: Illustrations shown below are from a representative product and operating system, and may differ from your Brother machine and operating system.
-
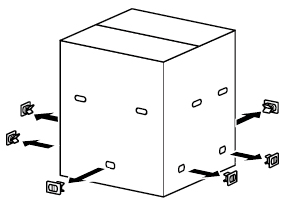
Remove the attachments from the Tower Tray Unit box.
-
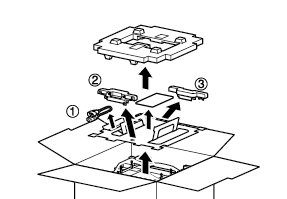
Remove the packing materials and take out the AC cord (1) and brackets(2), (3), located in the top of the Tower Tray Unit.
-
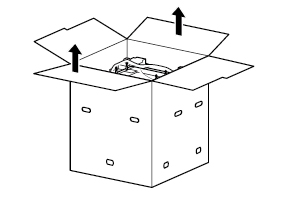
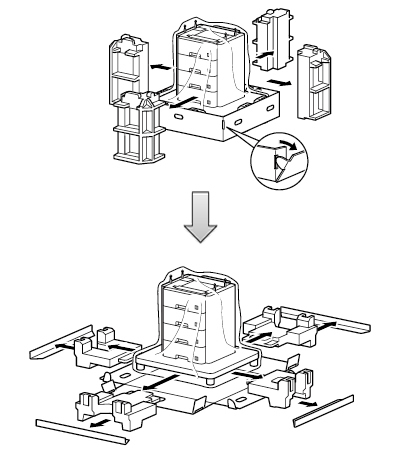
Lift up and remove the outer carton from around the Tower Tray Unit.
-
Remove the packing materials surrounding the Tower Tray Unit.
-
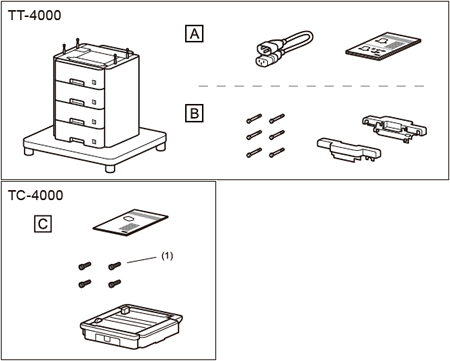
Check the components of both the TT-4000 and TC-4000.
Use only the parts illustrated in A and C. Do not use parts shown in B to set up the Connector.
Be sure to use the black screws (1) included with the TC-4000 to attach the connector to your machine's base.
-
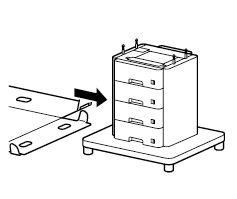
Place the Tower Tray Unit on a flat surface.
-
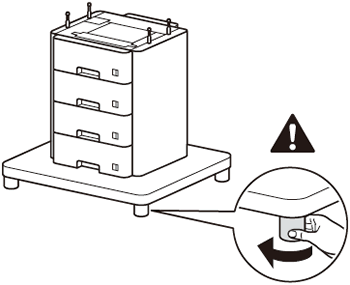
Rotate each of the support legs until all four touch the floor so that the Tower Tray will not move.
-
Unplug the machine from the AC power outlet (electrical socket). Remove the AC power cord from the machine and save for use in step 18.
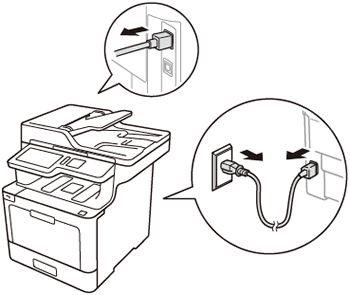
-
Remove the Paper Tray and the toner cartridge and drum unit assembly from the machine.
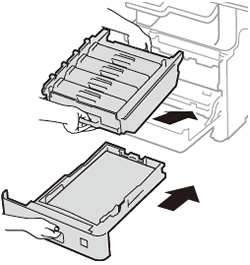
-
Hold the green handle of the belt unit with both hands and lift the belt unit up, then pull it out.
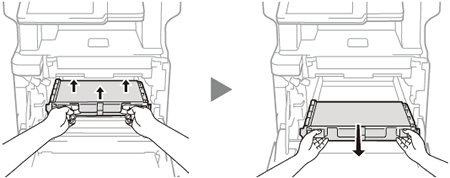
-
Remove the two pieces of orange packing material and discard them.
Hold the blue handle of the waste toner box and remove the waste toner box from the machine.The orange packing pieces are installed at the factory to protect your machine during shipment.
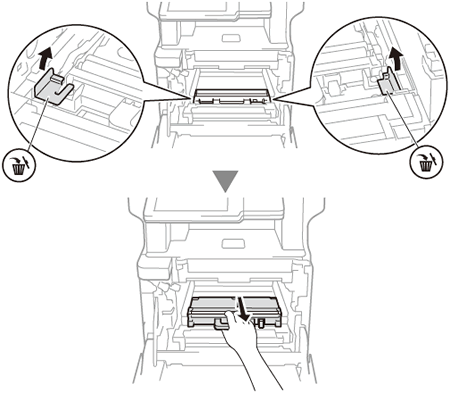
-
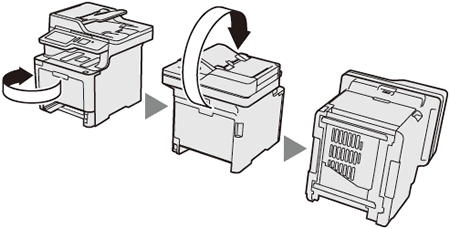
Rotate the machine 180 degrees.
Carefully place your Brother machine face down on a flat surface so you can access the bottom of the machine.
-
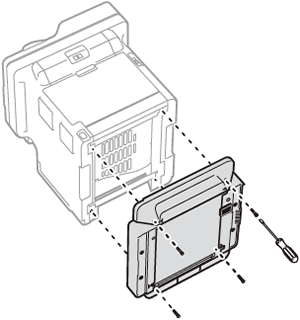
Securely attach the brackets to the machine's base using a screwdriver and the included screws.
Be sure to use the black screws included with the TC-4000 to attach the connector to your machine's base.
-
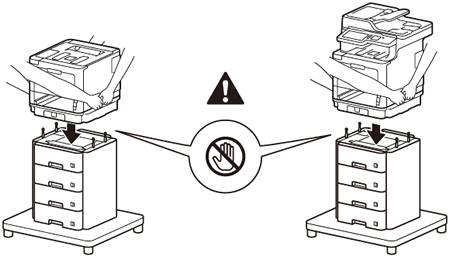
Lift your machine, align the bracket holes with the four pins on the Tower Tray Unit, and carefully lower the machine into place.
-
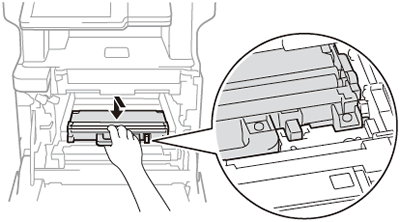
Install the waste toner box back into the machine using the blue handle. Make sure the waste toner box is level and fits firmly into place.
-
Install the belt unit back into the machine. Make sure the belt unit is level and fits firmly into place.
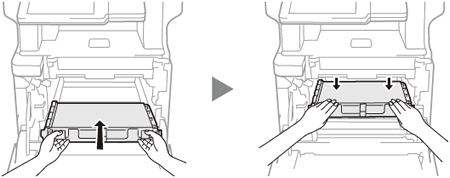
-
Install the Paper Tray and the toner cartridge and drum unit assembly back into the machine.

-
Connect your machine (1) to the Tower Tray (2) using the cable included with the Tower Tray, and connect the Tower Tray (3) to a grounded AC power outlet (electrical socket) (4) using the AC power cord you disconnected from your machine in step 8. Then, turn on the machine (5).
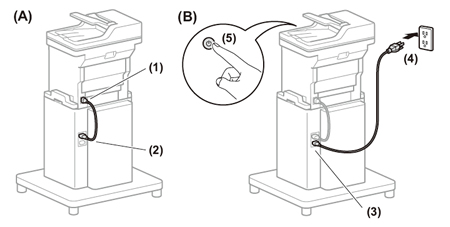
-
Let your machine recognize the Tower Tray Unit by following the steps applicable for your Operating System.
(Windows)- Open the Printer Properties. (Click here to see how to open Printer Properties.)
-
Click the Device Settings tab, and then click Auto Detect. When the Tower Tray Unit and paper size have been detected, click Apply.
(Under certain conditions, Auto Detect may not be available. If this occurs, you can manually add the Tower Tray. Under Available Options, select Tray5, click Add, and then click Apply.)
The printer driver is already configured for use with the Tower Tray Unit. No additional steps are required.
Content Feedback
To help us improve our support, please provide your feedback below.
