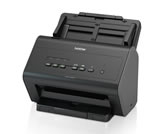
ADS-2400N
FAQs & Troubleshooting |
A gray line or margin appears on the side of the scanned document.
The settings are not suitable for your document. Configure the margin settings and adjust the scanning position.
Follow the steps below to configure the margin settings.
NOTE: The screens may differ depending on operating system being used and your Brother machine.
Scan Using the Control Panel
When you scan documents using the control panel, you need to configure Margin Settings by completing the following steps:
Scan to USB
-
Start the ControlCenter application.
-
(Windows)
-
Click the
 (ControlCenter4) icon in the task tray and then select Open from the menu. The ControlCenter4 window will appear.
 -
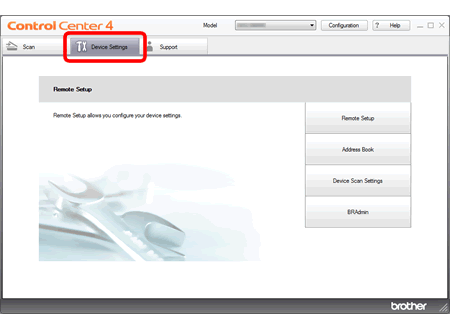
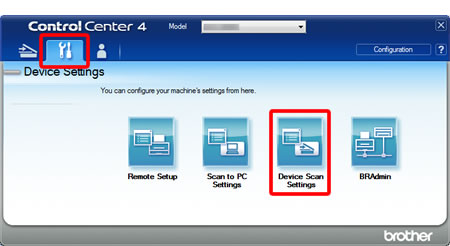
Open the Device Settings.
[Home Mode]
Click the Device Settings tab.
[Advanced Mode]
Click the (Settings) icon to access Device Settings.
-
Click the
-
(Macintosh)
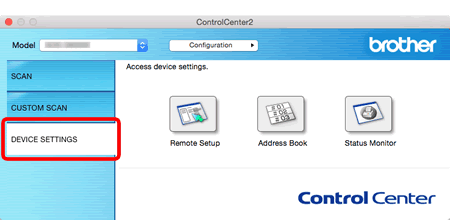
- Click the ControlCenter2(ControlCenter2) icon in the Dock. The ControlCenter2 window will appear.
-
Click the DEVICE SETTINGS tab.
-
(Windows)
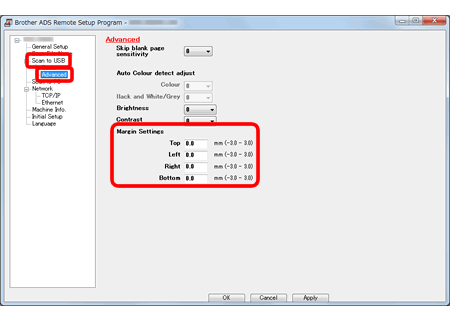
- Click the Remote Setup. The Remote Setup window will appear.
-
Select Scan to USB => Advanced in the folder tree.
In the Margin Settings, enter -3 to 3 to add or remove a specific margin at the edge of the image.
- Click OK.
Scan to FTP/SFTP/Network/SharePoint
- To use Web Based Management, type http://IP address on the machine/ into your web browser.
-
If you have previously set a password, type it, and then press
 .
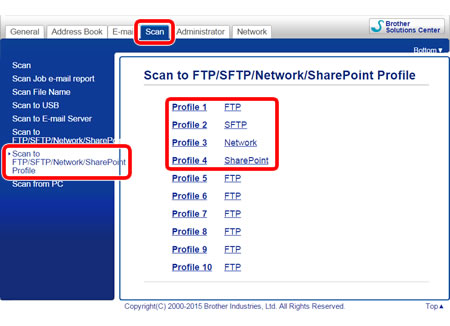
. - Click Scan => Scan to FTP/SFTP/Network/SharePoint Profile.
-
Select the profile you want to change.
-
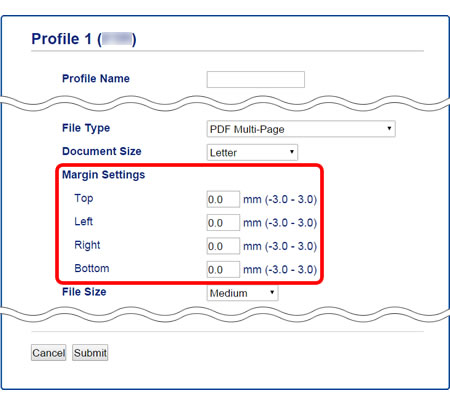
In the Margin Settings, enter a value between -3 and 3 to add or remove a specific margin at the edge of the image.
- Click Submit.
Scan Using Your Computer (Windows only)
When you scan documents using the computer, you need to configure Margin Settings by completing the following steps:
- Nuance™ PaperPort™ application with TWAIN driver (recommended) is used in the example on this page.
- The WIA driver with Windows XP (SP2 or later) does not support Margin Settings.
- These instructions are for Nuance™ PaperPort™, but are similar for other Windows applications.
- Load your document.
-
Start PaperPort™.
(Windows 7/ Windows 10/ Windows 11)
Click Start or or
or  (Start button) => (All Programs or All apps =>) Nuance PaperPort => PaperPort.
(Windows 8)-
On the Start screen, click
 .
.
If is not on the Start screen, right-click somewhere on an empty spot, and then click, All Apps from the bar.
 - Click PaperPort.
-
On the Start screen, click
-
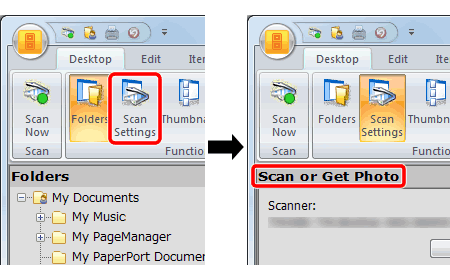
Click Scan Settings from the Desktop tab on the ribbon.
The Scan or Get Photo panel appears on the left side of the window.
-
Under the scanner section click Select.
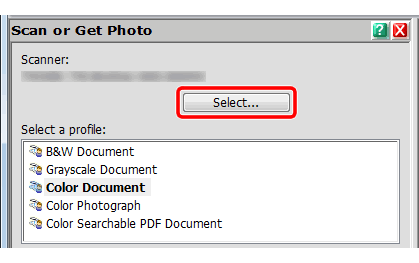
- Ensure that TWAIN has a check next to it and from the list of available scanners select the TWAIN driver for your model brother machine. (ex: TWAIN: TW - BROTHER [model name])
- Click OK.
- Select Display scanner dialog box check box in the Scan or Get Photo panel.
-
Click Scan.
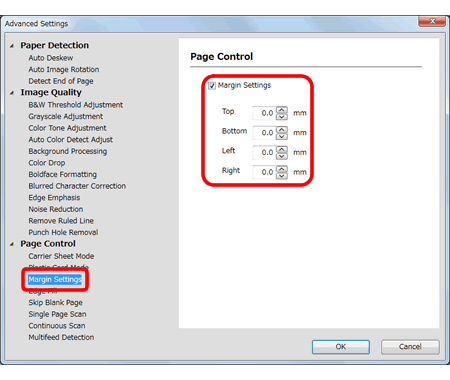
The Scanner Setup dialog box appears. - Click Advanced Settings.
-
Select Margin Settings, and then enter -3 to 3 to add or remove a specific margin at the edge of the image.
- Click OK.
- Click Start. The machine starts scanning.
Content Feedback
To help us improve our support, please provide your feedback below.
