PT-9500PC
GYIK és hibaelhárítás |
How to use a 9/64" (3.5 mm) wide tape
To create labels with a 9/64" (3.5 mm) wide tape, you need to set the top and bottom margins of the tape. Otherwise the printed text may extend beyond the width of the tape because a 9/64" (3.5 mm) wide tape cassette is detected as a 1/4" (6 mm) wide tape cassette.
Follow the procedures below to set the tape margins in order to print the text correctly.
- Insert a 9/64" (3.5 mm) wide tape into your P-touch.
- Start P-touch Editor.
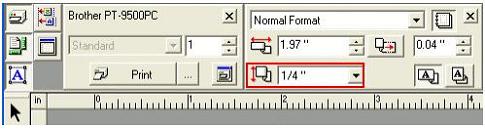
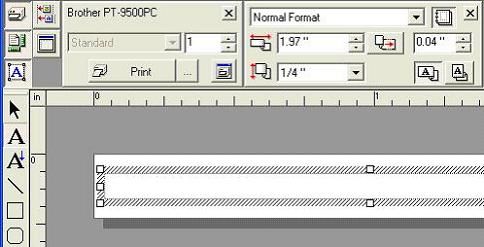
-
Make sure that the tape width is set to 1/4" (6 mm).
If not, select 1/4" (6 mm) from the pull-down menu.
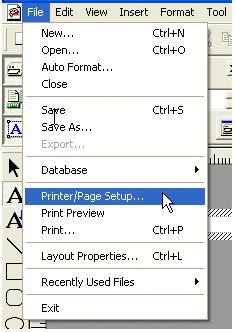
-
Click on the "File" on the menu bar and then select the "Printer/Page Setup…" to display the Printer Setup dialog box.
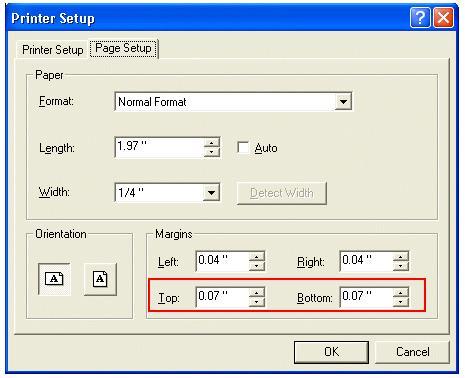
-
In the Printer Setup dialog box, select the "Page Setup" tab.
Under the Margins, set the top and bottom margins to 0.07" (1.8 mm) (Recommended value). -
Click the OK button to apply the setting.
-
Click
 and then type in the text.
Tartalommal kapcsolatos visszajelzés
Kérjük, segítse munkánkat azzal, hogy visszajelzést küld.