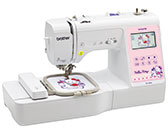
Innov-is NV180K

FAQs & Troubleshooting

FAQs & Troubleshooting

Basic operations and embroidery functions [Video instructions]

Video instructions for Basic operations on getting ready, Sewing basics and Embroidery function.

Click on the image to play the video instructions.

* The movies are being streamed from YouTube. (Opening new window.)


1. Basic Operation
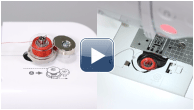
[1-01] Winding and setting the lower thread

Basic Operation 1-01

Let's take a look at how to wind the bobbin and set the lower thread.


  • Only use the plastic bobbin that comes with this machine or bobbins of the same type.

[1-02] Upper threading

Basic Operation 1-02

Let's take a look at how to pass the upper thread into the machine and thread the needle.


  • Make sure to raise the needle using the needle position button before upper threading.

[1-03] Basic sewing

Basic Operation 1-03

Let's start sewing to use the straight stitch.


In the latter part of the movie, it shows you how to use the presser foot locking pin (black button on the left side) of zigzag foot "J".

[1-04] Reverse sewing

Basic Operation 1-04

Let's try reverse sewing.


In the latter part of the movie, it shows you how to sew using the automatic reverse/reinforcement stitching function.

[1-05] Adjusting the stitch length and width

Basic Operation 1-05

Let's take a look at how to adjust the stitch length and width.


(The adjustment screen of the stitch width and stitch length varies depending on the language.)

[1-06] Adjusting the thread tension

Basic Operation 1-06

Let's check the thread tension.


  • Before starting your sewing project, we recommend sewing trial stitches using thread and a piece of fabric that are the same as those used for your project. While checking the sewing results, adjust the thread tension.

[1-07] Replacing the presser foot

Basic Operation 1-07

Let's take a look at how to replacing the presser foot.


  • Use the appropriate presser foot for the type of stitch that you wish to sew.
    For details on the presser foot that should be used with the selected stitch, refer to "Stitch Chart" on the operational manual.
  • Use the embroidery foot when doing embroidery.


2. Embroidery Function

[2-01] Embroidering

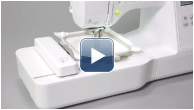
Embroidery 2-01

Let's take a look at the basic steps for embroidering.


  • Use the embroidery foot when doing embroidery.

[2-02] Various editing operations on the display panel for embroidery

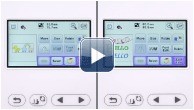
Embroidery 2-02

Let's try selecting embroidery pattern or fonts, and performing various editing function for embroidery.


[2-03] Creating the embroidery data combining several embroidery patterns

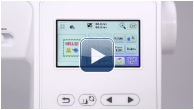
Embroidery 2-03

Let's try creating combinations of embroidery pattern, character pattern, frame pattern or other patterns.


3. Maintenance

[3-01] Replacing the needle and maintenance

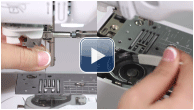
Maintenance 3-01

Let’s take a look at how to change the needle and maintenance.


You can see other instructional videos for this model.
Click the banner or link below to watch other videos.
Advanced Operation

Various sewing and application


If your question was not answered, have you checked other FAQs?

Have you checked the manuals?

If you need further assistance, please contact Brother customer service:

Related Models

Innov-is NV180, Innov-is NV180D, Innov-is NV180K

Content Feedback

To help us improve our support, please provide your feedback below.

Step 1: How does the information on this page help you?

Step 2: Are there any comments you would like to add?

Please note this form is used for feedback only.