Innov-is 4000D/4000
FAQs & Troubleshooting |
How do I manually thread my machine?
- Be sure to thread the machine properly. Incorrect threading can cause the thread to tangle and break the needle, leading to injury.
- When using accessories not included with this machine, attach the accessory to the machine after threading the machine.
- Never use the thread of No. 20 or lower.
-
Before manually threading the machine, be sure
 to press in the LCD, otherwise injuries may occur if the "Start/Stop" button or any other button is pressed and the machine starts sewing.
Automatic threading cannot be used when using the wing needle, the twin needle, or special thread with a thickness of 130/20 or thicker. In these cases, thread the needle as described below.
-
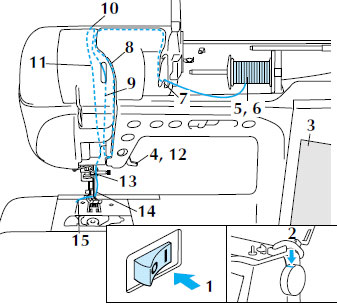
Turn the main power to ON.

-
Turn the handwheel so that the line on the machine is aligned with the line on the handwheel.

 Line on handwheel
If the line on the machine is not aligned with the line on the handwheel, the sewing machine cannot be threaded. Check that the line on the handwheel is facing up as shown in the illustration above.
-
Press
 at the lower right of the LCD screen.
The entire screen becomes white, and all keys and operation buttons are locked.
-
Raise the presser foot lever.
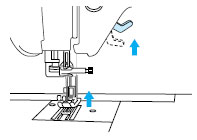
If the presser foot is not raised, the sewing machine cannot be threaded correctly.
-
Pivot the spool pin so that it angles upward.
Set the thread spool on the spool pin so that the thread unwinds from the front of the spool.

 Spool pin
 Spool cap
 Thread spool
 -
Push the spool cap onto the spool pin as far as possible, then return the spool pin to its original position.
- If the thread spool and/or spool cap are set incorrectly, the thread may tangle on the spool pin and cause the needle to break.
- Use the spool cap (large, medium, or small) that is closest in size to the thread spool. If a spool cap smaller than the thread spool is used, the thread may become caught in the slit on the end of the spool and cause the needle to break.
-
When sewing with fine, cross-wound thread, use the small spool cap, and leave a small space between the cap and the thread spool.

 Spool cap (small)
 Thread spool (cross-wound thread)
 Space
Space
-
Holding the thread with your hands, slide the thread into the grooves on the thread guide plate.

 Thread guide plate
 -
While holding the thread in your right hand, use your left hand to pull the thread toward the threading path cover, then pass it along the thread path as shown in the illustration.

 Threading path cover
 -
Be sure to pass the thread along the right side of the thread path guide.
Pull the thread under the thread path guide.

 Thread path guide
 -
Pull the thread up along the left side of the thread path guide to the top left corner of the threading path cover.

 Top left corner
 Threading path cover
 -
Pull the thread down to the needle bar along the left side of the thread path guide.
Make sure the thread is hooked at the top corner and positioned behind the transparent front cover.

 Thread take-up lever check window
 Transparent front cover
Look through the thread take-up lever check window and check that the thread is correctly fed through the take-up lever, turning the handwheel toward you.
 Take-up lever
 Thread
 -
Lower the presser foot lever.
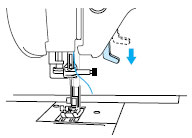
-
Holding the thread with both hands, pass the thread through both the upper and lower needle bar thread guides.

 Needle bar thread guide (upper)
 Needle bar thread guide (lower)
 -
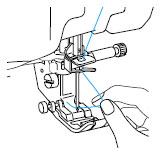
Pass the thread through the eye of the needle from front to back.
-
Pass the thread through the presser foot, and then pull out about 100-150 mm (approx. 4-6 inches) of thread toward the back of the machine.

 10 cm-15 cm (approx. 4-6 inches)
Press to unlock all keys and buttons.
Content Feedback
To help us improve our support, please provide your feedback below.
