HL-L5100DN
常見問題&故障排除 |
Load and Print Thick Paper Using the Paper Tray
If the Check Size setting is set to On and you pull the paper tray out of the machine, a message appears on the LCD asking if you want to change the paper size and paper type. Change the paper size and paper type settings if needed, following the LCD instructions.
- When you load a different size and type of paper in the tray, you must change the Paper Size and Paper Type settings in the machine or on your computer, also.
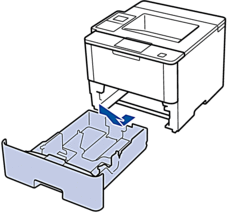
- Pull the paper tray completely out of the machine.
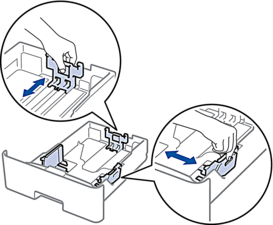
- Press and slide the paper guides to fit the paper.Press the green release levers to slide the paper guides.

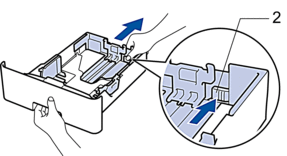
For Legal or Folio size paper, press the release button (1) in the bottom of the paper tray or the release lever (2) in the back of the tray, and then pull out the back of the paper tray. (Legal and Folio size paper are not available in some regions.)
For trays with a release button:

For trays with a release lever:
- Fan the stack of paper well.
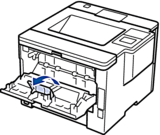
- Load paper in the paper tray with the printing surface face down.
DO NOT load different sizes and types of paper in the paper tray at the same time. Doing this may cause the paper to jam or misfeed.
- Make sure the paper is below the maximum paper mark (
 ). Overfilling the paper tray will cause paper jams.
- Slowly push the paper tray completely into the machine.
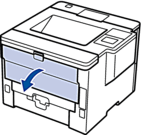
- Open the machine's back cover (the face up output tray).
- Open the paper stopper (Available only for certain models).
- Send your print job to the machine.Change your print preferences in the Print dialog box before sending the print job from your computer.
- Close the paper stopper.
- Close the back cover (the face up output tray) until it locks in the closed position.
內容意見回饋
請於下方回饋您的意見以幫助我們提升服務的品質