MFC-J2310
FAQs & Troubleshooting |
Restrict access to certain operations on my Brother machine.
Secure Function Lock is a feature that lets you restrict Public access to certain operations on your Brother machine: Fax Tx(Fax Transmission) *if applicable, Fax Rx(Fax Reception) *if applicable, Copy, Scan, PCC, PCprint (PC Printing and PC Fax Transmission) *if applicable, Color Print, Page Limit, Web Upload and Web Download.
This feature also prevents users from changing the default settings of the machine by limiting access to the menu settings.
You can set one Public user and up to 10 individual users (restricted users). When you set up a Public user, you can restrict one of more of the machine's functions to all users, unless a user is set up as a restricted user. Restricted users have access to restricted operations. Restricted users must select the stored user name and password in order to the use the machine.
Disabling at least one function is required to turn on Secure Function Lock for the Public user.
Before you begin to use Secure Function Lock 2.0
You can configure Secure Function Lock 2.0 settings using a Web browser. Before configuration, following preparations are needed.
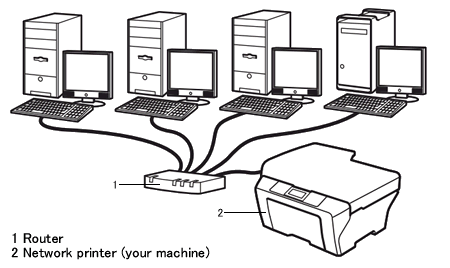
Verify that the Brother machine and your PC are connected by a Peer-to-Peer environment.
- Start you Web browser.
- Type "http://machine's IP address/" into your browser's address bar (where "machine's IP address" is the machine's IP address).
For example:http://192.168.1.2
You can find machine's IP Address in the Network Configuration List. For more information on how to print a Report Page, please refer to the User's Guide or Network User's Guide for your machine. The latest User's Guide or Network User's Guide is available in the Manuals section.
- Enter a password in Login box. (This is a password to log into the machine's Web page, not the administrator password for Secure Function Lock.) Click
 .
.
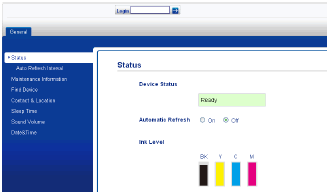
If you are using a Web browser to configure the machine's setting for the first time, set a password.
- Click Please configure the password.
- Enter a password you want to use (up to 32 characters).
- Re-enter the password in Confirm new password box.
- Click Submit.
- Click Please configure the password.
Setting up Secure Function Lock
You must set up the Secure Function Lock in the following order:
- Set the Administrator password. (See STEP A)
- Set up the Restricted Users (if any). (See STEP B)
- Turn Secure Function Lock ON. (See STEP C)
STEP A: Setting the password for the administrator
The password you set in the steps listed below is for the administrator. This password is used to set up the Public user and Restricted users and to turn Secure Function Lock on or off.
- Click Administrator.
- Click Secure Function Lock.
- Enter a four-digit number for the password in the New Password box.
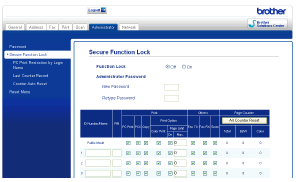
- Re-enter the password in the Retype Password box.
- Click Submit.
STEP B: Setting up the Restricted User
You can set up users with specific restrictions and a password. Example: If you disabled the "Scan" function for public users, however thre are specific users you would like to have access to this function, you would set them up as a restricted user with access to this function (enable "scan")
- Click Administrator.
- Click Secure Function Lock.
- Enter an alphanumeric Group name or User name (up to 15 characters) in the ID Number/Name box and then enter a four-digit password in the PIN box.
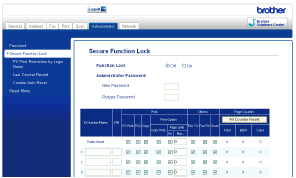
- Uncheck the functions that you want to restrict in the Print box or the Others box. If you want to configure the maximum page count, check the On box in Page Limit, and then enter the number in the Max. box. Then click Submit.
- You cannot use the same password as another user's password.
- You can set up one Public user. Public users do not need to enter a password.
STEP C: Turning Secure Function Lock ON
- Press
 (Settings).
- Press the Up or Down arrow key to display General Setup.
- Press General Setup.
- Press the Up or Down arrow key to display Function Lock.
- Press Function Lock.
- Press Lock Off->On.
- Enter your four-digit administrator password using the keyboard on the Touchscreen. Press OK.
